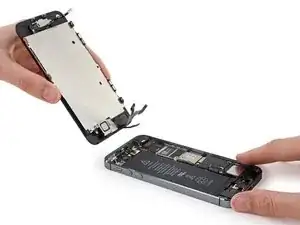
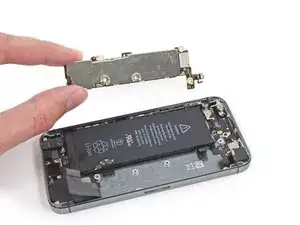
Introduzione
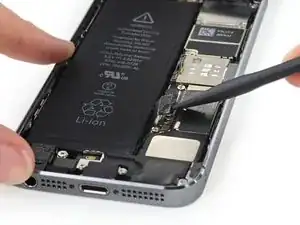
Usa questa guida per rimuovere il pulsante accensione/sospensione dall'iPhone 5s.
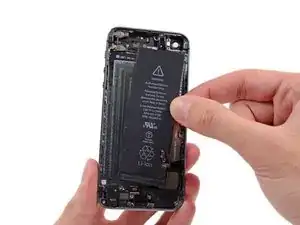
Questa guida richiede la rimozione della batteria. Le strisce adesive che fissano questo elemento non sono riutilizzabili, quindi dovrai avere delle strisce di ricambio sotto mano prima di iniziare. In alternativa puoi tenere ferma la batteria con un pezzo di nastro biadesivo. La batteria è bloccata molto bene all'interno del dispositivo, ma il nastro previene ogni movimento all'interno dell'alloggiamento.
-
-
Spegni l'iPhone prima di iniziare lo smontaggio.
-
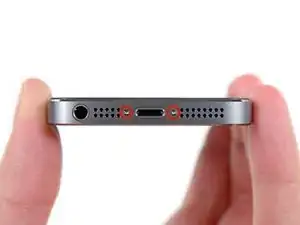
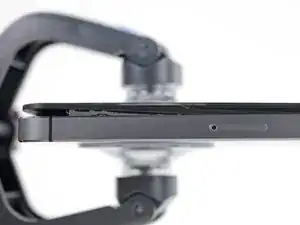
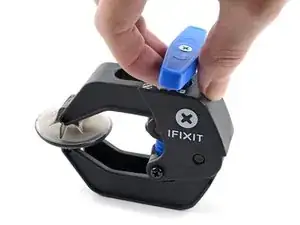
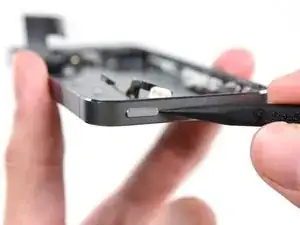
Rimuovi le due viti Pentalobe da 3,9 mm dai lati del connettore Lightning.
-
-
-
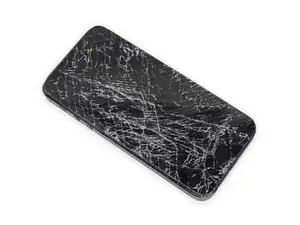
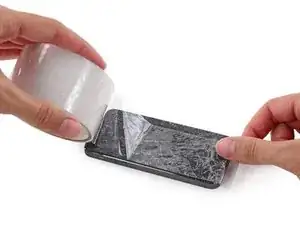
Se il tuo display è in pezzi, evita ulteriori rotture e la possibilità di ferirti durante la riparazione applicando del nastro adesivo sul vetro.
-
Incolla striscie sovrapposte di nastro adesivo sullo schermo del tuo iPhone fino a ricoprirlo completamente.
-
-
-
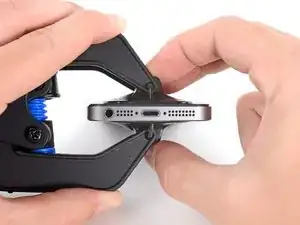
Indipendentemente dall'attrezzo che userai, devi essere sicuro di tirare via l'intero display.
-
Se il vetro inizia a separarsi dalla plastica, come mostrato nella prima immagine, fai scorrere uno strumento di apertura in plastica tra il telaio in plastica e il corpo in metallo del telefono per staccare dal case le clip metalliche.
-
-
-
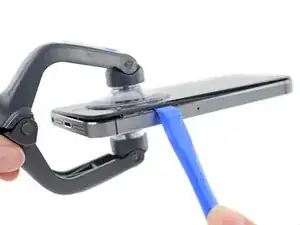
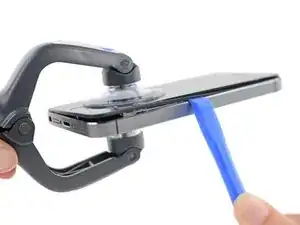
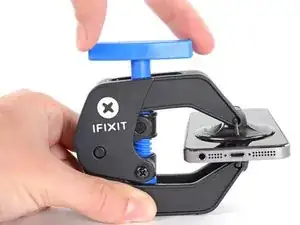
Tira la maniglia blu indietro per sbloccare i bracci dell'Anti-Clamp.
-
Fai scorrere i bracci oltre il bordo sinistro o destro del tuo iPhone.
-
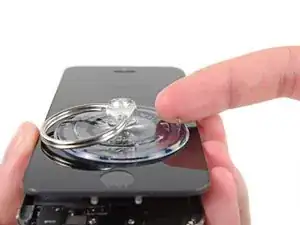
Posiziona le ventose vicino al bordo inferiore dell'iPhone, appena sopra il tasto Home, una di fronte e una sul retro.
-
Premi le ventose insieme per farle aderire sull'area desiderata.
-
-
-
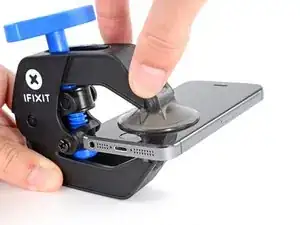
Tira la manopola blu in avanti per bloccare i bracci.
-
Gira la manopola in senso orario di 360° o finché le ventose cominciano ad allungarsi.
-
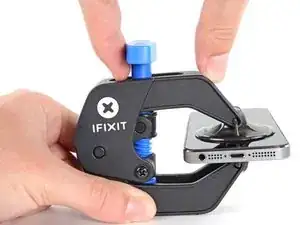
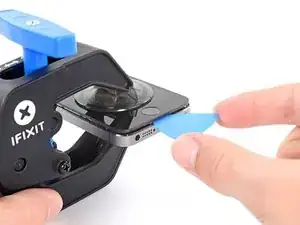
Inserisci un plettro di apertura sotto lo schermo quando l'Anti-Clamp crea una fessura abbastanza grande.
-
Salta i prossimi tre passi.
-
-
-
Se non hai un Anti-Clamp, usa una singola ventosa per sollevare il pannello frontale:
-
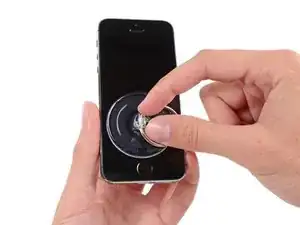
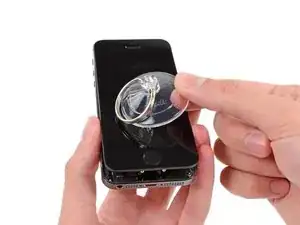
Premi la ventosa contro lo schermo, giusto sopra il pulsante Home.
-
-
-
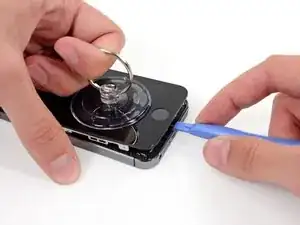
Mentre tieni fermo l'iPhone con una mano, tira la ventosa per separare lievemente il gruppo del pannello frontale dal case posteriore.
-
Con uno strumento di apertura in plastica, forza delicatamente verso il basso i bordi del case posteriore, allontanandoli dal gruppo display, mentre continui a tirare con la ventosa.
-
-
-
Apri il telefono quanto basta per scoprire la staffa di metallo che copre il cavo del pulsante home.
-
Solo il pulsante home originale permette di usare la funzione di riconoscimento Touch ID. Se si strappa il cavo, rimpiazzare il pulsante non farà che garantirne le funzioni di base, non il Touch ID.
-
Usa la punta di uno spudger per liberare la staffa di metallo e rimuovila con le pinzette.
-
-
-
Usa la punta di uno spudger per staccare dal suo zoccolo il connettore del cavo del pulsante Home.
-
-
-
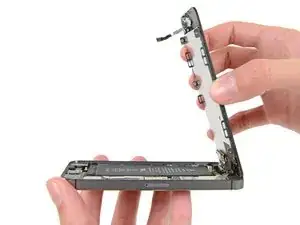
Una volta che il connettore è stato liberato, solleva dal case posteriore il gruppo dal lato del pulsante home, usando la parte superiore del telefono come una cerniera.
-
Apri il display a un angolo di circa 90° e posalo contro qualcosa che lo tenga aperto mentre tu stai lavorando sul telefono.
-
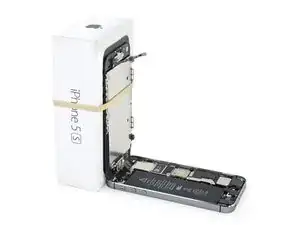
Aggiungi un elastico per tenere il display al suo posto mentre lavori. In questo modo si eviteranno sforzi imprevisti sui cavi del display.
-
-
-
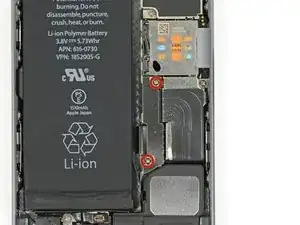
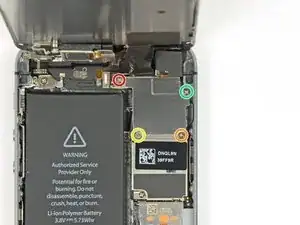
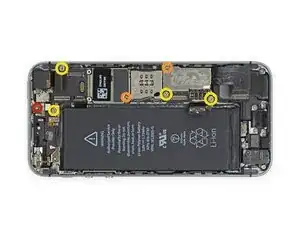
Rimuovi le due viti Phillips #000 da 1,6 mm che fissano sulla scheda logica la staffa metallica del connettore della batteria.
-
-
-
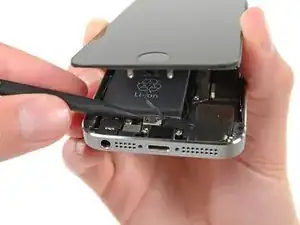
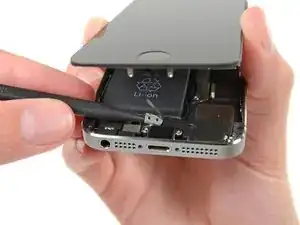
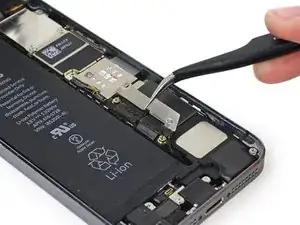
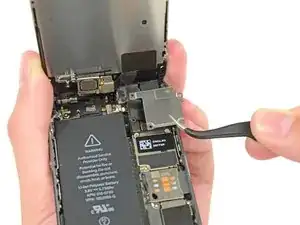
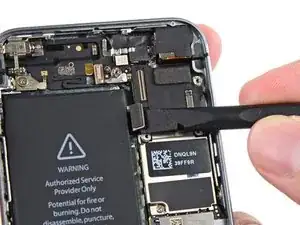
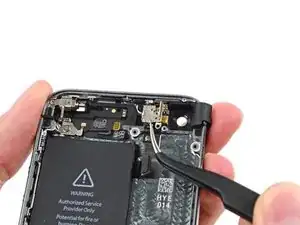
Usa l'estremità piatta di uno spudger per sollevare delicatamente il connettore della batteria dal suo zoccolo sulla scheda logica.
-
-
-
Rimuovi le seguenti viti che fissano il cavo del gruppo del pannello frontale alla scheda logica.
-
Una vite a croce Phillips #000 da 1,7 mm
-
Una vite a croce Phillips #000 da 1,2 mm
-
Una vite a croce Phillips #000 da 1,3 mm
-
Un'altra vite a croce Phillips #000 da 1,7 mm
-
-
-
Usa l'estremità piatta di uno spudger o un'unghia per staccare il cavo della fotocamera frontale e del sensore.
-
-
-
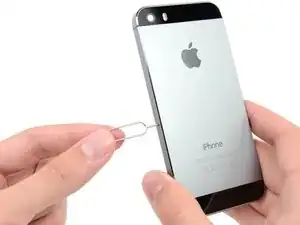
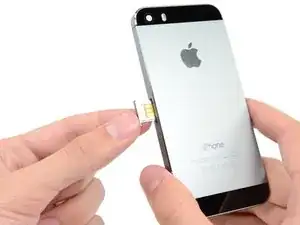
Inserisci uno strumento di estrazione SIM o una graffetta nel piccolo foro nel vassoio della scheda SIM.
-
Premi per espellere la SIM. L'operazione può richiedere una certa forza.
-
-
-
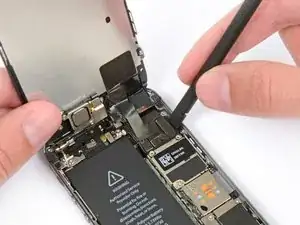
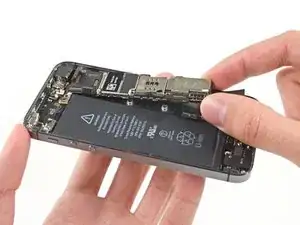
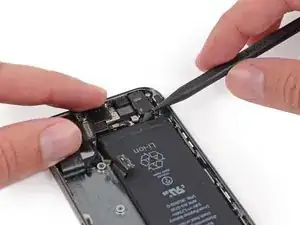
Usa una levetta per sollevare delicatamente il cavo del gruppo del pulsante dalla scheda logica.
-
-
-
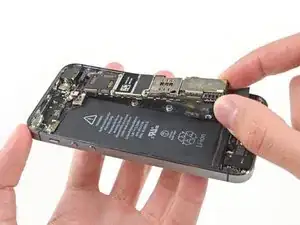
Usa una levetta per sollevare il cavo del connettore Lighting dalla sua basetta sulla scheda logica.
-
Piega il cavo del connettore Lightning per non farlo interferire con la scheda logica.
-
-
-
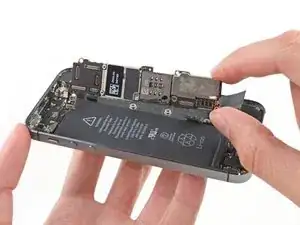
Usa la punta di uno spudger per staccare il cavo dell'antenna fuori dal suo zoccolo sulla scheda logica.
-
-
-
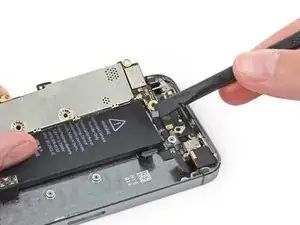
Usa l'estremità piatta di uno spudger per scollegare il cavo della fotocamera posteriore dal suo attacco sulla scheda logica.
-
-
-
Rimuovi le seguenti viti dalla scheda logica:
-
Una vite a croce Phillips #000 da 2,4 mm
-
Due viti Phillips #000 da 2,3 mm
-
Quattro distanziali a vite da 2,8 mm
-
-
-
Usa uno strumento di apertura in plastica per sollevare la scheda logica abbastanza da poterla afferrare con le dita.
-
-
-
Tira la scheda logica per allontanarla lievemente dalla fotocamera posteriore.
-
Rigira la scheda logica verso la batteria, come se stessi girando la pagina di un libro.
-
-
-
Usa l'estremità piatta di uno spudger per scollegare il cavo di antenna sul retro della scheda logica.
-
Rimuovi la scheda logica dall'iPhone.
-
-
-
A questo punto, si è liberata e quindi può essere rimossa dalla sua sede una piastrina di metallo vicino alla fotocamera anteriore.
-
Usa delle pinzette per rimuovere la piastra da sotto la staffa a sinistra della fotocamera posteriore.
-
-
-
Usando un paio di pinze, ribaltare la protezione di gomma della fotocamera e verso l'esterno dalla struttura.
-
-
-
Rimuovi le due viti a croce Phillips #000 da 1,6 mm che tengono in posizione la staffa della fotocamera posteriore.
-
-
-
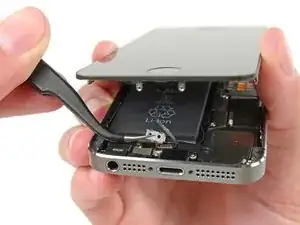
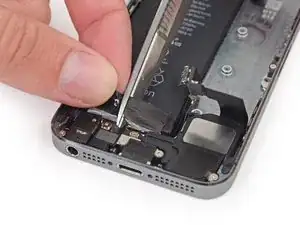
Inserire la punta di una leva nel buco nella parte adesiva della batteria, vicino al plug delle cuffie.
-
Sollevare leggermente la struttura e usate la leva per separarla dal resto.
-
-
-
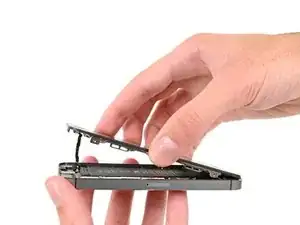
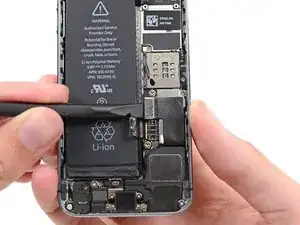
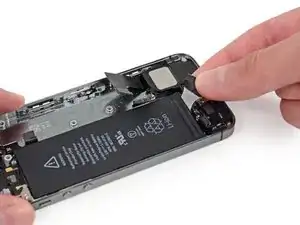
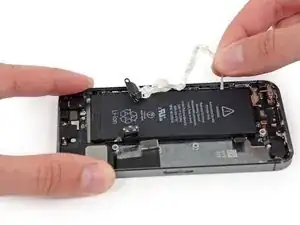
Sfila la parte adesiva della batteria direttamente fuori dal telefono.
-
Taglia la aprte nera adesiva della batteria, tra le due strisce adesive bianche.
-
-
-
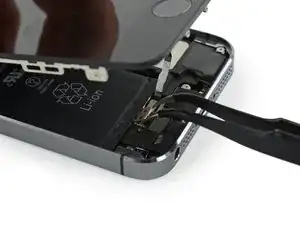
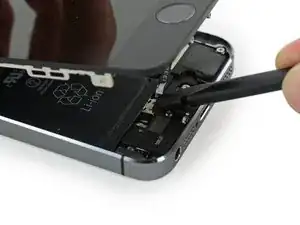
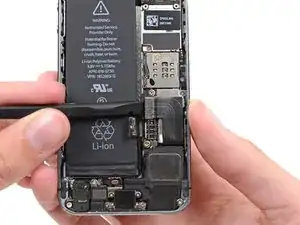
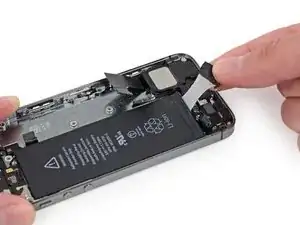
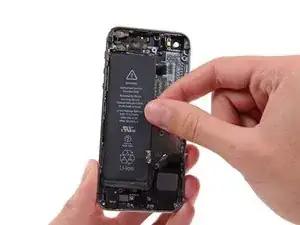
Tira la striscia attentamente intorno all'angolo della batteria.
-
Tira la striscia lungo la batteria fino a quando non si libera dal telefono.
-
-
-
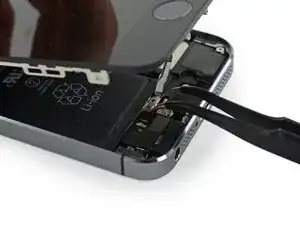
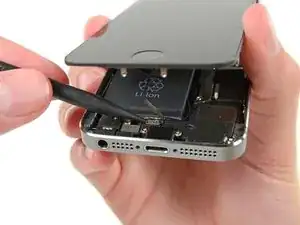
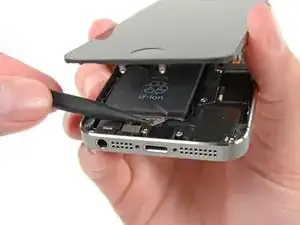
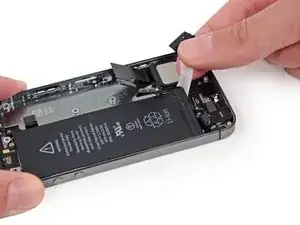
Tira direttamente verso l'alto la striscia adesiva esterna, fagli girare attentamente l'angolo.
-
Tira la striscia lungo la batteria fino a quando non si libera dal telefono.
-
-
-
If any of the adhesive strips broke off and the battery remains stuck to the rear case, prepare an iOpener or use a hair dryer to heat the rear case directly behind the battery.
-
-
-
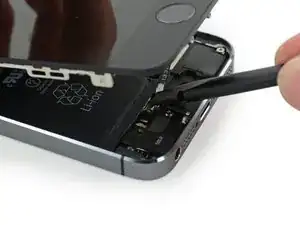
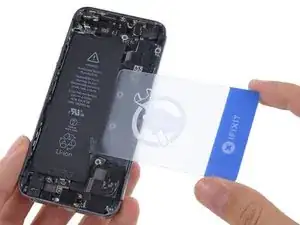
Flip the iPhone back over and insert a plastic card between the case side of the battery and the rear case.
-
Press the card in farther to break up the adhesive behind the battery.
-
-
-
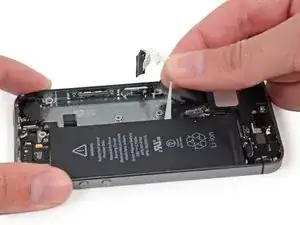
Rimuovere le seguenti viti Phillips #000 dalla protezione del vibratore.
-
Una vite da 1.7 mm
-
Una vite da 2.5 mm
-
-
-
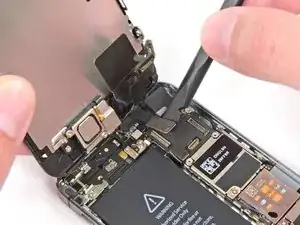
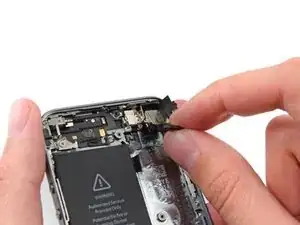
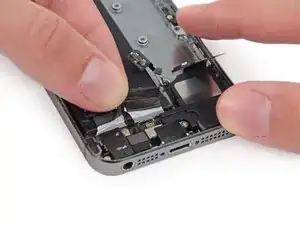
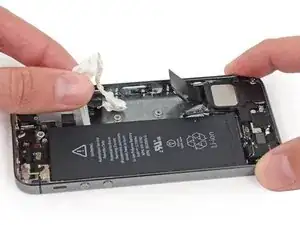
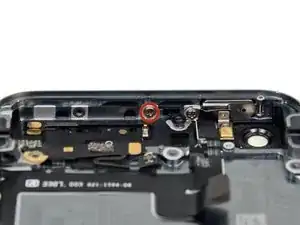
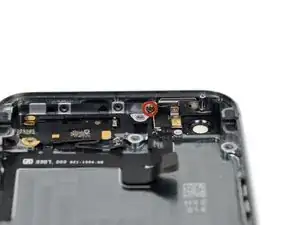
Rimuovi la vite a croce Phillips #000 da 1,3 mm che fissa la staffa di terra della logic board al case posteriore..
-
-
-
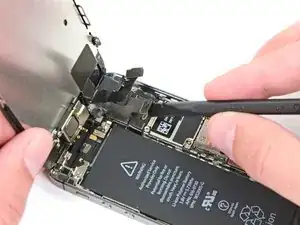
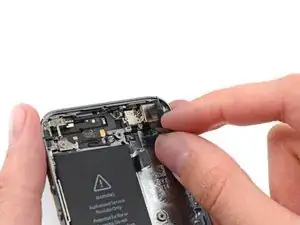
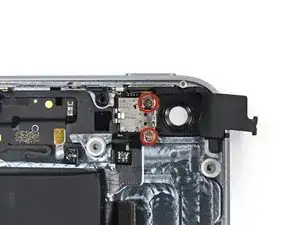
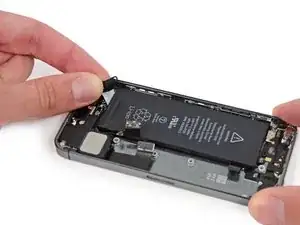
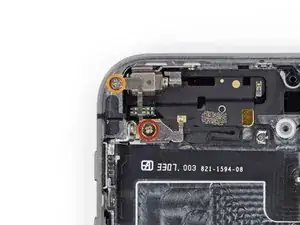
Rimuovi la vite Phillips #000 da 2.1 mm che fissa la clip di contatto e la staffa del pulsante accensione/sospensione.
-
-
-
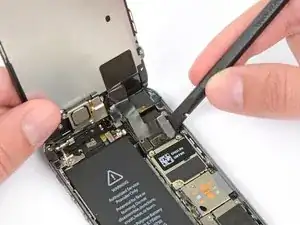
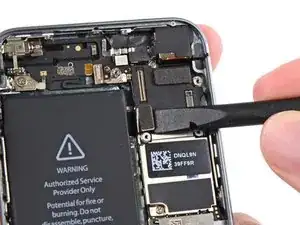
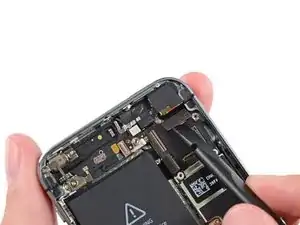
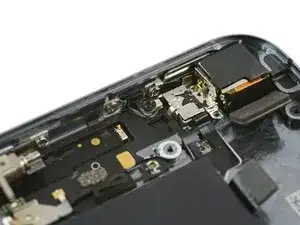
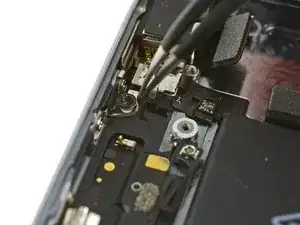
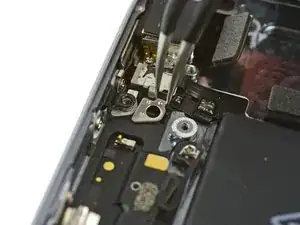
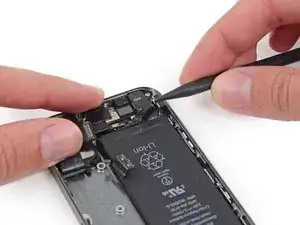
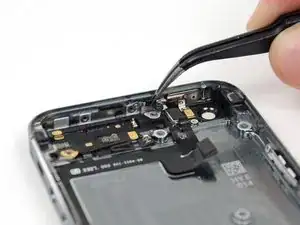
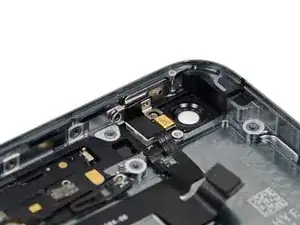
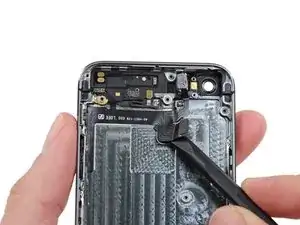
Infila l'estremità piatta di uno spudger sotto il gruppo del cavo flex superiore per liberarlo dal case posteriore.
-
-
-
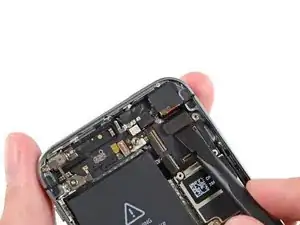
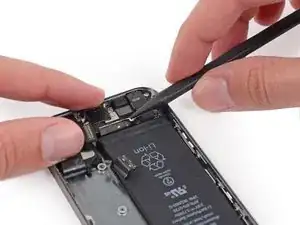
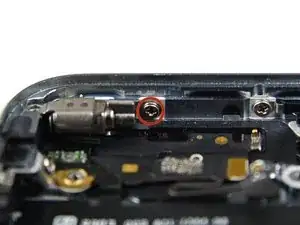
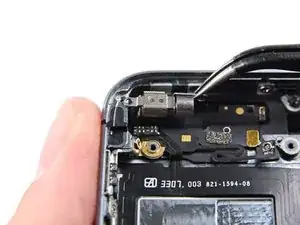
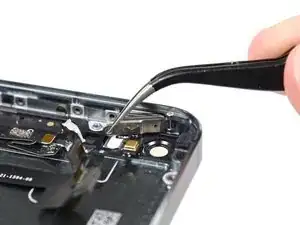
Usa la punta di uno spudger per liberare dal case posteriore la parte con il microfono del cavo flex.
-
-
-
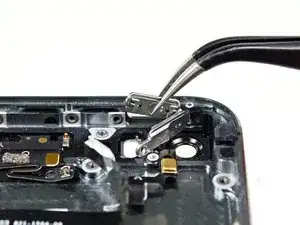
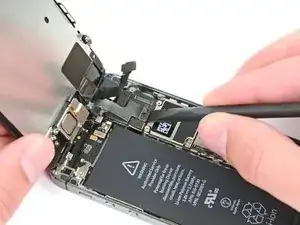
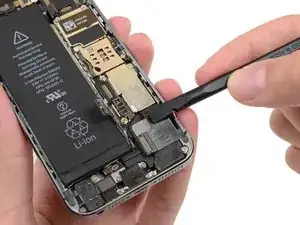
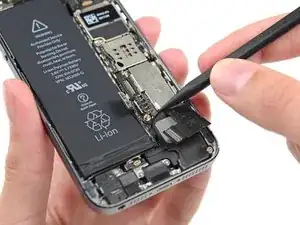
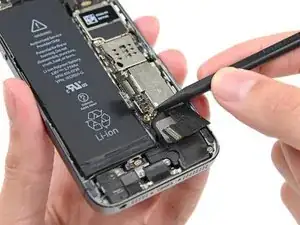
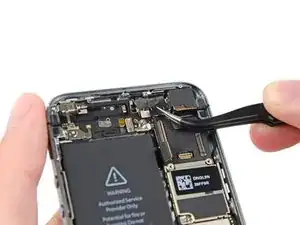
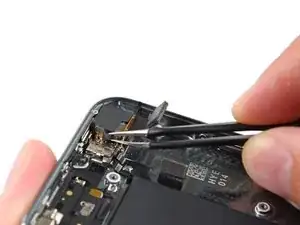
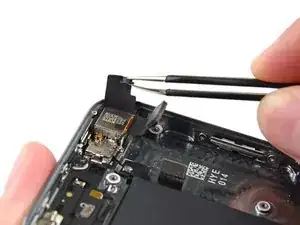
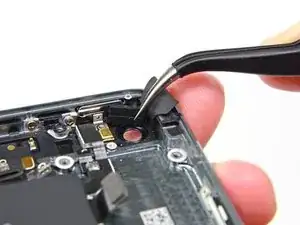
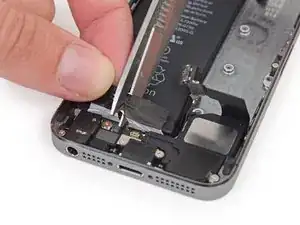
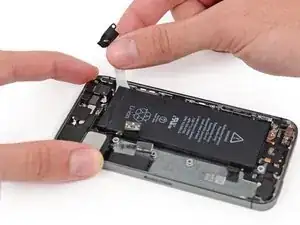
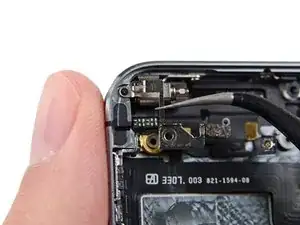
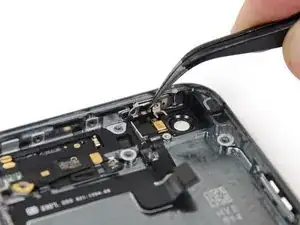
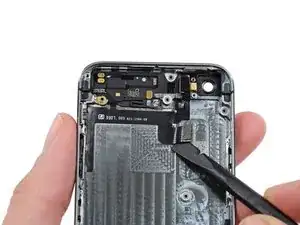
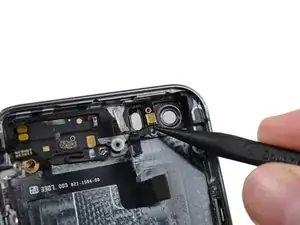
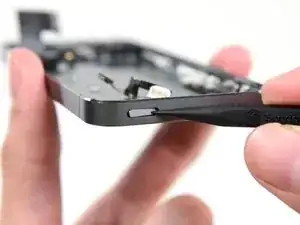
Usa la punta di uno spudger per spingere lievemente il pulsante accensione/sospensione verso l'interno del telefono.
-
Usa delle pinzette per rimuovere il pulsante.
-


Per rimontare il tuo dispositivo, segui queste istruzioni in ordine inverso.

12 commenti
In this disassembly for the power button, did you guys figure out how to silence the button rattle that we hear when shooting video or just shaking the phone? It is believed to be coming from the power button.
Scott -
How do you re connect the new button to the Hinge part of the power button assembly?
finn -
Nice write up. Thanks!
I used a white terrycloth hand towel as my work surface and to position and retain all the screws and part in their relative positions, so I didn't mix things up. I also magnetized the screwdriver tips and that made it very easy to deal with these tiny, tiny screws.
Magnus Dalen -
For a secure working, put a small pot with lid on your workplace. When the battery starts burning, throw it in the pot, close it with the lid and get the pot safely out of the building, e.g. on the balcony or throw it out of the window. Do not try to extinct the battery with water, just let it burn out outside. This might take some hours.
Raymond Willems -
This is a really helpful one! My battery caught fire but luckily it was only one cell and not the entire battery. So it was done after a few seconds and I could go on with the replacement.
Matthias Blab -
Directions should say “use the P2 screwdriver head.”
William Kolb -
This step should have included that information. It was very helpful and important. Thank you very much.
Jeffery -
ifixit supplied a set of replacement philips screws (marked “Liberate!”). Thanks but I’m sticking with the pentalobe since they fit more securely than philips which have a chance of stripping if not held with the right amount of pressure.
Don Libes -
What are you supposed to do if the screws are stripped or won’t come out. No luck with the tweezers either.
ibrokeit -
Yep i‘ve had the same problem. One screw out, one that won‘t budge!!!
Stennett -
“cheater” reading glasses are a big help. Carolyn
Carolyn Green -
In this step, it is the P02 screwdriver from the kit (see that the nib has five sides , exactly for ‘pentalobe’ screws). All the other steps involving screws it was the Philips 000 (there was a third screwdriver Y 000 in the kit which I did not use). Did not have any problems at all removing and readding screws back through the process.
Andre Silva -
I'm trying to fix my 5s’s but one has some water damage, and impeccable screen but won't turn on,then I have another one that has no water damage, screens a bit busted but won't turn because of the screen. If I use the good screen from the water damaged phone would it work?
samuel.m.fudge -
After removing the phone from a very good plastic case and before I started the repair I cleaned the entire phone with a soft cloth misted with rubbing alcohol. That removes all the grunge which builds up in the seams of the phone and the small spaces inside the case. Having a clean phone to work on makes the job a lot easier and prevents grunge from falling into the phone.
David Park -
General comment about the screwdriver tips and reassembly: If you get a screw nicely set in place using tweezers and then use the screwdriver, the magnet will probably pull the screw out before you can tighten it. If this is a problem use just the tip (without the handle) to start the screw, then tighten using the handle.
Kevin Patfield -
DO NOT disconnect the screen.
Benjamin Piscopo -
Having two SE’s needing batteries, I ordered an extra battery. The extra battery did not come with the Phillips replacement screws. It would be helpful if every battery came with a set of case replacement screws.
Dorothy Campbell -
Upon reassembly I found it useful to squeeze the phone right above the screws so everything lines up nice. I noticed that when I didn’t do this the new Phillips screws were trying to go in crooked. So just holding the phone together helps.
Samara Sullivan -
hello i am replacing my iphone 5s battery but i am stucked because the adhesive broke whiles pulling it out
before i started i made sure my battery was 0% but i am afraid that when i mistakenly puncture it with the spudger it might catch fire
please is the battery capable of catching fire when it has no power (0%)?
please can someone give me the honest answers before i continue
thank you
George Rockson -
The screws in my iPhoneSE were not P2 (1,2mm) but P1 (0,8mm). I had to order an extra screwdriver which is not available at iFixit.
Tadeus Nawka -
Instructions were fine until removing the battery , No adhesive strip at the bottom of the battery . Unable to remove battery as the battery was stuck sold with adhesive but could not get at the adhesive strip to remove battery . seems whoever put the battery together did not put a strip across the bottom . Had the phone from new and this was the first time I tried to replace the battery . Now I need a new phone
J Caley -
Instructions fine until removing the battery . No strip at bottom of the battery hence impossible to get at the adhesive strips around the battery . This must have been done in the factory as I have had the phone from new and this was the first time the battery was being replaced . Cheesed off as I now need a new phone
J Caley -
30 minutes - to an hour? I gave up after removing the screws and spending an hour trying to lift the display with a suction pad.
harwood -
iPhone 5s maderbored
Rahan Ali -