
Introduzione
Segui questa guida per sostituire i pulsanti L1 ed R1 sul controller DualSense per Sony PlayStation5.
Scollega e spegni il controller prima di iniziare la riparazione.
Strumenti
-
-
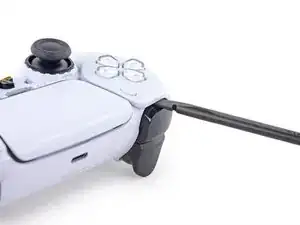
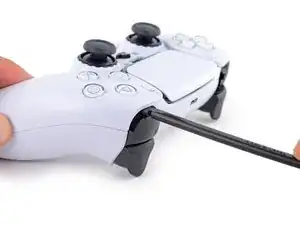
Inserisci la parte piatta dello spudger all'interno della fessura sopra il pulsante L1.
-
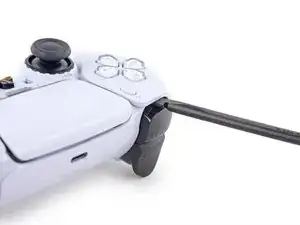
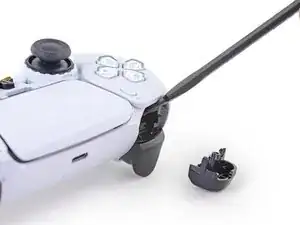
Fai leva verso l'alto e rimuovi il pulsante L1.
-
-
-
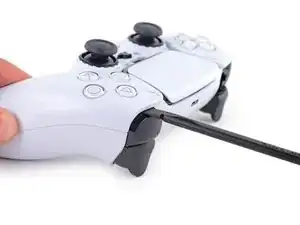
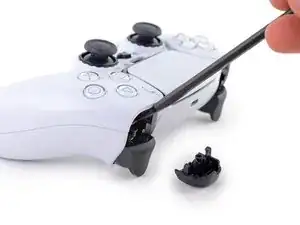
Inserisci la parte piatta dello spudger all'interno della fessura sopra il pulsante R1.
-
Fai leva verso l'alto e rimuovi il pulsante R1.
-
Per rimontare il dispositivo, segui le istruzioni in ordine inverso.
Porta i tuoi rifiuti elettronici a un riciclatore certificato R2 o e-Stewards.
La riparazione non è andata come previsto? Prova soluzioni di base ai problemi, o chiedi alla nostracomunità Risposte per trovare aiuto.

3 commenti
It is easier to remove L1/R1 by going from below than by from above- without any damages.
Does the spudger dent or mark the button when doing this?
My replacement R1 button is different enough to not fit. Fins around center sleeve are wider. So there must have been a design change at some point.
Tried prying from the front of the buttons as pictured and my spudger broke off in the gap. A video I watched showed them being pried off from the back (between the R1/R2 and L1/L2 buttons) which seemed much easier.
Lora Singleton -
Agree with Lora's comment above. I was able to use an old credit card to take L1/R1 out this way. I pressed down the L2/R2 button to create space to work in, then came in from between L1/L2 and R1/R2. It's easy to pop one of the outer corners first then you can work the credit card around the top and the rest falls out.
darkstar448 -
Man, if I'd just read the thumb part...
caldugen -