Introduzione
Se stai usando il tuo iMac 27” fine 2009 o 2010 per il gaming, potresti voler aggiornare la tua scheda video ad una serie 6 del modello 2011.
-
-
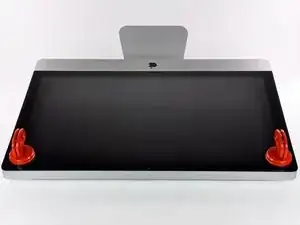
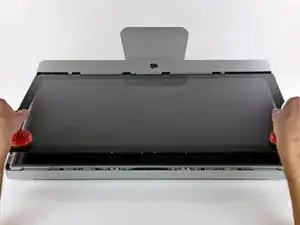
Fai aderire una ventosa accanto a ciascuno dei due angoli superiori del pannello di vetro.
-
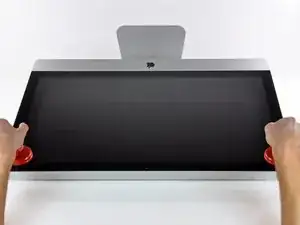
Tenendo delicatamente la ventosa contro il vetro, solleva la maniglia orientabile finché non è parallela all'altra maniglia (come indicato nella terza immagine).
-
-
-
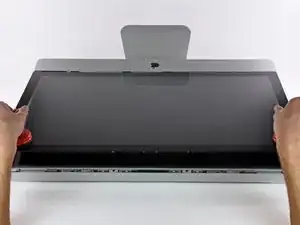
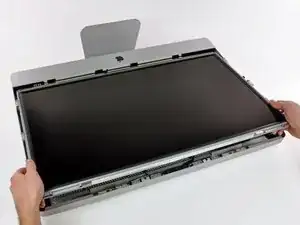
Solleva delicatamente il pannello di vetro in perpendicolare rispetto alla superficie dello schermo LCD affinché sia possibile sgombrare i piedini di montaggio in acciaio inseriti lungo il lato sottostante al bordo superiore del pannello di vetro.
-
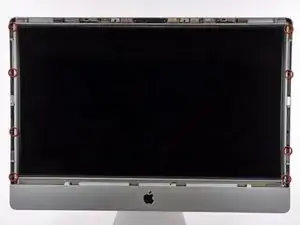
Estrai il panello di vetro dal bordo inferiore dell'iMac e riponilo da parte con attenzione.
-
-
-
Poggiare delicatamente l'iMac dal lato della staffa su una superficie piatta.
-
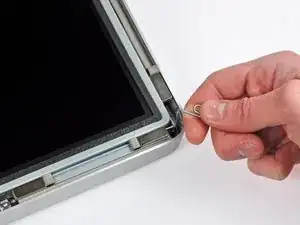
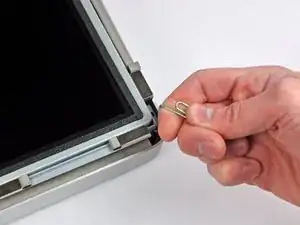
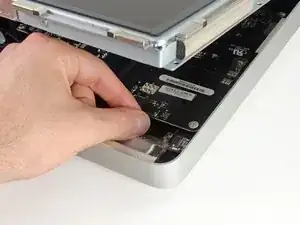
Mediante un attrezzo sottile e ricurvo, sollevare un lato del bordo superiore del display dal telaio esterno in acciaio.
-
-
-
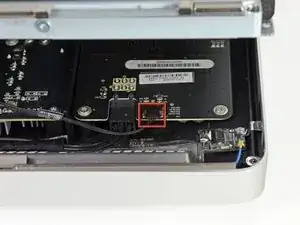
Con le dita, estrarre il cavo della sincronizzazione verticale dal connettore femmina sulla scheda di azionamento LED, vicino all'angolo superiore sinistro dell'iMac.
-
-
-
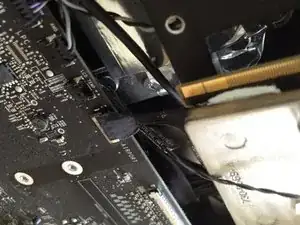
Premere le due alette del connettore del cavo dati del display contemporaneamente per sbloccarlo dal connettore femmina sulla scheda logica.
-
Estrarre il connettore del cavo dati del display dal connettore femmina sulla scheda logica.
-
-
-
Ruotare il display dal case esterno affinché sia possibile scollegare il cavo di alimentazione della retroilluminazione LED dall'apposita scheda di azionamento.
-
-
-
Sollevare il display per creare spazio sufficiente a scollegare il connettore del cavo del sensore termico dell'LCD dal connettore femmina sulla scheda logica.
-
-
-
Estrarre con cautela il cavo verso il bordo superiore dell'iMac e sollevarlo dal case esterno.
-
-
-
Presta molta attenzione con i cavi del display, poiché possono essere danneggiati facilmente.
-
-
-
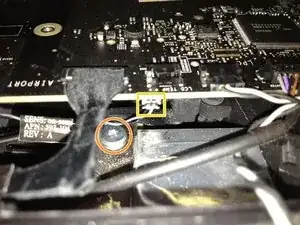
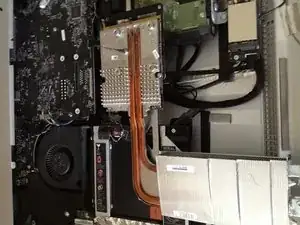
Rimuovi queste 3 viti Torx T9 dal bordo della scheda grafica.
-
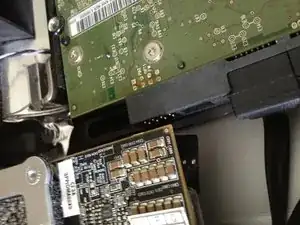
Individua il grande dissipatore della scheda grafica: dovrebbe essere appena sopra il lettore ottico.
-
Rimuovi l'unica vite che lo fissa.
-
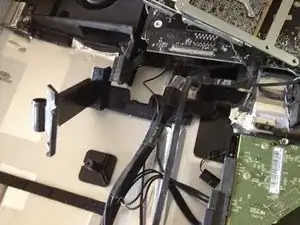
Rimuovi delicatamente il cavo del sensore della temperatura da sotto la scheda madre.
-
-
-
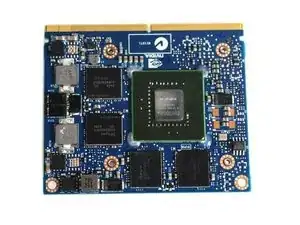
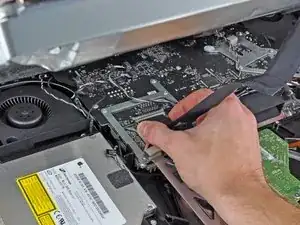
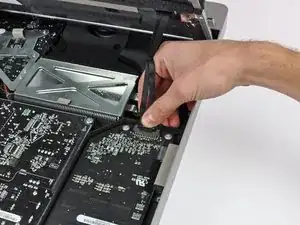
Prestando attenzione, solleva delicatamente e lentamente la scheda grafica e rimuovila dalla scheda madre.
-
Dovresti poterla rimuovere facilmente, se prima rimuovi il cavo del sensore della temperatura.
-
-
-
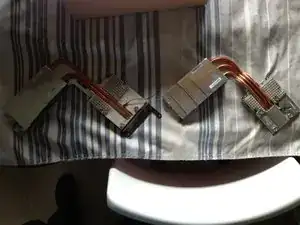
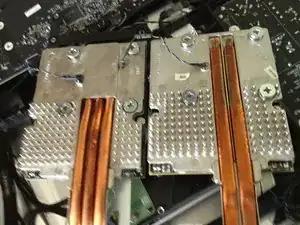
Rimuovi il bordo in metallo dalla scheda grafica; è fissato solo con un paio di viti.
-
Conserva la tua scheda video in un posto sicuro se ti dovesse servire ancora o volessi reinstallarla.
-
La seconda immagine mostra la Radeon 4 e la Radeon 6 una accanto all'altra. La piccola differenza di altezza rende necessario un ulteriore lavoro per poter montare la 6 (vedi il prossimo passo).
-
-
-
Devi rimuovere il lettore ottico per poter rimuovere il pezzo di plastica citato nel prossimo passo. Il lettore è fissato da 4 viti Torx.
-
Una volta rimosse le viti, il lettore può essere sollevato e tolto di mezzo senza scollegare alcun cavo.
-
-
-
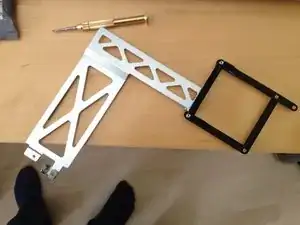
Dato che la Radeon serie 6 è leggermente più alta, dobbiamo fare spazio sul supporto in plastica sotto alla scheda.
-
Rimuovi la parte in plastica mostrata nella seconda immagine, svitando la vite che la tiene ferma e tirandola fuori dal case in alluminio con attenzione.
-
Questo pezzo è fissato con del nastro adesivo, quindi non preoccuparti: non puoi rompere niente.
-
Muovendolo un po' e guidandolo intorno ai cavi, adesso dovresti staccarlo facilmente.
-
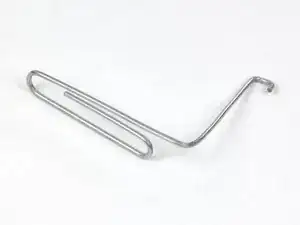
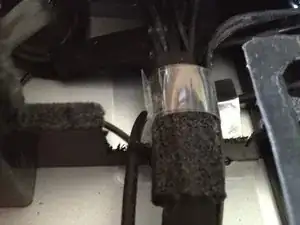
Individua lo spazio rettangolare attraverso il quale passa il cavo grande. Usa un piccolo trapano per renderlo circa 5 mm più largo e 2/3 mm più profondo.
-
La terza immagine mostra il risultato finale desiderato.
-
La ragione principale per effettuare questo passaggio è che il dissipatore della Radeon serie 6, occupa più spazio.
-
-
-
Installa la cornice metallica sulla nuova scheda grafica Radeon serie 6. Assicurati che sia allineata correttamente.
-
Ora reinserisci, prestando attenzione, la Radeon serie 6.
-
Una volta posizionata, fissala con le tre viti.
-
Ricollega il cavo del sensore della temperatura. Servono delle mani piccole o uno strumento adatto. Abbi pazienza con questo passaggio.
-
-
-
Rimonta il display LCD come spiegato su iFixit.
-
Non serve altro. Quando hai rimosso il cavo di alimentazione dovrebbe essersi resettato l'SMC, che è il chip responsabile per la configurazione dell'hardware.
-
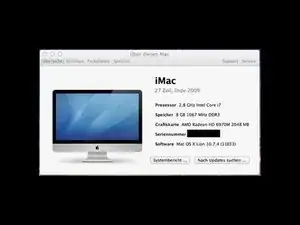
Se tutto è andato bene dovresti vedere la schermata di benvenuto e la schermata "Informazioni su questo Mac" dovrebbe mostrare l'immagine a sinistra.
-
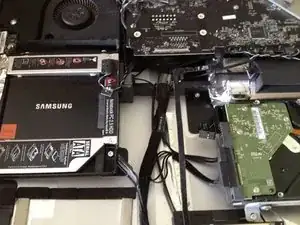
Nota: noi abbiamo anche sostituito il lettore ottico con un SSD da 256 GB, il che può essere fatto facilmente durante il riassemblaggio.
-
Ultimo consiglio: se togli il lettore ottico per mettere un SSD, crea una partizione bootcamp minima e installaci windows. ti risparmierà parecchio tempo se mai volessi farlo in futuro. Fidati: fallo e basta. Installare bootcamp senza lettore ottico è parecchio complicato.
-


Per riassemblare il tuo dispositivo, segui queste istruzioni in ordine inverso.
127 commenti
works perfectly ;-) just be slow and precised
Just be noticed that this upgrade not work for iMac 27 late 2009 equipped with core 2 duo CPU, but only with the i5 and i7 CPU one!
Paolo -
Did you know you can add an additional SSD drive WITHOUT needing to remove your Optical drive? It installs vertically just to the right of your HDD. I just performed this upgrade last weekend. I believe you can do this to 2009 and up models.
Regretfully Not on the iMac late 2009, because the motherboard has only 2 SATA ports, not 3 like the 2010 and later models...
Just a question: with this mod, are you able to use Airplay Mirroring in Mountain Lion? Since the inhability to use it on these macs is GPU-related, virtually with this Graphic card you may be able to enable it... Let me know please!!
I read somewhere that AirPlay mirroring uses a technology on the processor called Intel Quick Sync Video, ant it is present only in the 3rd+ generation of Intel Core ix processors. So if this is true it explains why some Macs do not have AirPlay mirroring and why you do not get AirPlay Mirroring after updating the graphics card.
You can easily lift the glass panel off the magnets with only your fingernails (or something thin like a credit card or a guitar pick). No need to buy suction cups you will only use once.
Nick Caron -
Yes, you don't need the specific suction cups to remove the display cover - it's held on by magnets, and if you start at the center by the iSight you can work out to the edges and remove it. I had an iPhone screen suction cup around and it helped with balancing the screen when you pull it out fully, but by no ways is it required.
jtowner -
Great guide and pretty straight forward the only thing that took me ages and I didn't manage to undo were the power btn cable (step 28) and the thermal sensor (step 25) Seemed like they were glued on! Very difficult to remove and obviously conscious so I didn't break anything!
Eddie -
Thanks!!! Worked excellently.
I used a plunger (clean first ;-) to get the screen off, and http://exirion.net/ssdfanctrl/ for fan control.
Then, i did not take out the whole display and left it in the hinges on the bottom side and held it up with two small cardboard boxes. Easy enough to disconnect the hdd then.
I replaced with an ssd, put that into a ssd enclosure. Had to drill an extra hole in it to fasten the pins that hold it in place.
Used Carbon Copy Cloner to make an image from the old hdd, with the sad connected via usb. Checked it of it booted via System Preferences > Startup Disk. It worked so the took the imac apart and replaced the disk. Booted, everything was working as always, only faster!
Frank303 -
I'm replacing my optical drive too. what exactly needs to be plugged into the SSD? I don't have the kit - as I am not sure one is required if I buy something like this: http://www.amazon.com/gp/product/B0056OB...
Can you please advise? Can I do it with this piece, or do I need to get the entire bracket kit?
Allen Borza -
My display data cable forks, with a smaller section going up near the camera board. Where it forks, it is attached to the aluminum plate that attaches around the cpu board. I haven't seen any images that look similar, and I'm stumped at how to remove this second section of the cable. 2010 i7 build to order
Awolf -
Agree with the other comments here. Despite buying suction cups, not sure they were necessary as the screen removed very easily. A sat nav suction cup would do the job fine.
Stuart Bloomfield -
I can confirm that it is possible to remove the front glass using fingernails rather than suction cups. It isn’t easy, but if you try you should be able to pry off the glass.
I did this twice: once at the beginning of the procedure and once again at the end, when I realized that a big pice of lint was trapped under the glass.
gordonhamachi -
Don’t use suction cups. totally unnecessary. screen pops off with fingernails.
Kieran Hobbs -
The reason for caution about suction cups tends to be making sure you don’t apply uneven pressure on the edges of the glass and crack it in the process of removal. I do agree however that some pretty small suction cups would do fine. These suction cups can be had at your local princess auto (Harbor freight) for a few bucks and are useful elsewhere as well. if you use your fingernails or other items just try and do it evenly :)
Abirinder Brar -
good duct tape or gaffer tape wrapped around your hands makes an excellent glass removal 'tool'. Even clear packing tape works a charm.
Stu Blair -
A great first step that minimizes that first gust of dust migration when the glass is lifted is to clean the glass, sides *and the back* before lifting the glass, and then lift SLOWLY. Most of that dust is already trapped inside and pulled up as the screen lifts, but with care you can keep it there (or gently vacuum out with a micro vac…).
John -
before starting any of this…there is a device that you can use that comes with the IFixit kit to format and either clone or restore your hard drive to the new drive…it will save you a lot of headaches..it is a SSD enclosure that you can plug into your existing computer …
Tomr -
Thanks for the instructions. Before doing this the first time, suggest to everyone, read through at least twice. This is the easiest step, as you’ll soon see. As for removing the glass, USE suction cups, either the ones the sell here, or others. DON’T skimp. Also wear gloves when handling the glass. Don’t take chances.
ECJohansen -
Duct tape works too!
Dani -