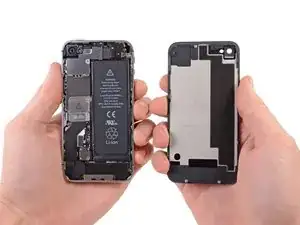
Introduzione
Usa questa guida per sostituire la scheda logica del tuo iPhone.
-
-
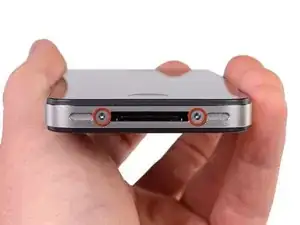
Spegni il tuo iPhone prima di iniziare lo smontaggio.
-
Rimuovi le due viti pentalobe da 3,6 mm vicino al connettore del dock.
-
-
-
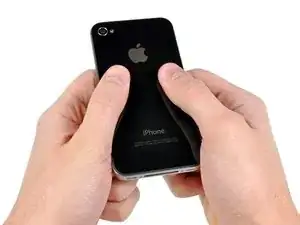
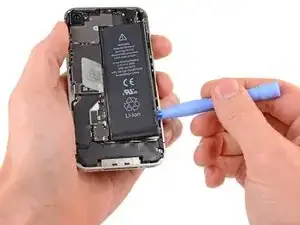
Tira via il pannello posteriore dal retro dell'iPhone, facendo attenzione a non danneggiare le clip di plastica collegate al pannello posteriore.
-
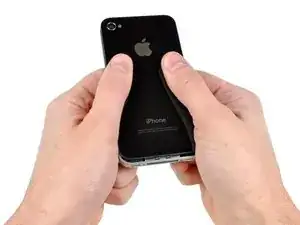
Rimuovi il pannello posteriore dall'iPhone.
-
-
-
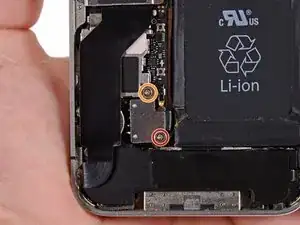
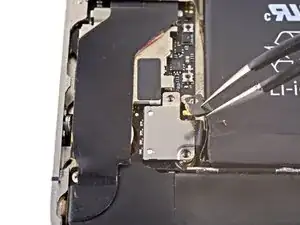
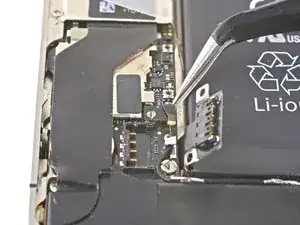
Rimuovi le seguenti viti che fissano il connettore della batteria alla scheda logica:
-
Una vite Phillips da 1,7 mm
-
Una vite Phillips da 1,5 mm
-
-
-
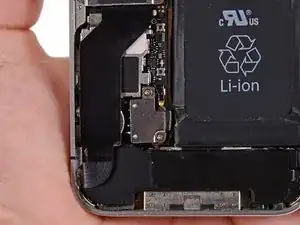
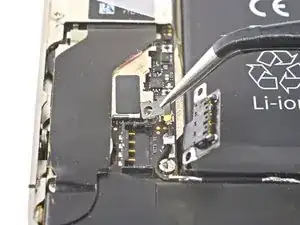
Spingi via delicatamente il contatto a pressione dal connettore della batteria finché non si libera.
-
Rimuovi il contatto a pressione.
-
-
-
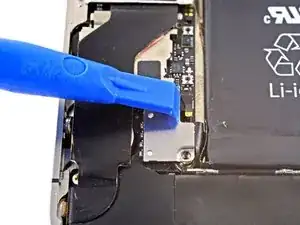
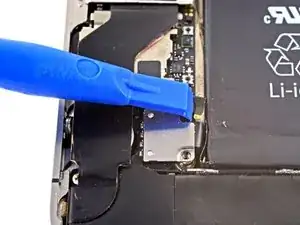
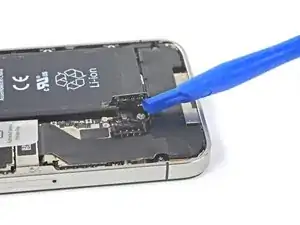
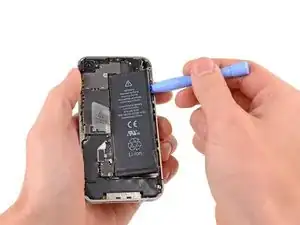
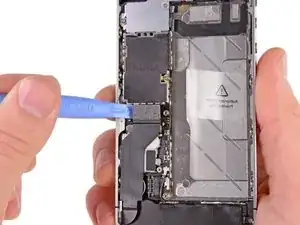
Usa uno strumento di apertura in plastica per staccare delicatamente il connettore della batteria dalla sua presa sulla scheda madre.
-
Inserisci la punta dell'attrezzo fra l'alloggiamento dell'altoparlante e il coperchio metallico del connettore, e solleva prima il bordo inferiore del connettore.
-
-
-
Inserisci il bordo di uno strumento di apertura in plastica tra la batteria e il case esterno, vicino alla parte inferiore dell'iPhone.
-
Fai scorrere lo strumento di apertura in plastica lungo il lato destro della batteria e fai leva in molti punti diversi per separare completamente la cella dall'adesivo che la fissa al case esterno.
-
Lascia agire l'alcool per circa un minuto per ammorbidire l'adesivo.
-
Usa la punta di uno strumento di apertura in plastica per sollevare delicatamente la batteria.
-
Se è rimasto dell'alcool nel telefono, puliscilo attentamente o lascialo asciugare prima di reinstallare la nuova batteria.
-
-
-
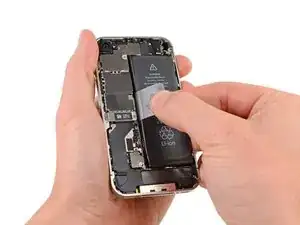
Tira la linguetta sporgente in plastica trasparente per staccare la batteria dall'adesivo che la fissa alla iPhone.
-
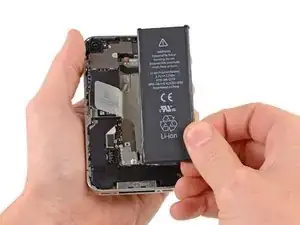
Rimuovi la batteria.
-
-
-
Rimuovi le seguenti viti che fissano alla scheda logica la copertura del cavo del connettore del dock:
-
Una vite Phillips da 1,5 mm
-
Una vite Phillips da 1,2 mm
-
Rimuovi la copertura metallica del cavo del connettore del dock.
-
-
-
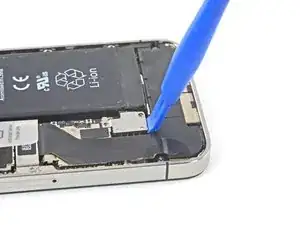
Usa l'estremità di uno strumento di apertura in plastica per staccare il cavo del dock dal suo zoccolo sulla scheda logica.
-
-
-
Stacca il cavo del connettore del dock dall'adesivo che lo fissa alla scheda logica e al fianco del gruppo altoparlante.
-
-
-
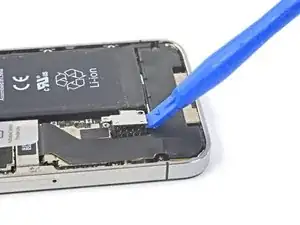
Usa l'estremità di uno strumento di apertura in plastica per staccare il cavo dell'antenna cellulare dalla sua sede sulla scheda logica.
-
Sfila il cavo dell'antenna cellulare da sotto i passaggi metallici attaccati alla scheda logica.
-
-
-
Rimuovi le seguenti quattro viti che fissano la copertura del cavo alla scheda logica:
-
Una vite Phillips da 2,7 mm
-
Una vite Phillips da 2,6 mm
-
Una vite Phillips da 1,3 mm
-
Una vite Phillips da 1,2 mm
-
-
-
Usa l'estremità di uno strumento di apertura in plastica per staccare le linguette della copertura dalle loro fessure ricavate nella schermatura EMI della scheda logica.
-
Solleva la copertura del cavo prendendola dal bordo più vicino alla parte superiore e rimuovila dall'iPhone.
-
-
-
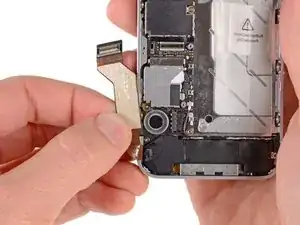
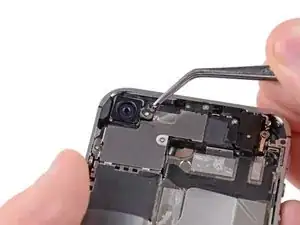
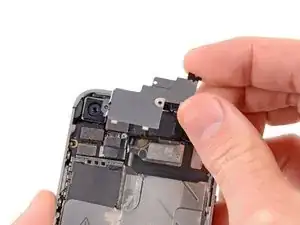
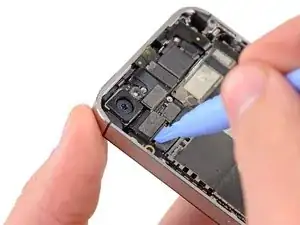
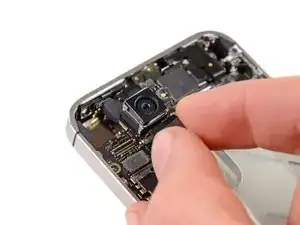
Usa l'estremità di uno strumento di apertura in plastica per staccare il connettore della fotocamera dal suo zoccolo sulla scheda logica.
-
Rimuovi dall'iPhone la fotocamera posteriore.
-
-
-
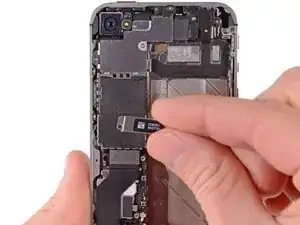
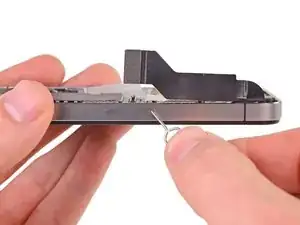
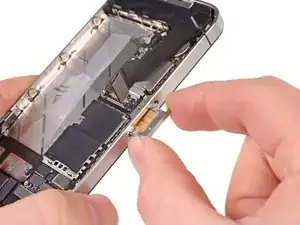
Usa uno strumento di estrazione SIM o una graffetta per espellere la SIM insieme al suo vassoio.
-
Rimuovi la scheda SIM e il suo vassoio.
-
-
-
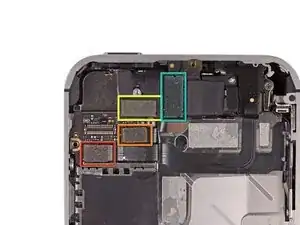
Stacca i cinque cavi vicino alla parte superiore della scheda logica nell'ordine seguente:
-
Cavo jack altoparlante/pulsante volume
-
Cavo fotocamera anteriore
-
Cavo digitizer
-
Cavo dati del display
-
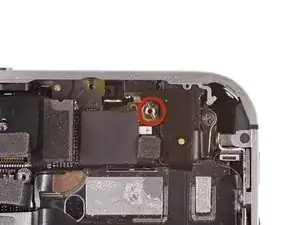
Cavo del pulsante di accensione (posizionato, come mostrato dalla seconda immagine, sotto il cavo jack altoparlante/pulsante volume)
-
-
-
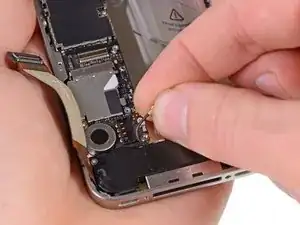
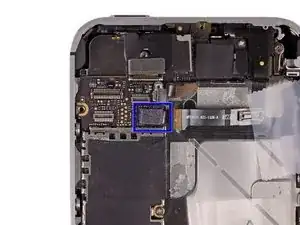
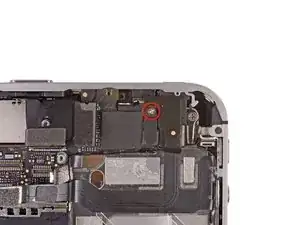
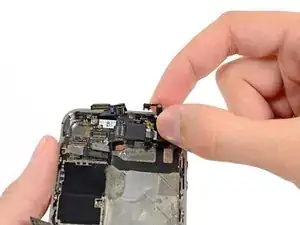
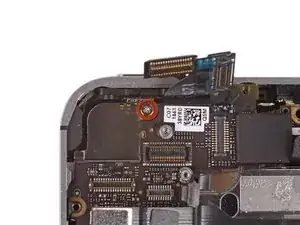
Rimuovi la vite Phillips da 1,5 mm che fissa vicino al jack cuffie la clip di messa a terra alla scheda logica.
-
-
-
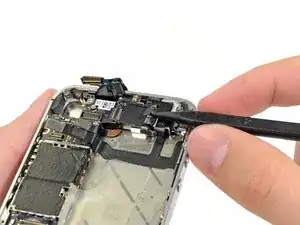
Usa la punta di uno spudger per staccare la piccola clip di messa a terra dalla scheda logica.
-
Afferra delicatamente la clip di messa a terra e rimuovila dall'iPhone.
-
-
-
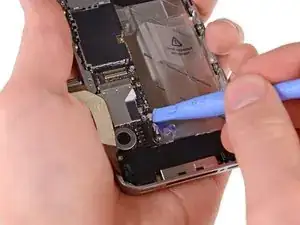
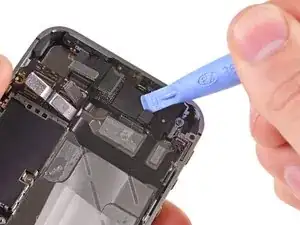
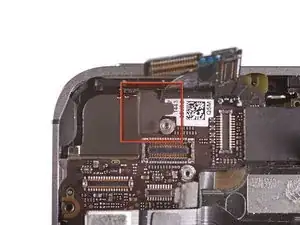
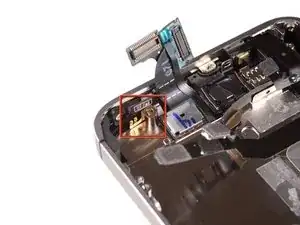
Usa l'estremità di uno strumento di apertura in plastica per scollegare l'antenna Wi-Fi dalla scheda logica.
-
-
-
Se è presente, stacca il il pezzo di nastro adesivo nero che copre la vite nascosta vicino al pulsante di accensione.
-
Rimuovi le viti Phillips da 2,6 mm che fissano la scheda logica vicino al pulsante di accensione.
-
-
-
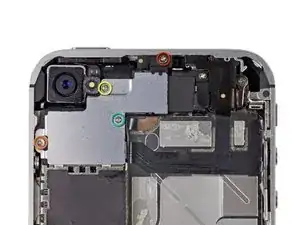
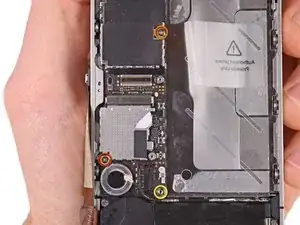
Rimuovi le seguenti viti che fissano la scheda logica al case:
-
Una vite Phillips da 2,5 mm vicino al motore di vibrazione
-
Una vite Phillips da 2,4 mm
-
Un distanziale a vite da 3,6 mm lungo il lato della scheda logica vicino all'apertura della batteria.
-
-
-
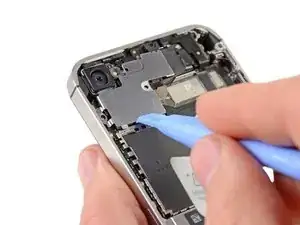
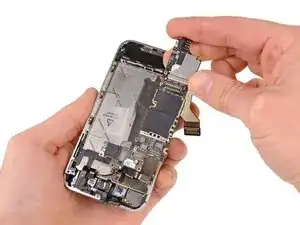
Solleva delicatamente la scheda logica prendendola dal bordo vicino all'altoparlante e falla scorrere via dal lato superiore dell'iPhone.
-
Rimuovi la scheda logica.
-
Per rimontare il tuo dispositivo, segui queste istruzioni in ordine inverso.

12 commenti
recently I tried to fix my wifi antenna and ended up disturbing something that made my touch unresponsive. Okay just to make sure that my Display unit was not damaged I plugged in another display set and still the touch was not working!
what could have possibly gone wrong?
What can I say but BRILLIANT!!!!
You have saved me a bomb - very easy and much appreciated!
wonderful description's steps..Don't stop..forwards gentelman
The Liberation Kit just stripped the screw. Now what.
nimpsy -
Had local iPhone repair shop remove the screw. Repair complete!
nimpsy -
I left the battery in and everything above the middle, using a pen knife to flex the logic board, I had plenty of room to else the old out and the new in.
Worked well and saved a lot of time.
Keith M -
After reviewing the steps I decided to follow this guy's advice and left the battery in.....one less item to possibly foul up. I don't know if it made it any faster (first time to open my phone, so nothing to compare it to) but I can say that my phone is charging for the first time in 6 months :D
Jennifer -
BEFORE YOU START:
1) This is doable but not easy, quick or without risk.
2) If this is your 1st time, the whole process can take >2 hours (half of it reading this fixit manual and notes, which I highly recommend!)
3) I highly recommend placing a large, thin clean white cloth on the table. This prevents screws from rolling around and you will clearly see anything falling out.
4) If you have them, use tight surgical (latex) gloves. This prevents you from greasing up contacts.
5) Have e.g. a big old egg box ready, so you can place the screws in order (and maybe write step/screw size on the side).
6) I bought my display from "Generic" on Amazon ($20.36). Screen works fine and tools were ok but not great (screw drivers do not withstand force needed to unscrew some).
7) I had my own 2mm Phillips screw driver and a 2.4mm flat (for the big screws).
8) Have a nice cold beer by your side! Good luck!
superedu111 -
Sounds like this comment relates to a screen replacement, not a rear panel replacement. No way a rear panel replacement would take 2 hours - can be done in 2 minutes!
Jonathan Deamer -
I was paranoid about stripping the pentalobes - I used the ifixit pentalobe screwdriver TOGETHER with a layer of Glad Wrap (cling film or saran wrap for the non-Aussies) over the pentalobe holes - absolutely no problems. Guess it helps the driver head gain purchase?
Anyway hat tip to this guy:
http://modmyi.com/forums/hardware/806092...
jimforbes -
It's also called glad wrap in the US as well. :)
Scorppio500 Webmaster -
After seeing the comments about trouble finding the carrier, I shut down the phone, did a soft reset (by holding the power and home buttons until it started and then shut down and stayed off), and removed the SIM. After the repair, I replaced the SIM and plugged it in to the charger. It started up and found the carrier (Verizon, as it happens) immediately. I would guess that only the soft reset made a difference, but I did both.
DavidLewis -
Thank you David, will I need to reload operating system if I replace thr logic board? I'm hoping to use a 32gb boards from a locked but working phone to place in my 8gb device. Thanks for your advice,
Sharif
Sharif Bagnulo -
I pried one end of the back off only to find 2 funny little screws holding the other end on so I took my Dremel, like Jack said, and ground those suckers out. Once I had the back off I loosened all the screws then turned it upside down and shook the crap out of it. The screws went flying everywhere and fell on the floor. Its my moms house so of course she's got gross brown carpet. How am I supposed to find my screws in that? I get the vacuum out and go over every inch of the floor to suck up all them screws. Then I dump the bag on the table and all I find is a bunch of hair and gods knows what else, but no screws. When I look for my phone I see its covered in all that stuff that came out of the vacuum. I mean, what's up with that? How can I work on my phone if its covered in dirt? Nobody said anything about that, did they? The average guy's gonna screw up his phone big time if he follows these instructions and nobody warns him about all the dirt that's gonna end up in his phone. Are you kidding me!! Now what?
Marv -
Here's a little vacuum trick for anything small: put nylons/panty hose over the end of the hose and then you don't have to dig thru the bag contents.
paul -
Marv you a first class pleb! Please don't try and fix anything again. Tool
ticklejahfancy -
It's clear who's at fault here, Marv.
It's as clear as the day has long legs. It's your Mom's fault.
Milfs who make earth-tone carpet choices, are more likely to twerk, than tweek.
And as far as trimmin the hedges are concerned, she's more likely to float a turd in the punchbowl,
than to give you your inch.
I know you think I'm crazy. But everyone else agrees. We all politely try to the other way...
Your cuck stops here. We'll not near me, go over there...
Nathan Brazil -
my screws are stipped and i am going though the front glass to get to the logic board could some one give me a guide on how to get to the board please... thanks
Caleb Croft -
all you need to do is remove the clip over the wifi antenna and the one that actually attaches the wifi antenna to the iphone two steps to do this job...
Ray Leahy -
The physical battery replacement went off without a hitch, and saw that the phone had no network connection, but also had no way to unlock. The slide lock said "Slide for Emergency Call" over my custom wallpaper and sliding would give the passcode screen, but it would reject the 6 digit passcode (it would buzz and go dark after the 4th digit, re-awakening and putting in the last 2 would indicate bad passcode). Very frustrating! I get it into recovery mode and convinced iTunes to "update" the OS, but it still didn't let me in. I performed a restore to fully factory reset the phone, and it worked! Sort of... the start screen kept being replaced by "Temperature - phone needs to cool down" but it's cold. Temp sensor is on the battery and returning to old battery fixed it. New battery is bad, and phone is wiped. Fun night.
I'm going to guess that disabling the password might save you from a similar fate. So, I'll suggest BEFORE YOU START, backup your phone and disable the passcode. Good luck.
Ian Epperson -
Same here.. Going through that terrible night myself! Guess you had to return your battery right?
Nuno Alves -
Is it possible to replace front glass only? If so, please provide a manuel
Iva -
Yes, it is. But it's very difficult and risky. Forget it... Have a look here: https://youtu.be/L_kCY05jR10
Jiri Altman -
I didn’t find this particularly difficult, even though I’m pretty inexperienced at this sort of work. I watched the video overview to get me going and then followed the steps in the guide. My tips would be to keep the screws and parts organised as you dismantle, and ensure you read all the reassembly tips as you go; it’s easy to skip over them. I also found using the Liberty Kit to replace the pentalobe screws was worthwhile.
Poor old Marv of Feb 2015. Suggest he sticks to chopping logs.
graemebagnall -
caught fire as soon as I replaced the back phone destroyed
Stuart Laurie -
The battery on the phone is swollen so I need to replace it but I can’t turn it on to drain the battery, what do I do?
Beetroot -