Introduzione

Sulla scheda madre sono presenti tutti i circuiti interni del Nintendo 2DS, perciò è necessaria la massima attenzione mentre la si smonta. Stai attento a non spanare alcuna vite, perché il danno potrebbe essere impossibile da riparare.

  1. wg4RTxdhgZNOVaab
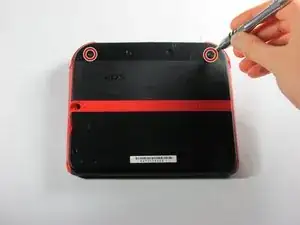
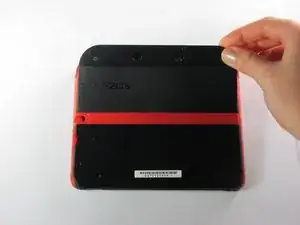
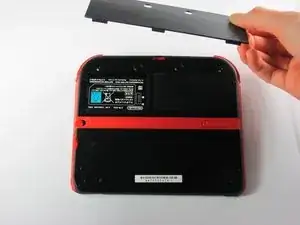
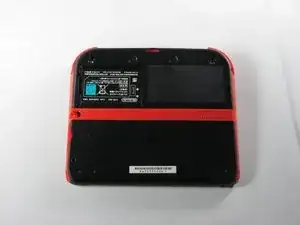
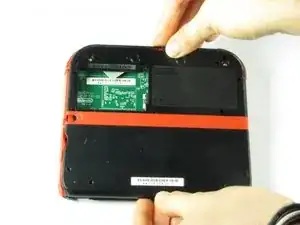
    • Rimuovi le due viti imperdibili che tengono il pannello superiore nel retro del dispositivo.

    • Le viti imperdibili non si staccheranno completamente dal pannello.

  2. cdb3AdyJTrNhIjrr
    cdb3AdyJTrNhIjrr
    okYxlIGDUBKBdGNP
    • Fai perno sulla parte inferiore e tira verso l'alto il pannello superiore per rimuoverlo.

  3. YA2mNvc2fLpeZ4NZ
    YA2mNvc2fLpeZ4NZ
    yjKMPFAO1SC1LncE
    HRaiAoWcVXEMByll
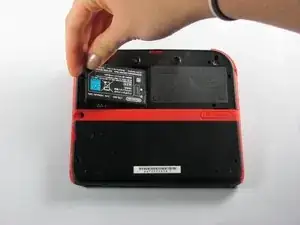
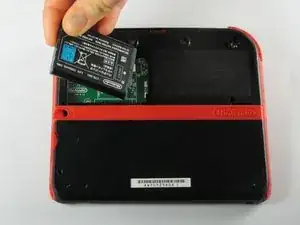
    • Rimuovi la batteria dal suo alloggiamento sollevandola dal lato più vicino al bordo esterno.

  4. vkEjnCVvCfkcXpKn
    • Rimuovi le 10 viti a croce che fissano il pannello posteriore.

    Can't take off the screw top left next to the battery. What type of screwdriver do I use and where can I find some?

    Little Mac -

    I used a husky with changeable heads, you could probably find one on amazon

    Minecrafter Pig -

  5. ona5d6XElywnV2F6
    • Il pannello posteriore è collegato alla scheda madre da un cavo piatto, perciò stai attento a non sollevare troppo il pannello posteriore dal tuo dispositivo.

    • Solleva delicatamente il pannello posteriore dal dispositivo.

  6. fVKP4KxbkT6Fggne
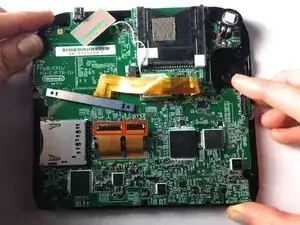
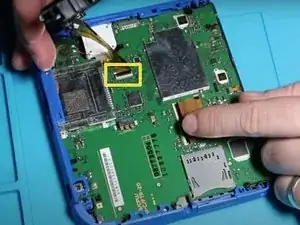
    • Usa la tua unghia o l'estremità piatta di un bastone di plastica per sollevare il connettore che fissa il cavo a nastro alla scheda madre.

    • Rimuovi il cavo dal connettore

    • Cogli l'opportunità di rimuovere i due pulsanti dorsali L e R, hanno dei cardini che potrebbero rompersi e delle molle che potrebbero schizzare via.

    You can also detach the cable from the motherboard safely by flipping up the connector on the motherboard. Just don't forget to reattach. Some will find this tedious but may save time if you know what you're doing with said connectors.

    Blackbeard -

    I agree, this is what the guide i followed said to do and since I was disconnecting all the other ribbon cables it made perfect sense to do it that way.

    Lin -

    pay attention: my 2ds dropped it's lens covers at this step

    Jos van Reenen -

    Likewise, I used a tiny drop of glue to put the lens back in place. Take care not to dirty the lens.

    Elliot West -

    The picture you have there has the camera lens ribbon installed upside down. The ribbon needs to be pointing down when you re-attach it not up.

    Rick Parrish -

    Agreed, ribbon cable looks upside down in picture

    Elliot West -

  7. hTml2euoIMtZJkd6
    hTml2euoIMtZJkd6
    OuYdgcEvDLpnQV5M
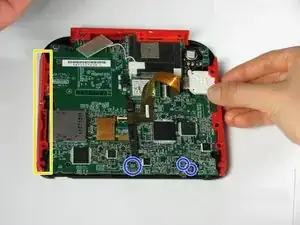
    • Afferra i pannelli laterali della scocca del dispositivo con le dita e tirali in fuori per rimuoverli.

    • I pannelli dovrebbero staccarsi facilmente, richiedendo una forza limitata.

    • Ci sono tre cavi a nastro che sono già stati staccati in questa immagine, disconnettili prima di smontare ulteriormente il dispositivo.

    When reattaching during reassembly, take great care to ensure volume slider piece is correctly aligned with potentiometer tab on motherboard, otherwise volume control cannot be changed.

    Elliot West -

    The are two small metal pins in the bottom corners of the case, take care not to misplace them.

    Elliot West -

    The (3?) small ribbon cables on the bottom of the motherboard appear to already have been unplugged in this step. unplug them while unplugging the two large screen ribbon cables in step 10

    Lin -

    What are the three ribbon cable at the bottom are supposed to be. Pls

    Doom Guy447 -

  8. 32gGatrJYXi2eqcW
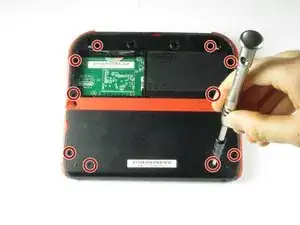
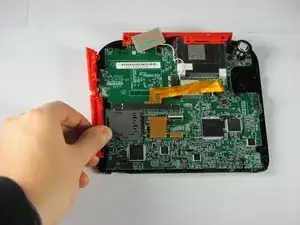
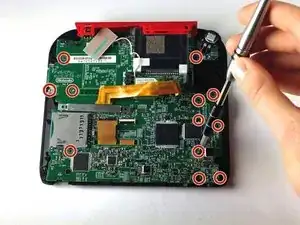
    • Rimuovi le 12 viti a croce color ottone che fissano la scheda madre.

    • Stai molto attento a non spanare nessuna di queste viti. È facile che accada e potrebbe rendere impossibile la sostituzione della scheda madre.

    • Il circle pad è scomparso in questa immagine. Non preoccuparti, ci occuperemo di questo nella prossima fase.

    ...also in this step, the pictures show the analog stick disappearing without a step to remove its two silver screws.

    Roger -

    I was using a brand new 000 driver, and found that I needed to dull the tip of it in order to get a better grip on these tiny screws.

    marjames -

    I dont know if its just me but my gold mother board screws i had a few that just didnt fit right with a ph000. Maybe my screw driver is just garbage?

    Mark Damien English -

  9. drj5COHLRB5bNu4x
    drj5COHLRB5bNu4x
    a5TIRFcWDcCjkH4k
    QFD1osmhxQpPJTkF
    • Il pannello superiore può essere rimosso solo se le scheda madre non è più fissata.

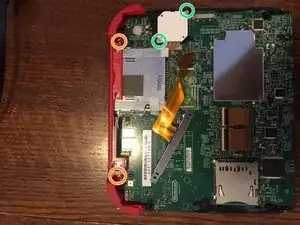
    • Ci sono due viti aggiuntive situate nel binario superiore. Rimuovi queste per poter asportare completamente i pulsanti e la rotaia superiore.

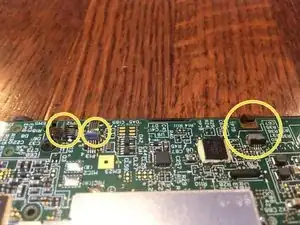
    • Ci sono due viti che fissano la base del joystick che devono essere rimosse. (Stai attento al cavo piatto—rimane connesso!)

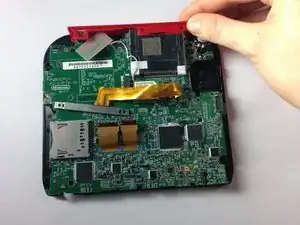
    • Afferra il pannello superiore con le dita e tiralo via dal dispositivo.

    • Il pannello superiore dovrebbe staccarsi facilmente, con poca forza applicata.

    There are two additional brass screws holding the top panel plastic on to the frame. They are 00 Philips and shorter than the ones securing the motherboard.

    Roger -

    When reassembling, take care to ensure all buttons, and rubber button pads are located correctly BEFORE securing the motherboard.

    Elliot West -

  10. JKQgNplHbIPXEZdK
    JKQgNplHbIPXEZdK
    14GOAGZYrKXdPMfo
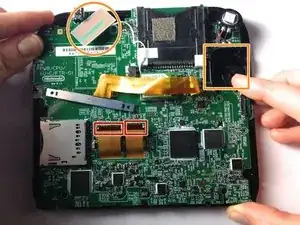
    • Scollega i 2 cavi piatti sollevando la parte nera dei connettori che li bloccano.

    • Solleva la scheda rettangolare adagiata sulla faccia e solleva il quadrato bianco che è il motore del joystick (serve un piccolo sforzo). Entrambi restano collegati alla scheda madre.

    • In alcuni modelli, dovrai rimuovere altri 3 piccoli cavi piatti nella parte inferiore dello schermo. Sono fissati tramite dei connettori da sollevare. SII DELICATO!

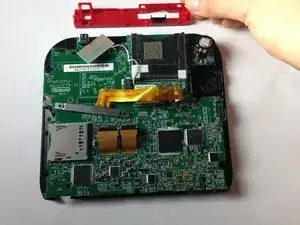
    • Afferra la scheda madre da entrambi i lati e sollevala per rimuoverla.

    Don't forget to disconnect the two tiny ribbon cables on the bottom of the motherboard that attach to the microphone and home button.

    Roger -

    What happens if I can't get the ribbons to reattach? Is the board broke irreparably?

    Laurie Hutcherson -

    ...as well as the hidden 4-conductor ribbon cable on the upper right that connects to the analog stick.

    Roger -

    What about the top 2 wires

    briana1987be -

    Briana the 3 wires on bottom of board are covered under screen 2 step 10.

    goldenkenneth -

    y e e t y e e t m y d u d e s ! ! ! ! ! ! ! ! ! !!n ! ! ! ! ! ! ! ! ! !

    scoobert doobert -

    The replacement board that I’ve got has not got a grey plastic flip down ribbon cable retainer! How do I swap one from my old board?

    JoeStoner -

    The motherboard of my 2017(I think) 2DS is definitely laid out differently than in this guide, be careful.

    Matthew D. H. -

    Cosa succede se i connettori dei 3 piccoli cavi piatti si dovessero rompere??

    00 Jumpscare -

    How do I flip up the two ribbons ( need help desperately)

    Abbigail Brogden -

Conclusione

Per riassemblare il dispositivo, segui queste istruzioni in ordine inverso.

Fina Beauchamp

Membro da: 12/01/15

2982 Reputazione

13 commenti

o meu 2ds esta com um defeito que, quando eu aperto o botão de power ele liga e apos alguns segundo desliga e faz um pequeno barulho.

thiagopereira10000 -

Would a jis #000 screw driver work better? As i tried a ph +000 and the gold motherboard screws just dont fit right

Mark Damien English -

I have a question. After I replaced the mother board I have been having issues with it freezing after a couple mins running. Do you know why

briana1987be -

I have a similar problem. After I replaced mine it will not open any app, and it does not show the status bar. Does anyone know why?

Steve David -

Now that I've removed the motherboard, how do I fix it? The instructible is great as far as it goes, but it doesn't go far enough

Danielle Chester -

Fix what? You need to be more specific. I have to purchase a screen from China in order to fix mine.

goldenkenneth -

The SD slot of my 2DS is not functioning. Should I replace the complete motherboard?

Ingeborg -

I have a quarter inch metal pin left over. Don’t see it in any tutorials. Anyone know where it’s from?

Mikael Daugherty -

I have the same thing, It came out when I was removing the back panel. I believe it was located towards the bottom of the panel. I’m scouring forums to see where it goes. Found this on Youtube! https://www.youtube.com/watch?v=qjoPIt5K... looks like it is just a reinforcement pin for a lanyard in the bottom corners.

Kwag -

stripped all of my screws. Your screwdrivers suck $@$*. never buying again. &&^& you

Tony Son -

The picture of the camera piece being unscrewed shows it in the backwards position, which caused me some grief during reassembly.

jcryay -

where do i buy a motherboaRD

TheKnight Onix -

Depends on the country where you live. In Europe, some countries have apps (flesh market) where you will find used motherboards of Nintendo. (Wallapop, Vinted...)
For the rest of the world, you can try a l i e x p r e s s . c o m or similar.

Francisco Sánchez -