Introduzione
Se hai una scheda madre danneggiata, rotta o corrotta, questa guida ti aiuterà a sostituirla.
Ricambi
-
-
Appoggia il dispositivo con lo schermo rivolto verso l'alto.
-
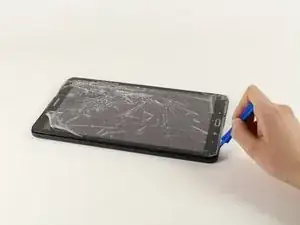
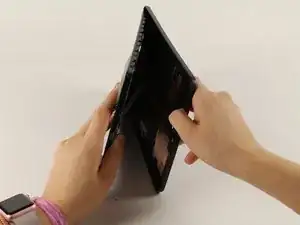
Inizia vicino ad uno dei bordi curvi del dispositivo(usa la seconda immagine come esempio).
-
Infila uno strumento di apertura in plastica tra la copertura posteriore e quella anteriore.
-
-
-
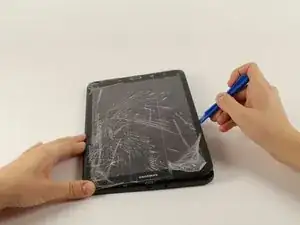
Una volta che lo strumento di apertura in plastica è stato infilato, usalo per fare leva lungo i bordi del dispositivo per separare la copertura posteriore.
-
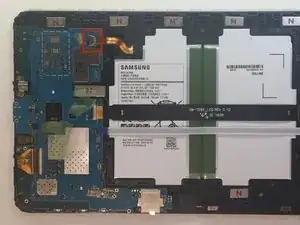
Rimuovi la copertura posteriore dal dispositivo.
-
-
-
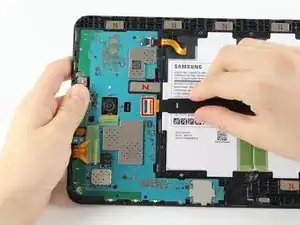
Rimuovi la protezione adesiva e ruota verso l'alto l'aletta di bloccaggio sul connettore ZIF della batteria.
-
Sfila il cavo a nastro arancio della batteria dalla sua presa.
-
-
-
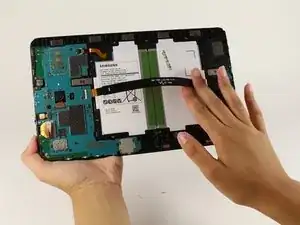
Rimuovi la protezione adesiva, solleva l'aletta di bloccaggio e sfila il cavo a nastro bianco dello speaker dalla sua presa.
-
-
-
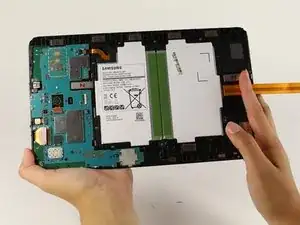
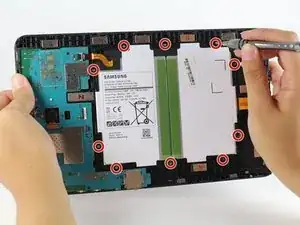
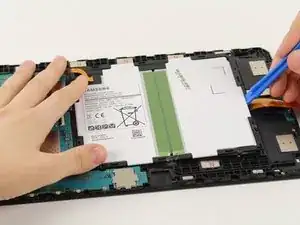
Usa un cacciavite a croce Phillips #000 per svitare le dieci viti da 4 mm attorno alla batteria.
-
Infila uno strumento di apertura in plastica sotto il bordo inferiore della batteria vicino allo speaker e sollevala.
-
-
-
Ruota verso l'alto le due alette di bloccaggio sui connettori ZIF con uno strumento di apertura in plastica.
-
Sfila i cavi a nastro arancio dalle loro prese.
-
Rimuovi la fotocamera anteriore.
-
-
-
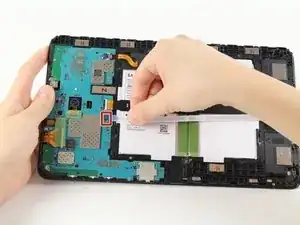
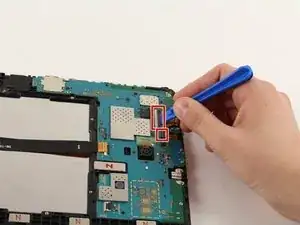
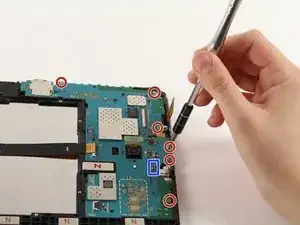
Scollega la presa jack dalla scheda madre.
-
Usa un cacciavite a croce Phillips #000 per svitare le sei viti da 4 mm.
-
-
-
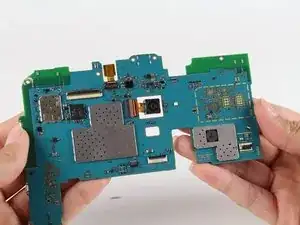
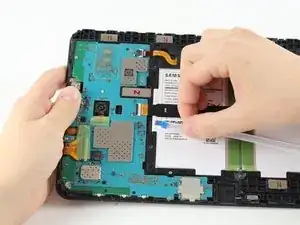
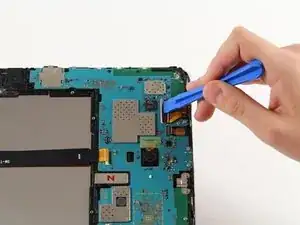
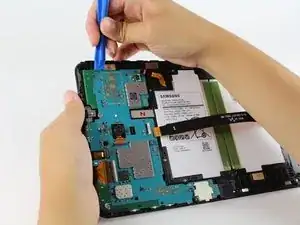
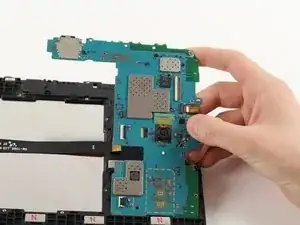
Infila lo strumento di apertura in plastica sotto la scheda madre, sollevala e rimuovila dal tablet.
-
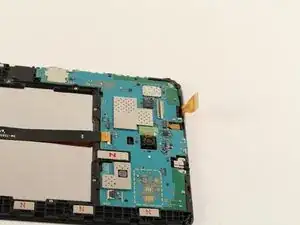
Rimuovi il supporto in metallo che stava sotto la porta di carica e mettila da parte.
-
Per rimontare il dispositivo, segui le istruzioni in ordine inverso.
Un commento
habe es geschafft zum zerlegen... leider ist nur der verschluss vom LCD hops gegangen. Ohne diesen geht wohl nix. Kein Bild.
AWESOME!! I was trying to open it from the “NOT OK” place and you saved me to broken the screen… thanks!!
David Leiva -
No problem, enjoy.
Roger L. Ortiz -
Felt it was easier for me to do it from the middles out.
Tanin Garcia -
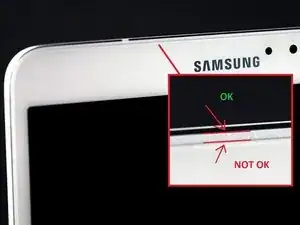
@rogerlortiz You two seem to be miscommunicating. The author points out the location between the digitizer and frame in which to place a tool. While @Tanin Garcia, whom no longer seems to be member, was pointing out where along the edge from corner to corner it was best to start the separating process.
B. A. Computer Services -
Important: the display is sourrounded with a plastic frame. You need to get beween this frame an the backcover (not directly at glass edge as I tried it first and almost broke the glass). Get a closeup picture of it to clarify.
Oliver Dawid -
wer lesen kann, ist klar im Vorteil - ich hab die SD-Karte drin gelassen. Hat aber funktioniert…
Thomas Wolter -
Don’t use a very small flathead screwdriver as a spudger. Just shattered the screen :(
nikvoss -
Yes, shattered the screen. To the garbage, it goes. A little knowledge is a dangerous thing. This a repair better suited for a professional repair! Thanks for helping me make the decision to get another one!
vancega -