Introduzione

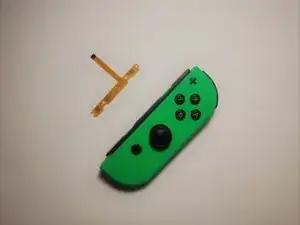
Un cavo della scheda dei pulsanti SL/SR piegato causerà la mancata risposta del pulsante SYNC, delle spie LED e dei pulsanti SL/SR. Ciò impedirà al Joy-Con di Nintendo Switch di connettersi a una console di gioco da solo senza un secondo Joy-Con.

Prima di utilizzare questa guida, verifica che i pulsanti non rispondano accedendo alle impostazioni di sistema della console di gioco e verificando i dispositivi di input nella sezione "Controller e sensori".

  1. qCUmEWTRWEdt4QrZ
    qCUmEWTRWEdt4QrZ
    iPfy3p1ZATgyikIK
    k5DUvqlvrSDuCprZ
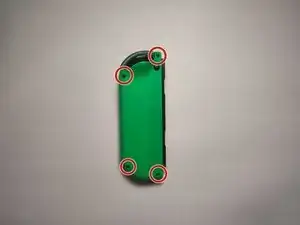
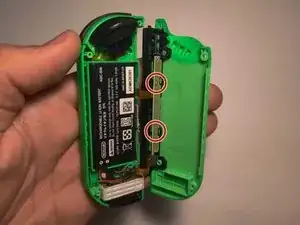
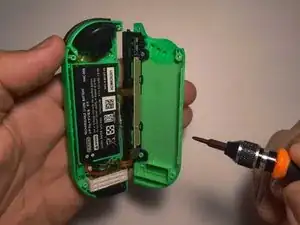
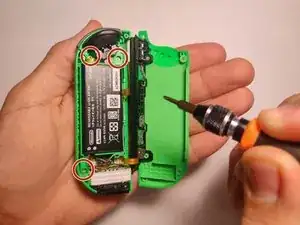
    • Rimuovi le quattro viti da 6 mm visibili sul retro del Joy-Con usando il cacciavite Tri-point Y00.

    • Durante l'intera procedura, posiziona le piccole viti in un posto in cui non le perderai e mantienile organizzate.

  2. oegGqkkt31LnXEsY
    oegGqkkt31LnXEsY
    HEVbSsSDbcdK4WXM
    dsJX1bvkCMeYWJ5E
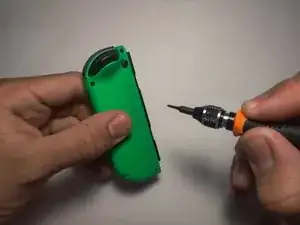
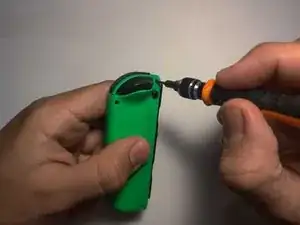
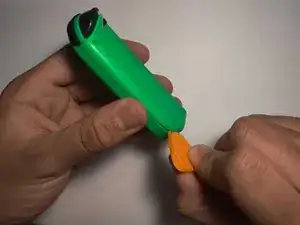
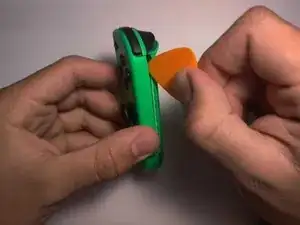
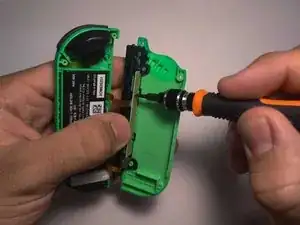
    • Apri il Joy-Con inserendo il plettro di apertura nell'angolo inferiore e facendolo scorrere verso l'alto.

    • Durante l'apertura, fai attenzione a non "strappare" le due metà del Joy-Con, poiché sono ancora collegate dai cavi.

    • I cavi a nastro sono fragili. Una trazione energica può causare danni al dispositivo.

  3. 5oIT4HTlaHvJxrpy
    5oIT4HTlaHvJxrpy
    ZiMsdfDIU3od5W1G
    gdCPtPX3kZTmJTae
    • Rimuovi le due viti da 3 mm sulla guida di ricarica utilizzando il cacciavite Phillips #00.

    • La parte che deve essere sostituita è la pulsantiera direttamente sotto queste due viti.

  4. 1okmN2XdGkIiUEOk
    1okmN2XdGkIiUEOk
    AGVCODAJJU4kyLqH
    TcP4RYMtKCxjsd62
    • Rimuovi le tre viti da 3 mm sul vano batterie usando il cacciavite Phillips #00.

    • Con il vano batteria allentato, sarà facile accedere alla linguetta di blocco che tiene il cavo in posizione.

  5. TBQigH3DOFnpZMkk
    TBQigH3DOFnpZMkk
    PGai5Qh2r5EYtkuT
    QkRdGyLtefQZJ3ZK
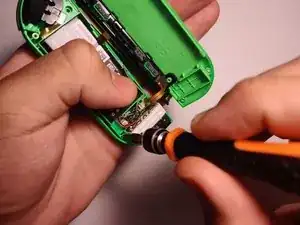
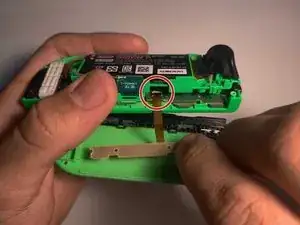
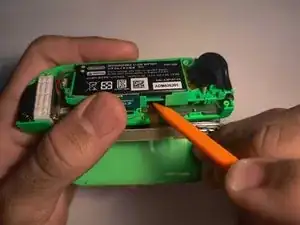
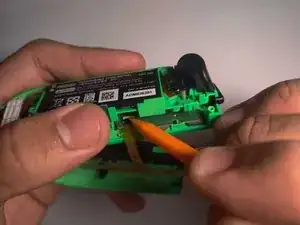
    • Usa lo spudger in plastica per sollevare il blocco della linguetta che trattiene il cavo della scheda dei pulsanti piegato. Solleva leggermente il vano batteria per avere più spazio mentre lo fai.

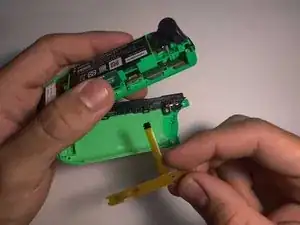
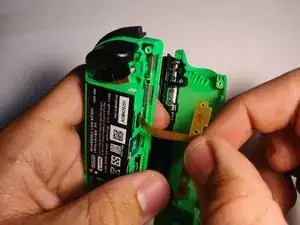
    • Una volta sbloccata la linguetta, rimuovere il cavo piegato.

  6. jMRsAYsM3ndubpuU
    jMRsAYsM3ndubpuU
    WuicTSQMjPOEWiCP
    16VJrOw6I2a6QPPW
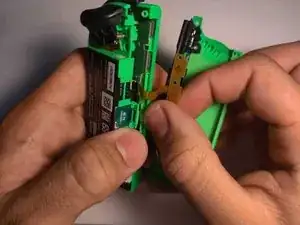
    • Inserire il nuovo cavo della scheda del pulsante di ricambio nella linguetta.

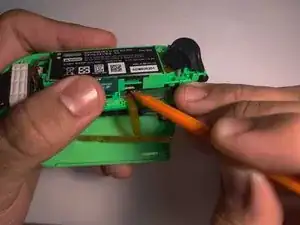
    • Usa lo spudger per ribloccare la linguetta per tenere la nuova parte al suo posto.

  7. rslgRrJRlkVGCiQq
    rslgRrJRlkVGCiQq
    AH1nRxgVgvSjA4bV
    DdtKHZduFoeVm1t3
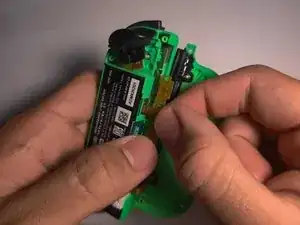
    • Per evitare di avere lo stesso problema in futuro, assicurarsi che il nuovo cavo sia piegato sotto il vano batteria dopo il rimontaggio.

    • Sollevare leggermente il vano batteria per facilitare la piegatura del cavo della nuova scheda dei pulsanti sotto di esso.

    • Lo spazio tra la batteria e il guscio posteriore del Joy-Con è molto stretto, il che ha causato la piegatura e il malfunzionamento del cavo originale. L'inserimento del nuovo cavo sotto la batteria darà più spazio.

Conclusione

Per rimontare il dispositivo, segui queste istruzioni in ordine inverso, partendo dal passaggio 4.

Javier Cora

Membro da: 18/03/22

1324 Reputazione

11 commenti

Valuable step-by-step guide plus pictorial samples. Keep writing your good stuff, Javier!

Rudi Lim -

Nice guide. To loosen the battery compartment on my controller I had to remove te battery first. I couldn't see te top 2 screws in step 4. The battery was sticked to the bracket with some tape but removes easily. Underneath the battery were two screws.

Edit: maybe its different because I had to change the button board on the left JoyCon.

Stefan Haarman -

Yes! This Guide above shows the right Joycon. As for the left one there are two screws below the battery as you said!

Paul Stachowiak -

Very helpful step-by-step guide. Thank you.

Had to change the Button Board on the left Joy-con. The screws were also located under the battery in my case. Attention: there 4 screws under the battery, two of which diagonal to each other that hold the battery compartment in place. No need to unscrew all 4.

Tone -

I’ve replaced the board, but SL and SR still not working, also two lights not working. What to do?

Mike -

Will this replacement also fix the LED lights that are now not working on my controllers? And if not, will this be a problem for playing with one Joy-con?

Sofie Lazeroms -

Depends on why your LED´s are not working. For my it was because the SR SL input was not registered, which will be a problem (only) for single joycon use. If its only the LED which is not working, then you should be fine.

Paul Stachowiak -

Thanks for spreading this knowledge to us.

Nolan Lester -

Thank you! My right button on the side turned unresponsive. I replaced the button board with this guide and fixed it!

Bouw De Vrieze -

Great guide - thank you. i need new eyes though... can barely see the screw heads!

Matt Glover -

I followed this guide, the LEDs, sync button and charging all work again, but the sl sr buttons still don't work

Julie -