Introduzione

Usa questa guida per sostituire uno schermo rotto o difettoso nel tuo Fairphone 4.

  1. IZiZiekpwsw1ZZQ1
    IZiZiekpwsw1ZZQ1
    YuF1pGqCbIOZ2EEe
    • Accertati di spegnere il telefono prima di cominciare.

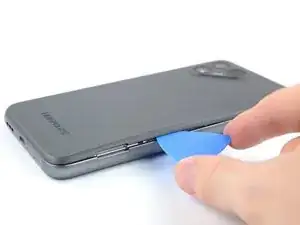
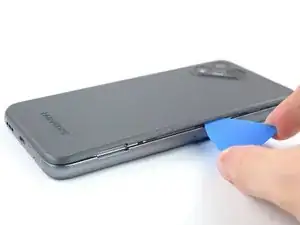
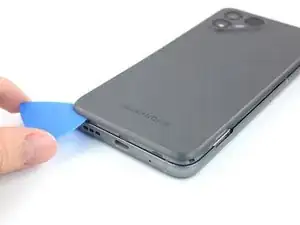
    • Inserisci l'unghia del pollice, o uno strumento per fare leva come uno spudger, nell'incavo in basso a destra della cover posteriore.

    • Solleva la cover per cominciare a separare i ganci di plastica.

  2. s1wWZCXSZkQr1Zsl
    s1wWZCXSZkQr1Zsl
    6UWRDSpaKfnoMcmv
    n2lDPKWglBUxWrhX
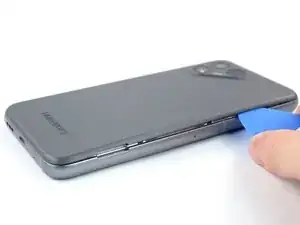
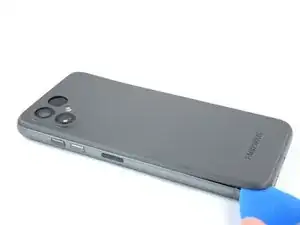
    • Con l'unghia o un plettro di apertura, scorri lungo il bordo destro del telefono per liberare i ganci di plastica.

  3. SEBkuuHe4FMXMxUc
    SEBkuuHe4FMXMxUc
    kBJSAQPsCpbJx6cF
    4DM3tdBSvuEsclVN
    • Scorri lungo il bordo inferiore del telefono per liberare i ganci di plastica.

  4. jkWp61XqnGKWViuj
    jkWp61XqnGKWViuj
    DDYUhYDnLoCQ6FgA
    G4yKxBVRmZnek2Gg
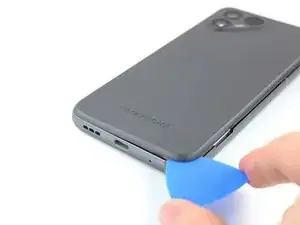
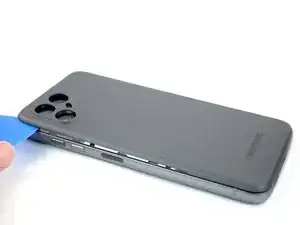
    • Scorri lungo il bordo sinistro del telefono per liberare i ganci di plastica.

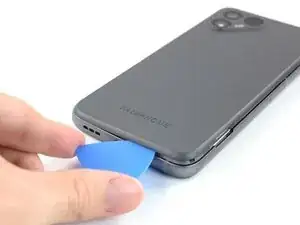
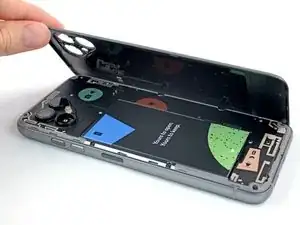
    • Solleva la cover posteriore per liberare il resto dei ganci di plastica e rimuoverla.

    • Per reinstallare la cover posteriore, premila saldamente in posizione finché non senti che i ganci scattano in posizione.

  5. JPdxUZBdrS1vWTe5
    JPdxUZBdrS1vWTe5
    4T6nYgpqxDKBEgJO
    LBR3NbQqfKPJlcrR
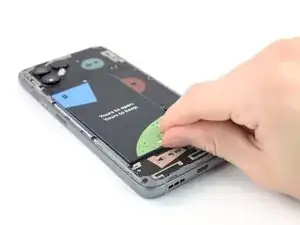
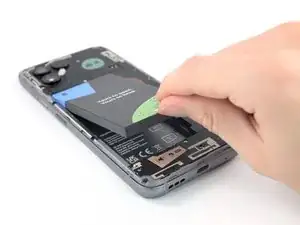
    • Usa un'unghia o uno strumento per fare leva alla tacca contrassegnata per estrarre la batteria dal suo alloggiamento.

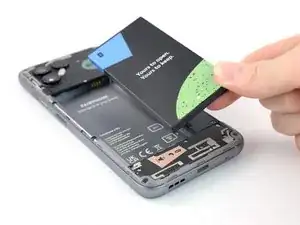
    • Solleva la batteria dal suo alloggiamento e rimuovila.

    • Rimuovi la batteria.

    Thank you for this very helpful guide. However I fail to see why you would conclude that replacing the battery is 'moderate'. Could you elaborate on this a little bit more, please?

    For me 'moderate' means it is (very) complicated (i.e. plenty of steps) but feasible in general (i.e. there is a good chance you're not gonna brick your device) for which there is only one escalation level left: 'not feasible at all'. Non of that is true for the FP4. Could removing the battery more user-friendly, though? Well yes, of course but it is still by far very simple and straight forward.

    Again, thank you very much for this great contribution.

    Dave S. -

    Hey Dave S.,

    thanks for your comment. You're totally right, the "moderate" rating was due to an oversight as it is the default in the system. I've changed the rating.

    Manuel Haeussermann -

  6. EVZL1k5KbD5Csh4g
    • Rimuovi le otto viti a croce Phillips da 4,8 mm.

    Screw head size is PH0

    Ryan Brierley -

    Screw head size is PH00, as mentioned in the official video: https://www.youtube.com/watch?v=SUJERxuY...

    Michiel -

  7. mecITJYw55HXHWFT
    mecITJYw55HXHWFT
    jGJPXBoRH611dqg6
    G2KTjCLELJCMdMIC
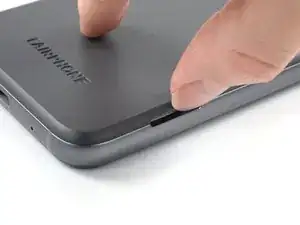
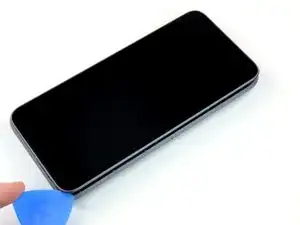
    • Capovolgi il telefono così che lo schermo sia rivolto verso l'alto.

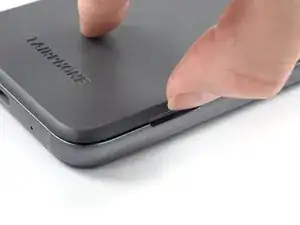
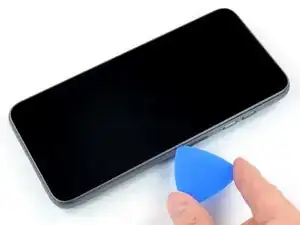
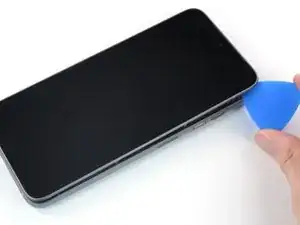
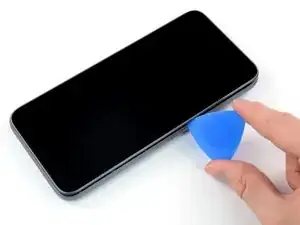
    • Inserisci un plettro di apertura tra lo schermo e la cornice.

  8. rpFJvEViWwmJmkwm
    rpFJvEViWwmJmkwm
    dZgMMFMFQTJGbfWb
    • Fai scorrere il plettro di apertura lungo il bordo fino all'angolo in alto a destra.

  9. XUMVHuCtxvp4uxwN
    XUMVHuCtxvp4uxwN
    TrZTUJVGR6UdCS1T
    • Continua a far scorrere il plettro lungo il bordo superiore del telefono.

  10. K4PPIbBsCJLtEMpg
    K4PPIbBsCJLtEMpg
    54DfF5G4xPj636pZ
    eSRI6ZoXQ6buTZU3
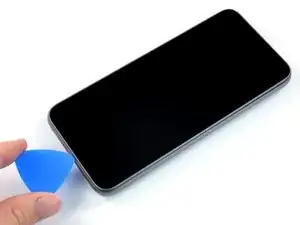
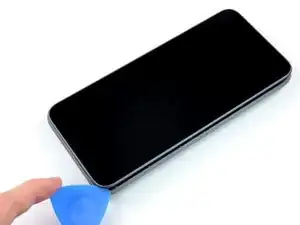
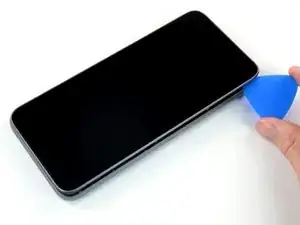
    • Fai scorrere il plettro di apertura lungo il bordo sinistro fino all'angolo in basso a sinistra.

  11. 62fy3ld1QLdOkBbd
    62fy3ld1QLdOkBbd
    I6sGlF5aulkScDjj
    HgTquQPABg1mAMHD
    • Non rimuovere ancora lo schermo. È ancora connesso al telefono tramite un cavo.

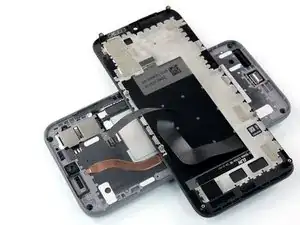
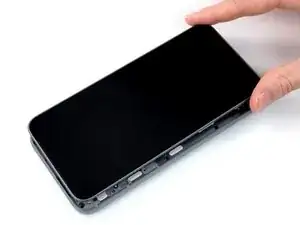
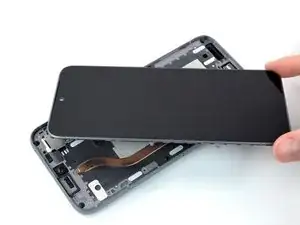
    • Afferra lo schermo e sollevalo quanto basta per liberare i perni dal telaio.

    • Ruota lo schermo con attenzione in senso orario e capovolgilo per aver accesso al connettore.

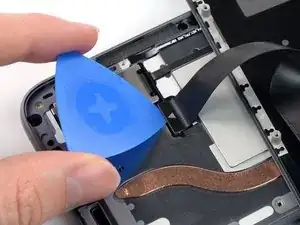
    • Posiziona lo schermo sul dispositivo con lo schermo rivolto verso il basso.

  12. r3GWyjjaDqBbTWAR
    r3GWyjjaDqBbTWAR
    nHVLSjmQSiD3xIDt
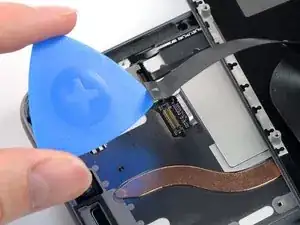
    • Usa un plettro di apertura per sollevare e scollegare il cavo di connessione dello schermo.

    • Rimuovi lo schermo.

    • Confronta il tuo schermo di ricambio con l'originale: potrebbe essere necessario rimuovere la copertura per la polvere sulla fotocamera interna prima di installarlo.

    the new screen will have a tiny sticker in the selfie cam on the inside to prevent scratches don't forget to take it out before putting all the screws back in

    The Kodo -

    Thanks for adding this advice!

    Manuel Haeussermann -

    This is the connector that a lot of users seem to experience being unreliable — the symptom is rapid false-touch inputs right up the centreline of the screen from time to time.

    Augmenting the thickness of the pressure pad (that aligns to the connector from the back of the screen frame) seems to help.

    Ryan Brierley -

    I wish Google would do a better job of indexing comments like this, this was my exact problem and I didn't figure out the cause until I read this comment, while replacing my screen 😕

    mrmonster -

Conclusione

Per rimontare il dispositivo, segui queste istruzioni in ordine inverso.

Porta i tuoi rifiuti elettronici a un riciclatore certificato R2 o e-Stewards.

La riparazione non è andata come previsto? Prova delle soluzioni ai problemi di base o rivolgiti alla nostra comunità Risposte per trovare aiuto.

Manuel Haeussermann

Membro da: 13/07/22

15087 Reputazione

8 commenti

20-40 Minutes? ... more like 10 ... and I wasn't even pushing it

Patrick Küster -

Thanks for your comment! The time estimate was set a little too high, you're right. I've adjusted it!

Manuel Haeussermann -

Vielen Dank für die präzise Anleitung. Auf alle heiklen Punkte wurde hingewiesen. Habe es locker geschafft und war danach ganz stolz!

Johanna -

I can confirm that you need a #0 screwdriver, not a #00, as has been changed in the latest unchecked version.

Jonathan -

Hi Jonathan, thanks for you comment! While a #0 screwdriver will work, we recommend a #00 as Fairphone themselves do, see their website: "The only tool you will need is a Phillips #00 screwdriver to access all spare parts of the Fairphone 4."

Manuel Haeussermann -

Hi Manuel, that is odd - my #00 did have a tendency to slip and wear out the screw, while I did not have that issue with the #0.

Jonathan -

My replacement screen came with a dust cover over the selfie camera opening so the selfie camera didn't function: it just showed slight changes of lighting but no image. The instructions should contain a warning to remove this paper cover as it took me quite a while to figure out why the camera didn't work.

Rick Hall -

I've looked up this guide to just double check how the small ribbon cable connects again. while doing that finished the replacement in exactly10 minutes (set up a stopwatch just for fun.

I've used a LTT ratchet screwdriver, the supplied bits had a correct one.

10/10 would recommend to replace your screen your self. going to a store to get it done will take longer for sure

Erik -