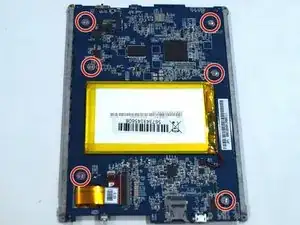
Introduzione
Questa guida ti mostrerà come sostituire lo schermo di un e-reader Kobo Aura HD.
Strumenti
-
-
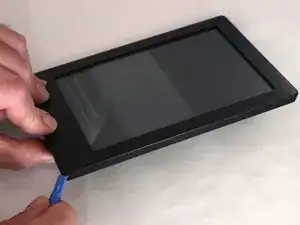
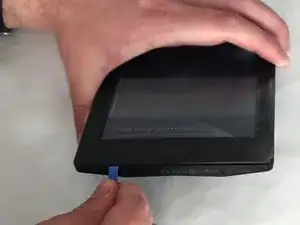
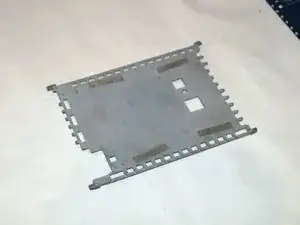
Iniziando dall'angolo in basso a destra, usa uno spudger in plastica per separare la cornice anteriore dalla copertura.
-
Lavora lungo il bordo inferiore, quindi lungo quello laterale, continuando lentamente tutto attorno al dispositivo.
-
-
-
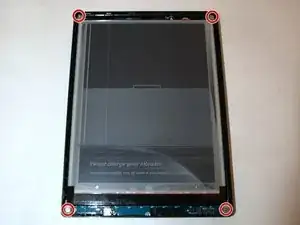
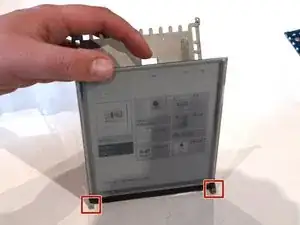
Usa un cacciavite a croce Phillips #000 per svitare le 4 viti agli angoli dello schermo.
-
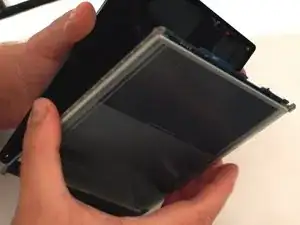
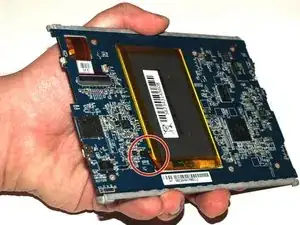
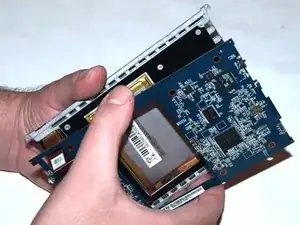
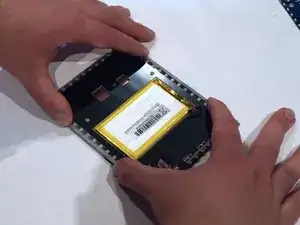
Rimuovi il gruppo dello schermo e della scheda madre dalla copertura posteriore.
-
-
-
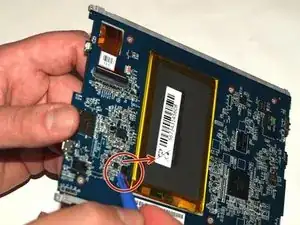
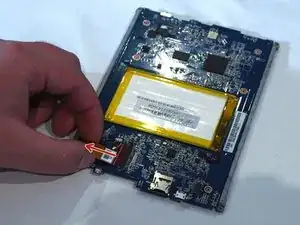
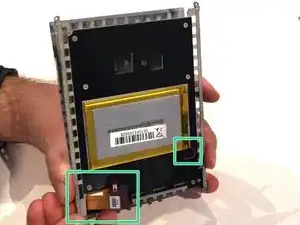
Fai leva sul connettore della batteria verso l'alto, lontano (perpendicolarmente) dalla scheda per scollegarlo.
-
-
-
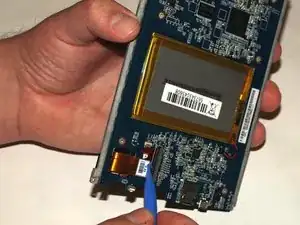
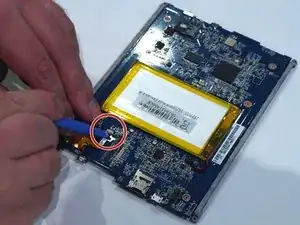
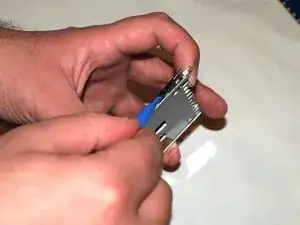
Apri delicatamente il connettore ZIF che tiene fermo il cavo dello schermo.
-
Puoi trovare utile aprirlo facendo leva col lo spudger.
-
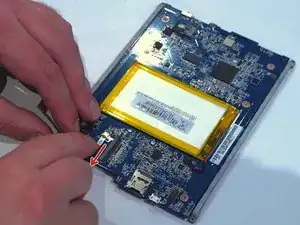
Dopo aver aperto il connettore, tira delicatamente il cavo verso sinistra per scollegarlo.
-
-
-
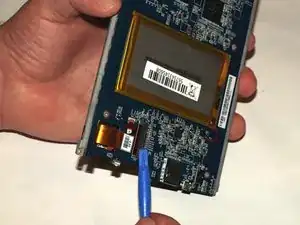
Apri delicatamente il secondo connettore ZIF facendo leva da sotto il gancio a pressione marrone.
-
Sfila il cavo verso il basso per scollegarlo.
-
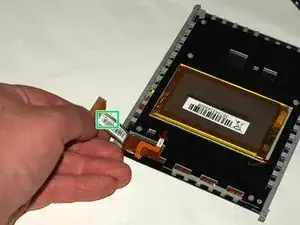
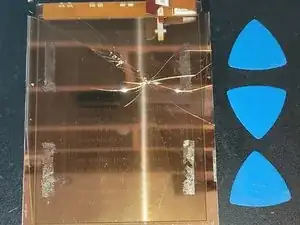
Sul retro del cavo dello schermo troverai il codice completo del modello del tuo schermo, che dovrai usare per trovare il ricambio per assicurarti di prendere quello corretto.
-
-
-
Usa un cacciavite a croce Phillips #000 per svitare le 6 viti che fissano lo schermo alla scheda madre.
-
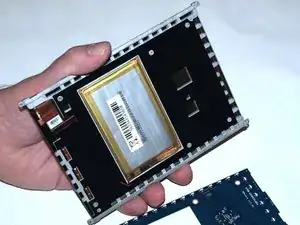
Separa la scheda dal gruppo dello schermo.
-
-
-
Il supporto in vetro dello schermo è fissato alla cornice in metallo con delle strisce adesive. Fai leva lentamente e delicatamente per separare le due parti.
-
-
-
Allinea lo schermo con le sporgenze alla base della cornice per assicurarti che sia posizionato correttamente.
-
Infila i cavi dello schermo nelle rispettive aperture nella cornice.
-
-
-
Allinea attentamente lo schermo con la cornice e premilo in posizione.
-
Applica una forza delicata e distribuita per 5/10 minuti per incollare lo schermo in posizione.
-
-
-
Esegui le precedenti istruzioni in ordine inverso per rimontare il dispositivo.
-
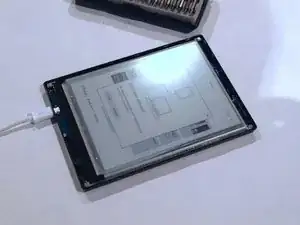
Una volta ricollegati i cavi dello schermo ed aver avvitato la scheda madre, puoi accendere il dispositivo per controllare che lo schermo sia collegato e funzioni correttamente.
-

Per rimontare il tuo dispositivo, segui le istruzioni in ordine inverso.

58 commenti
Hi,
Many thanks for your tutorial.
One quick question, where did you buy the replacement screen?
Many thanks in advance for your help.
Kind regards
Hello, King Koton,
I already had another broken Kobo, so I could reuse the screen. I don’t think you can buy original parts, so maybe you will have to get a broken Kobo at an auction.
Good luck, John
Hi King Koton, I brought a brand new screen on AliExpress, look for ED0680G1 (the Kobo Aura HD uses the exact same screen as the Kobo Aura H2O).
Marc -
Hello John, Ur information did helped me for 100%. We reinstalled a screen to based on ur guide. But i have a question. After reinstalling the front bezel the touch screen is responding reliable. sometimes he doesnt turn a page or somtimes turn more then one page etc. I usend also there the existing adhesive. Can that be a the reason of less responding quality. I hope u have an advice. Kind regards, Jan de Jong
Sorry Jan, I don’t know either. Maybe someone else can give advice. Good luck. (This guide was written by Spencer Harding, I only added one comment), John
Hey, I followed your guide, but unfortunately it seems that I have a problem. I did as you instructed but the touch does not respond, at all, even after reinstalling the front bezel. I honestly don’t know about the adhesive, is that the problem? The adhesive on the front bezel has definitely worn off. What do I do? Please help me.
Regards, Uzayer Masud
There is some light adhesive attaching the bezel to the screen. Will take some pressure to get it off.
Michael Newton -
When I did this, the front bezel stayed attached to the screen/motherboard, and it pulled the screws out of the rear casing. The screws don’t seem stripped, but time will tell.
Cliff -
On the KOBO GLOW (very similar to KOBO AURA) : be careful at step 1 not to torn down the ON/OFF micro switch soldered on the mother board. On my model it was not sealed correctly, it opened when I removed the motherboard. I had to put back in place the lever and the spring.
frde -