Introduzione
Istruzioni per smontare il dispositivo al fine di sostituire lo schermo o altri componenti.
-
-
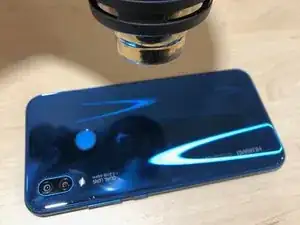
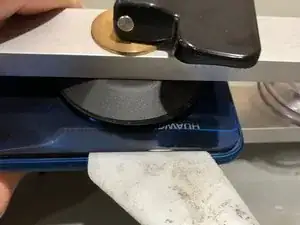
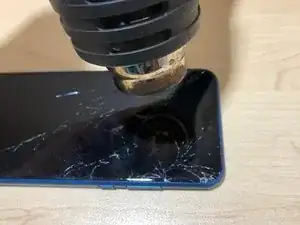
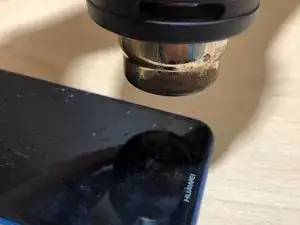
Riscalda bene il vetro posteriore.
-
Attenzione!! Il vetro posteriore può diventare molto caldo, stai attento.
-
Rimuovi il vassoio della SIM.
-
-
-
Con un po' di alcol e una ventosa, solleva delicatamente il vetro posteriore dal telaio.
-
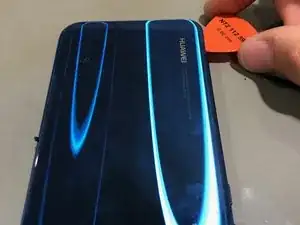
Quando vedi una piccola fessura, inserisci una spatola o plettro per tagliare l'adesivo.
-
Fai scorrere il plettro tutto intorno al dispositivo per allentare il vetro posteriore.
-
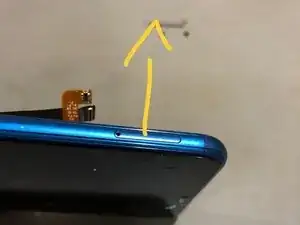
ATTENZIONE AL CAVO FLESSIBILE DEL SENSORE DI IMPRONTE DIGITALI! Il cavo flessibile si collega nell'angolo in alto a destra del dispositivo, quindi non inserire il plettro troppo in profondità.
-
-
-
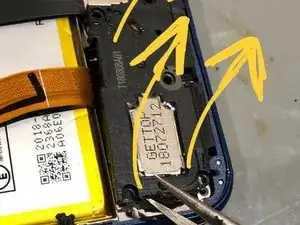
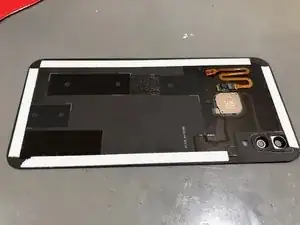
Capovolgi il vetro posteriore verso destra e poi svita le due viti a croce Phillips che tengono in posizione la piastra.
-
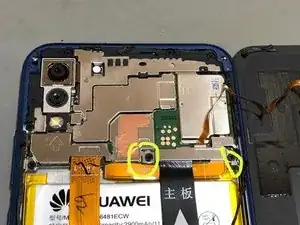
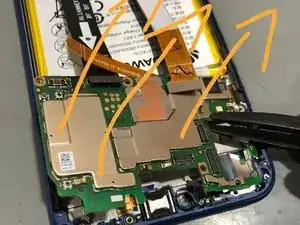
Scollega il cavo della scheda secondaria insieme al cavo del sensore, al cavo coassiale e il cavo flessibile della batteria.
-
-
-
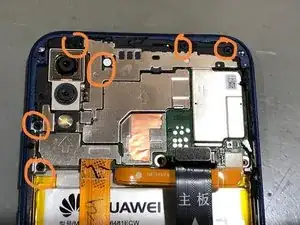
Rimuovi tutte le viti visibili mantenendo le piastre nella loro posizione.
-
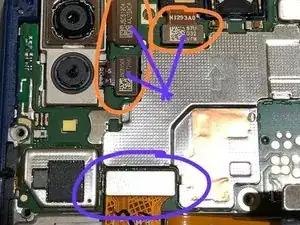
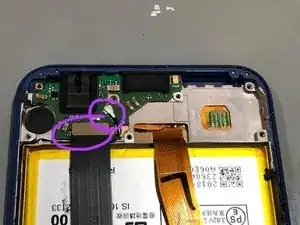
Scollega delicatamente i connettori delle fotocamere insieme con il connettore dello schermo.
-
Le fotocamere sono libere e non hanno adesivo che le mantenga attaccate.
-
-
-
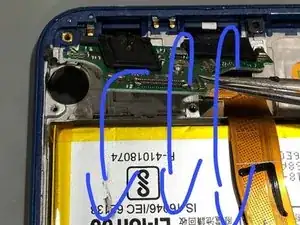
La scheda madre ha della pasta termica che la rende difficile e appiccicosa da rimuovere.
-
Riscalda la parte anteriore dello schermo finché non è abbastanza calda.
-
Fai leva delicatamente e fai scattare la scheda principale fuori dal telaio.
-
-
-
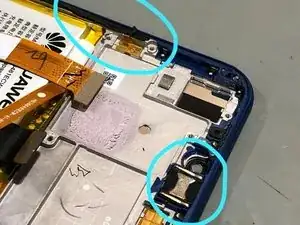
Ricordati di rimuovere l'altoparlante e i tasti laterali se non sono inclusi con il nuovo telaio.
-
Rimuovi delicatamente l'adesivo tra il tasto laterale e il telaio e solleva.
-
-
-
Rimuovi tutte le viti.
-
L'unità dell'altoparlante ha dell'adesivo sotto di essa. Riscaldala abbastanza da allentarla.
-
Sgancia delicatamente e solleva l'unità dal telaio.
-
Fai attenzione ai cavi flessibili che corrono al di sotto!
-
-
-
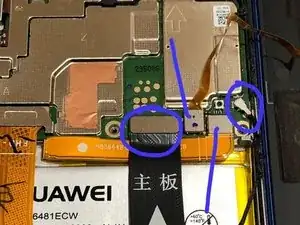
Disconnetti il cavo a nastro della scheda secondaria e il cavo coassiale.
-
Solleva la scheda secondaria e tirala verso di te.
-
-
-
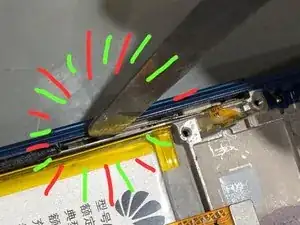
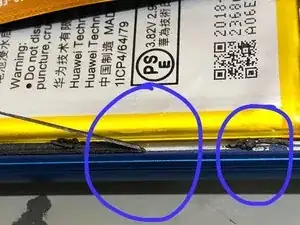
Applica molto calore da davanti.
-
Usa dell'alcol per ammorbidire l'adesivo.
-
Fai leva delicatamente da sotto e fai scorrere fino a quando la batteria non si è liberata.
-
Fai molta attenzione a non piegare o forare la batteria, in quanto potrebbe causare un'esplosione o l'emissione di fumo.
-
-
-
Applica un nuovo adesivo al vetro posteriore.
-
Se riutilizzi il vecchio telaio, assicurati che tutto il vecchio adesivo sia stato rimosso. Altrimenti il vetro posteriore non sarà a filo (e potrebbe non aderire completamente).
-
-
-
Segui tutti i passi per lo smontaggio (in ordine inverso) per riassemblare il dispositivo.
-
L'ultimo passo sarebbe collegare il sensore di impronte digitali e ricollocare la piastrina che copre i connettori insieme alle due viti.
-


Per rimontare il tuo dispositivo, segui queste istruzioni in ordine inverso.

6 commenti
Where can I take my p20 lite for fixing the broken screen
Wäre super, wenn ein extriges Bild zur Demontage des Mainboards gemacht wird in welchem Winkel das Werkzeug angesetzt gehört.
An sonsten gute Anleitung.
Tst -
So much parts you needn't to remove in this tutorial for a screen replacement ! Only move the sensor and screen flex by removing the three screws and metal parts at the back of the motherboard and the seven screws on the sub board with the black plastic part and its over ! Don't overmanipulate and dissambly your gear for nothing, you'll lose money and time.
LLBB -
Hi buddy. I believe you a referring to a situation where only the front panel is being replaced. In the tutorial the entire front assembly was being replaced. This includes the LCD and frame. The entire device had to be transferred. No shortcuts there.
If get you clear, you mean the screen alone can not be replaced? Meaning you have to replace the frame as well?