
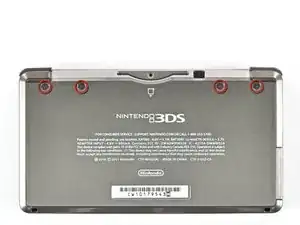
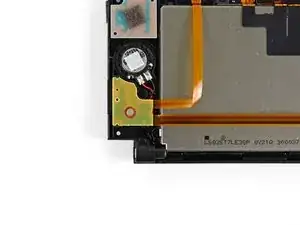
Introduzione
Stanco di poter giocare solo in 2D con il tuo 3DS? Sostituisci lo schermo superiore e torna a giocare in 3D.
Ricambi
-
-
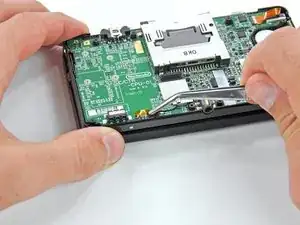
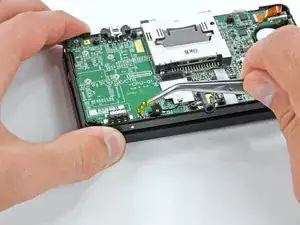
Afferra il bordo superiore della cover posteriore con l'altra mano in modo che non ritorni al suo posto da sola.
-
Tira la cover verso l'alto per rimuoverla dal dispositivo.
-
-
-
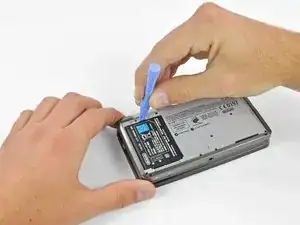
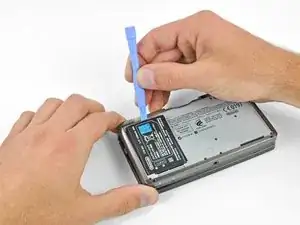
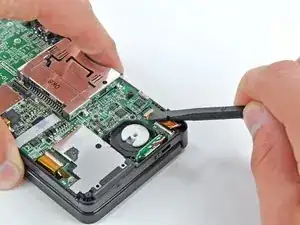
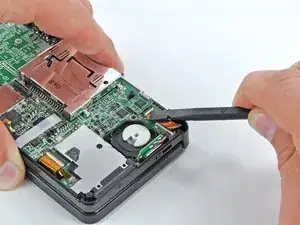
Infila uno strumento di apertura in plastica nella fessura nella scocca inferiore sopra la batteria.
-
Fai leva con lo strumento di apertura in plastica per sollevare la batteria.
-
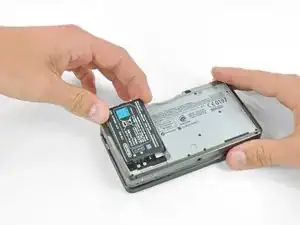
Afferra il bordo superiore della batteria e sollevalo dalla scocca inferiore.
-
-
-
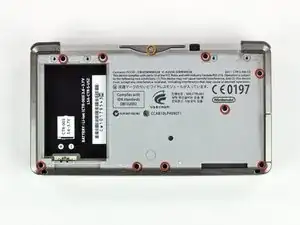
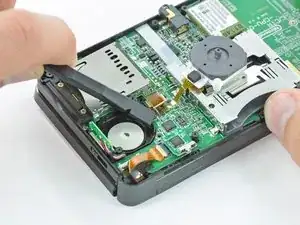
Svita le nove viti a croce Phillips nere da 6,3 mm sulla scocca inferiore.
-
Svita la vite a croce Phillips cromata da 2,4 mm sopra il lettore delle cartucce di gioco.
-
-
-
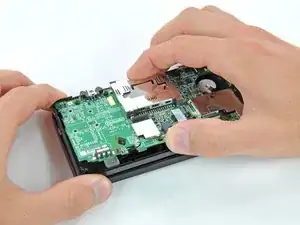
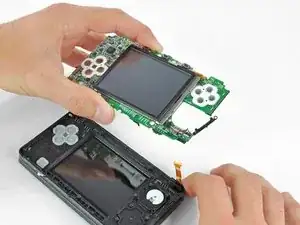
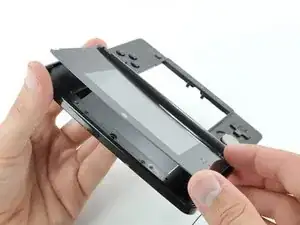
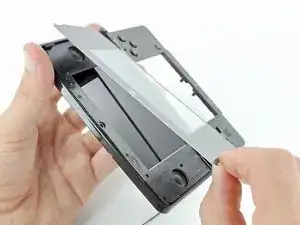
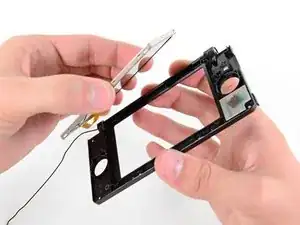
Solleva il bordo inferiore della scocca posteriore dal resto del Nintendo 3DS.
-
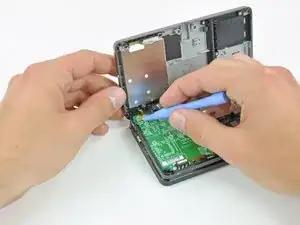
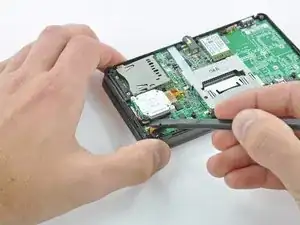
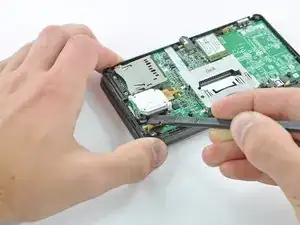
Usa uno strumento di apertura in plastica per scollegare i connettori dei tasti dorsali dalle loro prese sulla scheda madre sollevandoli.
-
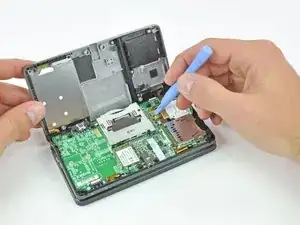
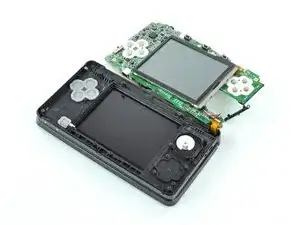
Rimuovi la scocca inferiore dal dispositivo.
-
-
-
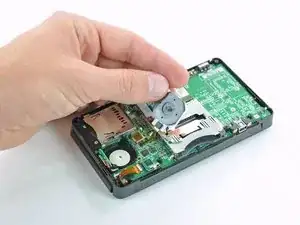
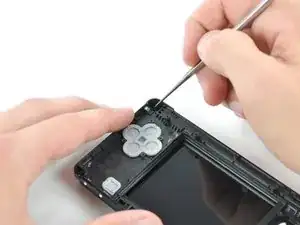
Svita le due viti a croce Phillips da 7,7 mm che fissano il retro della levetta analogica alla scheda madre.
-
-
-
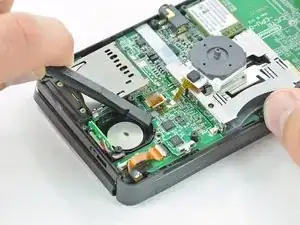
Usa la parte piatta di uno spudger per fare leva sul retro della levetta analogica dalla scheda madre.
-
Solleva la levetta analogica dalla scheda madre e appoggiala sul suo retro in modo che il connettore del cavo a nastro sia accessibile.
-
-
-
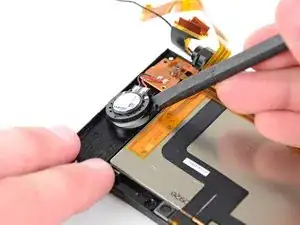
Usa la parte piatta di uno spudger o un'unghia per ruotare verso l'alto l'aletta di bloccaggio del connettore ZIF del cavo a nastro della levetta analogica.
-
Solleva la levetta analogica dalla scheda madre.
-
-
-
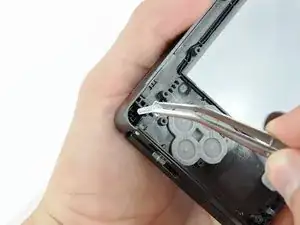
Usa uno spudger o la punta di un cacciavite per sollevare le guaine e rimuoverle dal dispositivo.
-
-
-
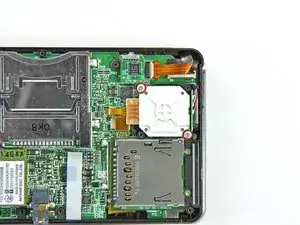
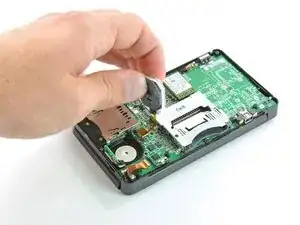
Svita le due viti a croce Phillips da 4,5 mm che fissano la scheda del lettore SD alla scheda madre.
-
-
-
Usa la parte piatta di uno spudger per scollegare il connettore del cavo della scheda del lettore SD dalla sua presa sulla scheda madre sollevandolo.
-
-
-
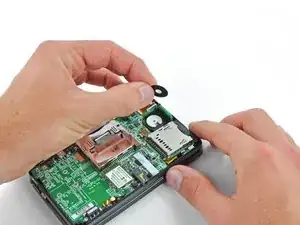
Infila la parte piatta di uno spudger tra la scheda del lettore SD e la scheda madre.
-
Fai scorrere lo spudger sotto i bordi della scheda del lettore SD per separarla dall'adesivo che la tiene ferma.
-
Una volta liberata, solleva la scheda del lettore SD dalla scheda madre.
-
-
-
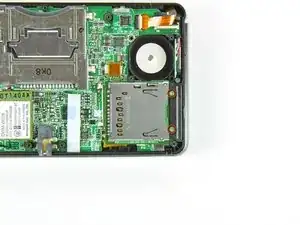
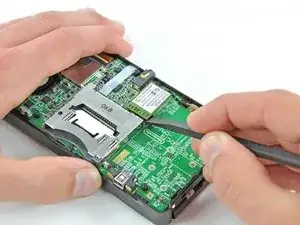
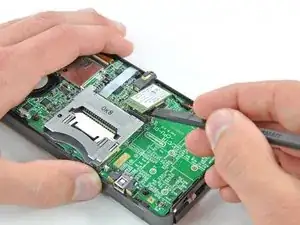
Infila la parte piatta di uno spudger sotto un angolo della scheda WiFi e solleva la scheda dalla scheda madre.
-
-
-
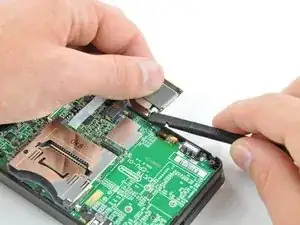
Usa la parte piatta di uno spudger per scollegare il connettore del cavo dell'antenna sollevandolo dalla sua presa sulla scheda WiFi.
-
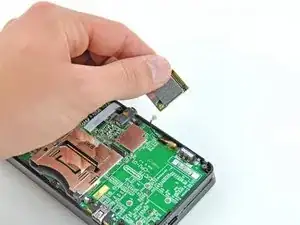
Rimuovi la scheda WiFi dal dispositivo.
-
-
-
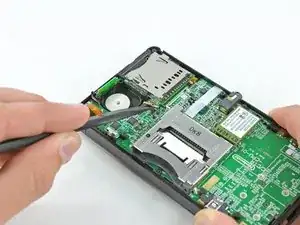
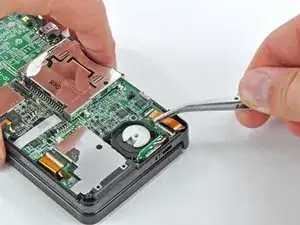
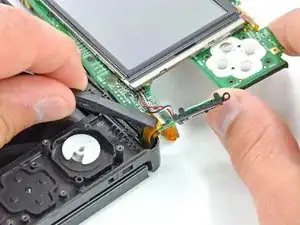
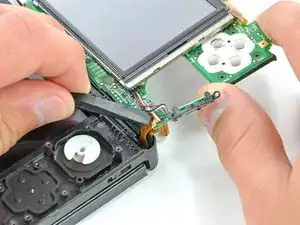
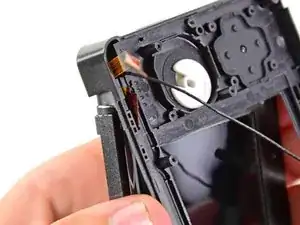
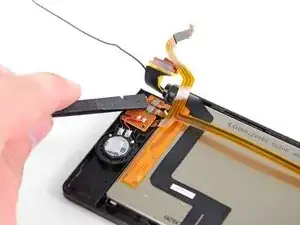
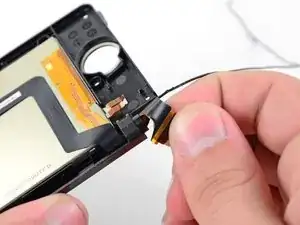
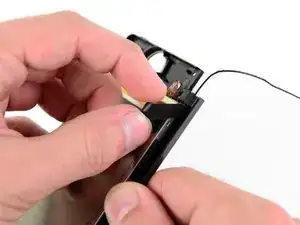
Afferra il cavo a nastro del microfono con un paio di pinzette vicno al microfono stesso.
-
Tira il microfono verso l'alto per sfilarlo dalla scocca superiore.
-
-
-
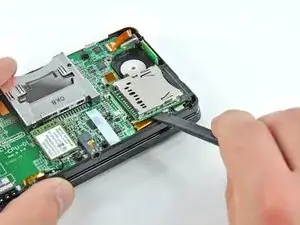
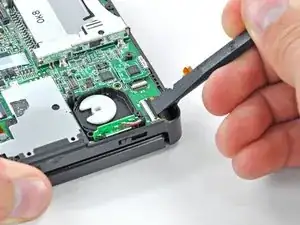
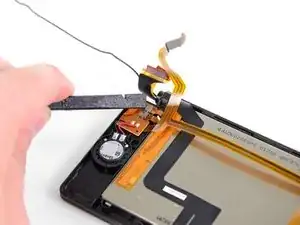
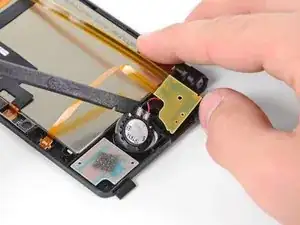
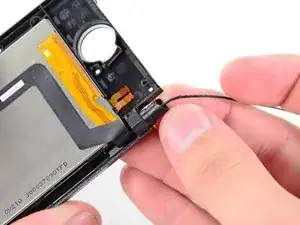
Usa la parte piatta di uno spudger o un'unghia per ruotare verso l'alto l'aletta di bloccaggio sul connettore ZIF del cavo a nastro del gruppo dello speaker.
-
Sfila il cavo a nastro del gruppo dello speaker dalla sua presa con un paio di pinzette.
-
-
-
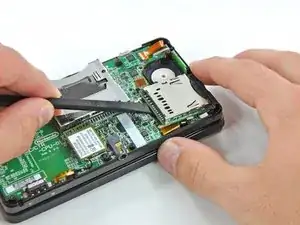
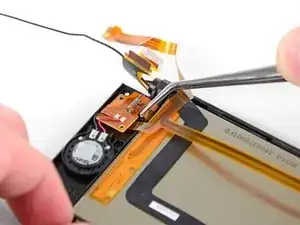
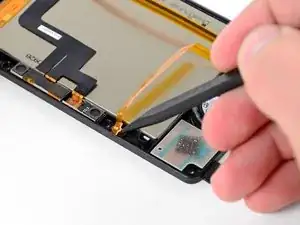
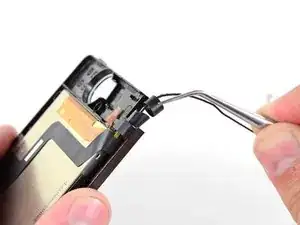
Usa la parte piatta di uno spudger o un'unghia per ruotare verso l'alto l'aletta di bloccaggio sul connettore ZIF del cavo a nastro della camera.
-
-
-
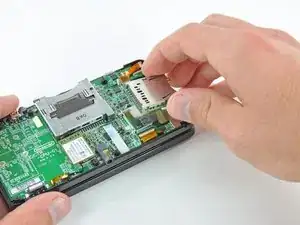
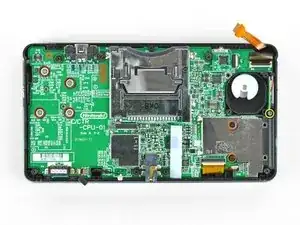
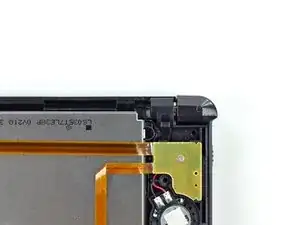
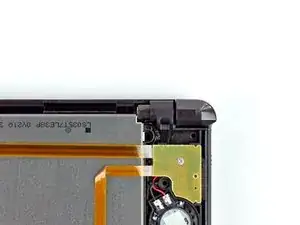
Svita le sette viti a croce Phillips che fissano la scheda madre alla scocca superiore:
-
Quattro viti dorate da 2,5 mm
-
Due viti nere da 3,5 mm
-
Una vite cromata da 2,5 mm
-
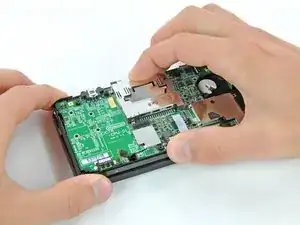
Solleva il bordo della scheda madre che si appoggia al bordo inferiore del 3DS.
-
-
-
Usa la parte piatta di uno spudger o un'unghia per ruotare verso l'alto l'aletta di bloccaggio sul connettore ZIF del cavo a nastro dello schermo.
-
-
-
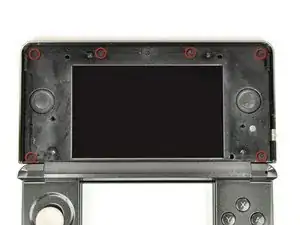
Prima di continuare con lo smontaggio, usa delle pinzette per rimuovere il diffusore in plastica trasparente del LED della connessione WiFi. Questa piccola componente può cadere da sola ed è difficile da ritrovare.
-
-
-
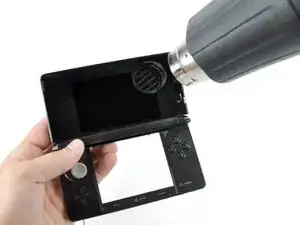
Scalda i bordi della protezione anteriore dello schermo superiore con un asciugacapelli o una pistola termica per ammorbidire l'adesivo che lo fissa alla cornice dello schermo.
-
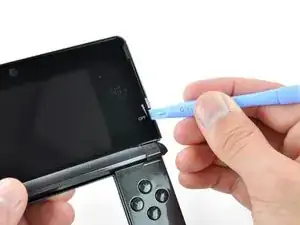
Inizia a separare i bordi della protezione anteriore con uno strumento di apertura in plastica.
-
-
-
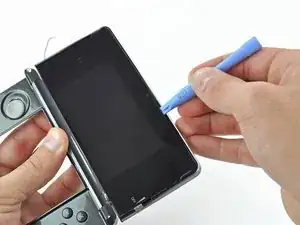
Continua a separare i bordi restanti della protezione anteriore facendo scorrere lo strumento di apertura in plastica sotto ogni bordo.
-
-
-
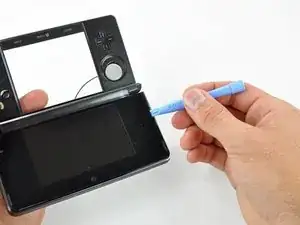
Dopo aver scollato tutti i bordi, solleva la protezione anteriore dello schermo superiore dalla cornice dello schermo.
-
-
-
Svita le sei viti a croce Phillips da 3,6 mm che fissano la cornice posteriore dello schermo a quella anteriore.
-
-
-
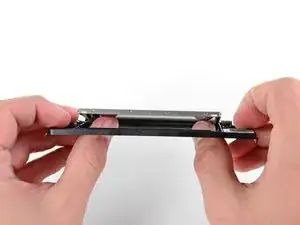
Solleva il bordo della cornice posteriore più vicino a te e ruotalo verso la cerniera.
-
Continua a sollevare la cornice posteriore dal dispositivo finché non l'hai rimossa del tutto.
-
-
-
Infila una sonda in metallo nello spazio sopra i tasti ABXY, toccando con la punta la cerniera in metallo.
-
Spingi la cerniera verso il centro della scocca superiore. Questo passaggio richiederà una buona dose di forza.
-
-
-
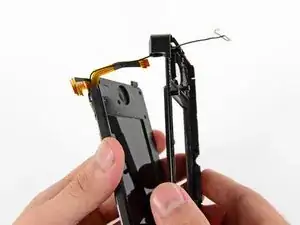
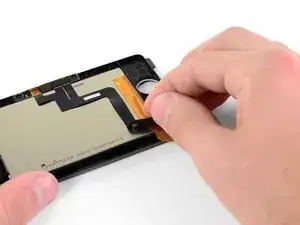
Lentamente tira via il gruppo dello schermo superiore dalla scocca superiore.
-
Assicurati che i vari cavi a nastro scorrano attraverso la fessura nella scocca superiore.
-
Separa il gruppo dello schermo dalla scocca superiore.
-
-
-
Fai scorrere con cura il cavo a nastro del gruppo dello speaker attraverso la fessura nella cornice dello schermo superiore.
-
-
-
Svita le due viti a croce Phillips da 2,5 mm che fissano la scheda dell'altoparlante destro alla cornice dello schermo superiore.
-
-
-
Usa la parte piatta di uno spudger o un'unghia per ruotare verso l'alto le alette di bloccaggio sui connettori ZIF dei cavi a nastro della barriera di parallasse.
-
Usa un paio di pinzette in metallo per scollegare i due cavi a nastro.
-
-
-
Usa la parte piatta di uno spudger per rimuovere gli altoparlanti destro e sinistro dai loro alloggi nella cornice dello schermo superiore.
-
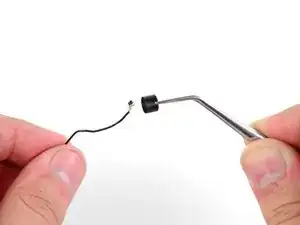
Solleva il LED di stato della fotocamera dalla cornice superiore con la punta di uno spudger.
-
-
-
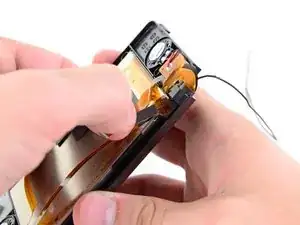
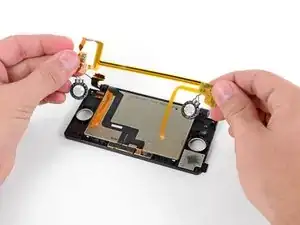
Delicatamente avvolgi insieme i cavi a nastro dello schermo superiore e della fotocamera e infilali nell'apertura della cerniera.
-
-
-
Usa un paio di pinzette in metallo per rimuovere l'anello in metallo nero della cerniera dalla cornice dello schermo superiore.
-
Tira attentamente i cavi a nastro della fotocamera e dello schermo superiore attraverso la loro fessura nella cornice.
-
-
-
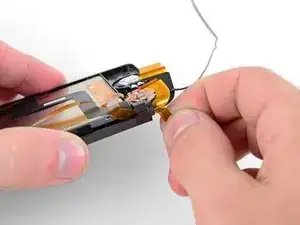
Rimuovi il cavo a nastro della fotocamera dal retro dello schermo superiore.
-
Rimuovi il gruppo del cavo a nastro della fotocamera.
-
-
-
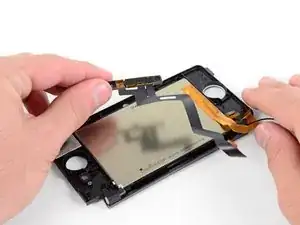
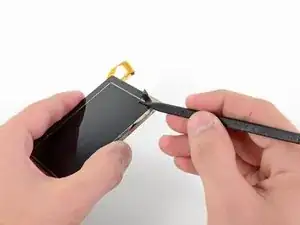
Usa i pollici per spingere, dalla sua parte frontale, lo schermo superiore per farlo uscire dalla cornice dello schermo.
-
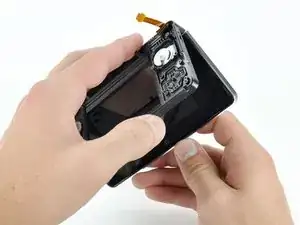
Rimuovi lo schermo superiore.
-
-
-
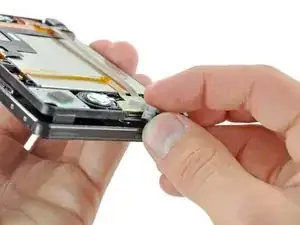
Una striscia di nastro adesivo nero fissa lo schermo superiore alla cornice. Usa la punta di uno spudger per rimuovere l'adesivo dal telaio dello schermo.
-


Per rimontare il dispositivo, segui le istruzioni in ordine inverso.

19 commenti
Thanks very much for this. After two different electronic repair shops had refused to replace the broken top screen in the 3DS which our daughter had borrowed from a friend, I reluctantly decided try it myself, having studied this guide a couple of times.
It took me over 4 hours, almost an hour of which was just getting the 3 ribbon cables out through the hinge and back in again. It was incredibly satisfying to power it up again and have everything work. Without this detailed guide and photographs, I would certainly have given up.
Use good quality screwdrivers!
All the commentors talking about how they stripped the screws are obviously not using the correct screwdriver - they're phillips #00 screws and they come out easily. You don't need to buy an expensive speciality screwdriver, just do it properly. Make sure the driver grips the screw properly, apply a moderate amount of pressure, and turn it slowly. It isn't hard at all. The only thing I can think is that everyone stripping the screws is using one of those screwdrivers with the head shaped like an 8 pointed star. Those will strip screws easily and are easy to mistake for the usual + shaped screwdriver. The one I used comes from a Black & Decker precision screwdriver set. I think it was £7 from Homebase.
how did you remove the glue ? and do you use new glue to put it back together? if yes, which one ?
thanks for the tutorial !
Erik -
#00 screwdriver is too big... probably need a #000
thomascroguennec -
#00 will work - but you must press down firmly and sort of jerk the screw out a few degrees at a time. If you don't press firmly, the screws strip very easily. Using #000 will strip the screws more easily.
Tai -
I used a #0 without any issues and 0 stripped. I used the #0 for all screws internally and externally. The head was sharp and I applied adequate amounts of pressure when loosening the screw.
Ben Kevan -
The correct screwdriver should be a JIS, or you can get a screwdriver specific for the 3DS from other sites for less than $2
Oscar -
do you have to buy it
deeznuts -
Where would I buy a screwdriver specifically for the 3DS? Also would it work on the DS? I need to replace the battery for my DS.
Caitlin Lumsden -
I used Phillips #000 and it worked like a charm, i need to order a new SD board or do you guys think i should send it. What happened is that it got water damaged and everything works fine when i opened it everything looked fine no signs of water corrosion everything on the 3DS works exept it always give me a message saying the SD card is locked and i know for a fact it isnt locked i already tried using 3 different SD cards and none of them are lock protected and yes they are formatted as well. I need help
Leo Torres -
there's a switch on the SD card, switch it and it will be unlocked again. it happened to me once too.
Bagel -
david hodson you are incredible. literally all you need to do is heat the screen up and pry it off and you make them take apart the whole thing
melody -
You've done this?
magykmaster -
I have to ask the same question. If just the glass display is broken, and you're heating it up to remove the glass, is it really necessary to remove everything? Doesn't like like it is necessary
Wade -
I just did it your way and it went fine. didnt even have to remove the battery. This is incredible misstep on the authors part.
patrick -
only take out the screen for a motherboard removal? Are you using the wrong guide or was this guide used for two different repairs?
Reed Deemer -
I used a PH0x50, but it wasn't easy.
John -
This may be a dumb question but where do I buy the 3DS upper screen?
John -
eBay... Just do a search for the 3DS Upper screen. $9.49 & it comes with the tools.
Gary Darnell -
The LCD screen I ordered came with all the tools I needed except a pair of tweezers. All in all it was about $14.00 and a little bit of my time.
Gary Darnell -
Does anyone know where I can find the right bumper button for a 3ds? I can't find it on ebay must of damaged it playing smash bros.
Steven Castro Parrilla -
Really wish I had read the comments first... How about instead of the warning saying to press down hardly and go slow, you say to use the correct screwdriver size like others mentioned in the comments. I not only stripped multiple screws, even after putting a glove on for more pressure, I bent my screwdriver from pressing down so hard. Granted it's a cheap jeweler's kit screwdriver, but it still would've been nice to not have that problem and be informed of the right size in the first place.
hockeymorgan35 -
Got my tools one day after ordering, as I live a couple hours away from the supplier, Will post again when i try guide.
nintendokakashi -
I tried doing this with a #00 Philips but it just didn't turn
Acrobatic Mars01 -
Hello there, I need some assistance I have done a full housing replacement I have everything working except the 3d slider . The 3D option is always on can someone let me know which flex it is or what I am forgetting . Thanks guys !
Noe Ibarra -
The 3D light lets you know there is a 3D option available for the current game you’re playing. Usually, it is always on, except when you’re playing a game that doesn’t support 3D. Turning the 3D slider off does not turn off the 3D LED.
Scott D -
I've always been lucky with these four, and at the time it was my first disassembly so I didn't know what stripping a screw was!
FarmYard Gaming -
These screws don't strip easily, however, the screws at step 4 do.
TheBlueInkling -