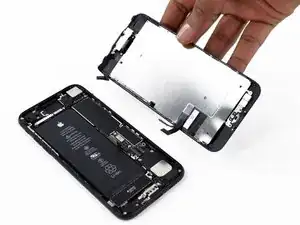
Introduzione
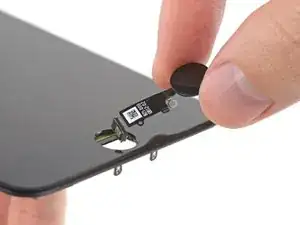
Il "pulsante" home dell'iPhone 7 in realtà è un sensore a stato solido che include anche la funzionalità Touch ID (riconoscimento impronta digitale).
La maggior parte dei pulsanti home sostitutivi non funzionerà, quindi verifica la cosa con cura prima di iniziare la tua riparazione. Il pulsante home originale del tuo iPhone è accoppiato in modo univoco in fabbrica alla scheda logica; e senza il processo di calibrazione proprietaria di Apple, perfino il pulsante home originale di un altro iPhone non funzionerà. Per riparare un pulsante home guasto, dovresti installare uno specifico pulsante home universale. Nota che questa parte sostitutiva funziona solo come pulsante; il Touch ID non funzionerà.
Se stai solo sostituendo lo schermo, puoi usare questa guida per rimuovere con attenzione il tuo pulsante home originale funzionante e trasferirlo sul nuovo schermo, conservando tutte le funzionalità, compreso il Touch ID.
Nel corso di questa procedura, per evitare di sforzare o strappare i cavi dello schermo sarebbe meglio staccare completamente il gruppo display prima di iniziare a intervenire sul sensore home/Touch ID. Se però pensi di potercela fare senza problemi, puoi saltare la sezione relativa al gruppo display di questa guida e andare direttamente alla sezione sul sensore home/Touch ID.
-
-
Spegni il tuo iPhone prima di cominciare a smontarlo.
-
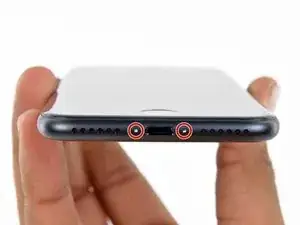
Rimuovi le due viti pentalobe da 3,4 mm nella parte inferiore del tuo iPhone.
-
-
-
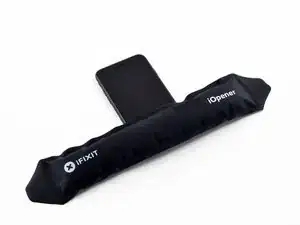
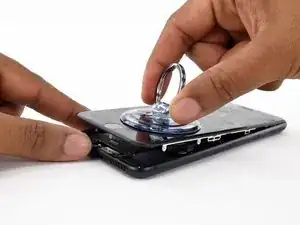
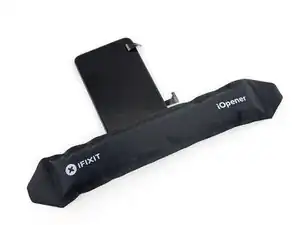
Usa un asciugacapelli o prepara un iOpener e applica calore per circa un minuto per ammorbidire l'adesivo sottostante.
-
-
-
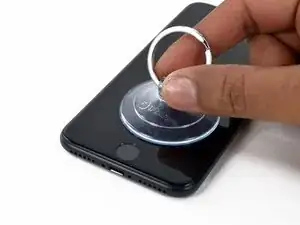
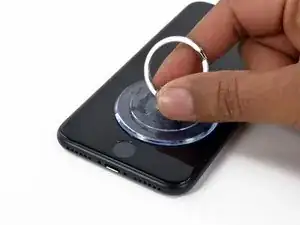
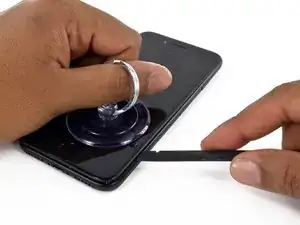
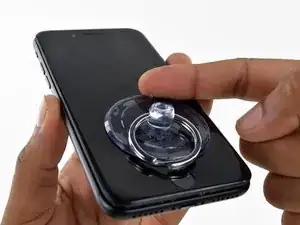
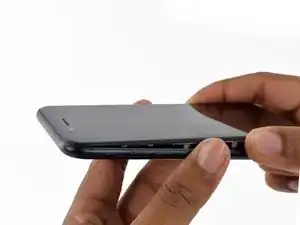
Tira la ventosa fino a creare una piccola fessura tra il gruppo display e il case posteriore.
-
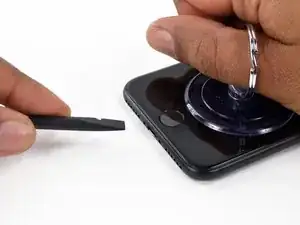
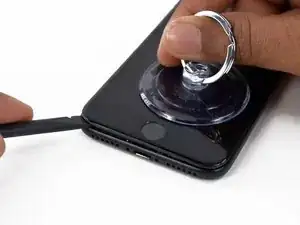
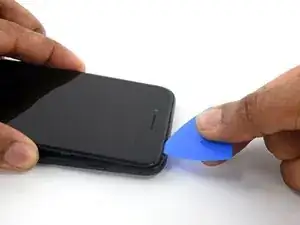
Inserisci l'estremità piatta di uno spudger nella fessura.
-
-
-
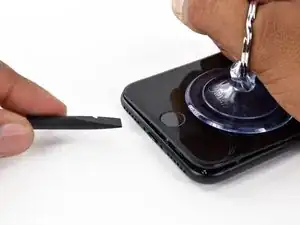
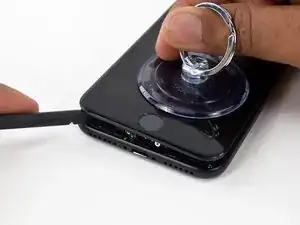
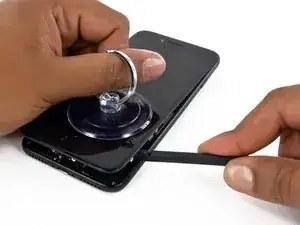
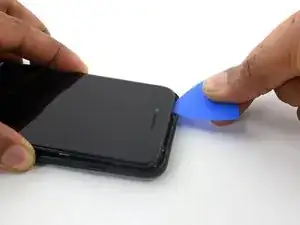
Fai scorrere lo spudger verso sinistra lungo il lato inferiore dell'iPhone.
-
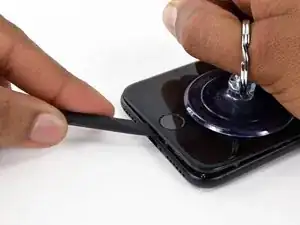
Ruota lo spudger per allargare la fessura tra il display e il case posteriore.
-
-
-
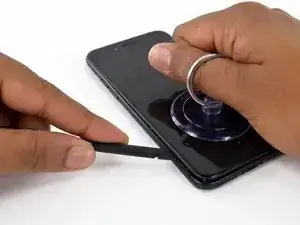
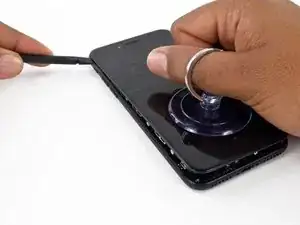
Fai scorrere lo spudger lungo il lato sinistro dell'iPhone, iniziando dalla parte inferiore e spostandoti verso i pulsanti del controllo volume e l'interruttore della modalità silenziosa.
-
-
-
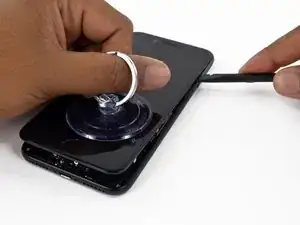
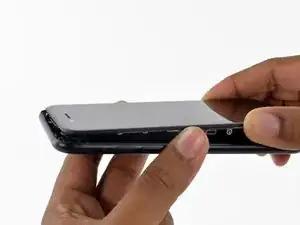
Inserisci l'estremità piatta di uno spudger nell'angolo inferiore destro del dispositivo.
-
Ruota lo spudger per allargare la fessura tra il gruppo display e il case posteriore.
-
Fai scorrere l'estremità piatta dello spudger sul lato destro del telefono per rompere l'adesivo che tiene in posizione il display.
-
-
-
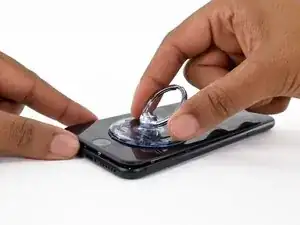
Solleva la piccola appendice della ventosa per rimuovere lo strumento dal pannello anteriore.
-
-
-
Fai scorrere uno strumento di apertura lungo il lato superiore dell'iPhone, tra il case posteriore e il pannello anteriore, per rompere la parte restante dell'adesivo che tiene in posizione lo schermo.
-
-
-
Tira lievemente in orizzontale il gruppo display per allontanarlo dalla parte superiore del telefono per scollegare le clip che tengono bloccato lo schermo al case posteriore.
-
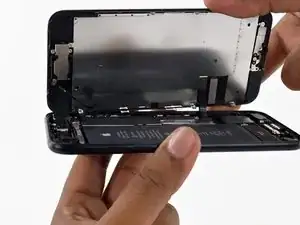
Apri l'iPhone sollevando il display dal lato destro, come se fosse la copertina posteriore di un libro.
-
-
-
Rimuovi le seguenti viti con testa tri-wing Y000 dalla staffa inferiore del connettore:
-
Tre viti da 1,2 mm
-
Una vite da 2,4 mm
-
-
-
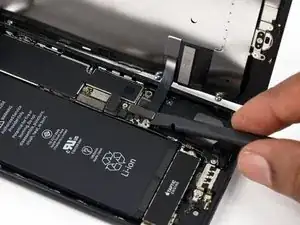
Usa l'estremità a punta di uno spudger per sollevare il connettore della batteria dal suo zoccolino sulla scheda logica.
-
-
-
In questo passo, accertati che la batteria sia scollegata quando disconnetti o riconnetti i cavi.
-
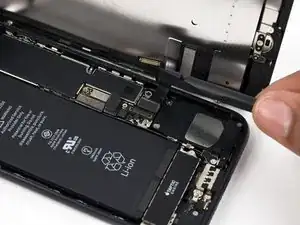
Usa l'estremità piatta di uno spudger o un'unghia per staccare i due connettori inferiori del display sollevandoli verso l'alto dai loro zoccolini sulla scheda logica.
-
-
-
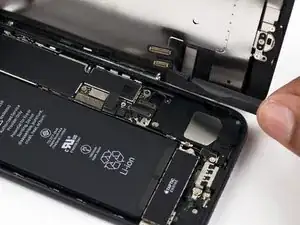
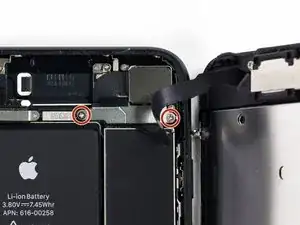
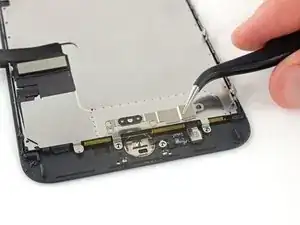
Rimuovi le due viti Phillips da 1,3 mm che fissano la staffa sopra il connettore del gruppo sensore del pannello frontale.
-
-
-
Stacca il connettore del gruppo sensore del pannello frontale dal suo zoccolino sulla scheda logica.
-
-
-
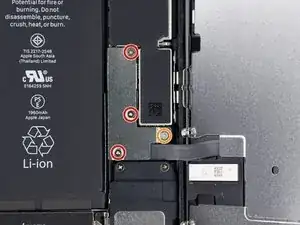
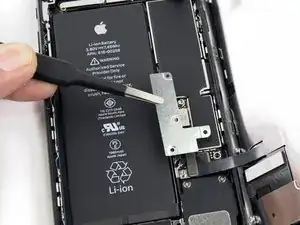
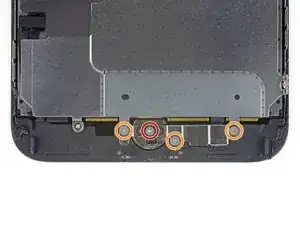
Rimuovi le quattro viti tri-wing Y000 che fissano la staffa sopra il sensore home/Touch ID:
-
Una vite da 1,1 mm
-
Tre viti da 1,3 mm
-
-
-
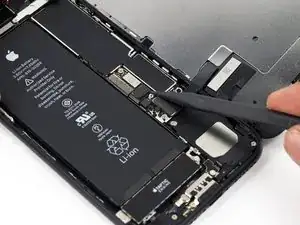
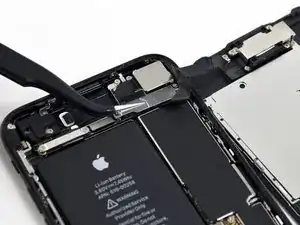
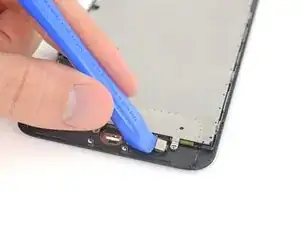
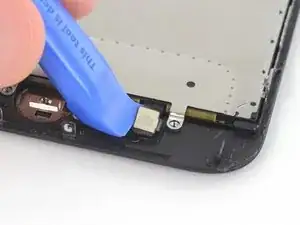
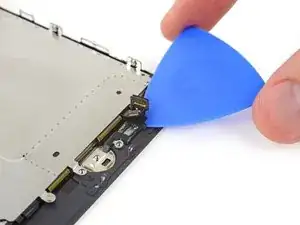
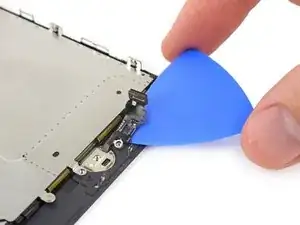
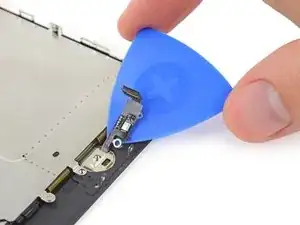
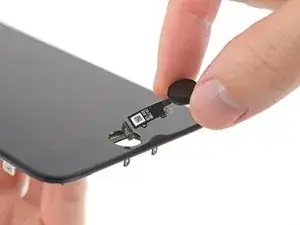
Stacca, spingendolo a destra, la spina del pulsante home per disconnetterlo dal suo zoccolino sul cavo di interconnessione.
-
-
-
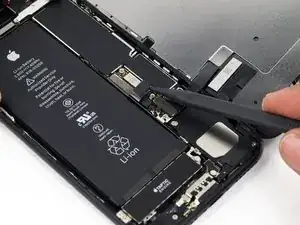
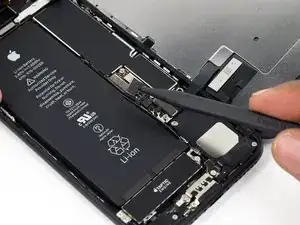
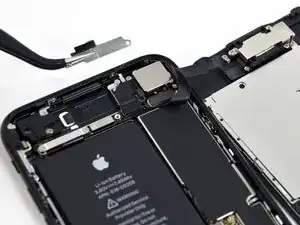
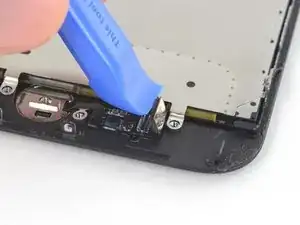
Fai leva delicatamente per alzare il cavo di interconnessione sottostante e spostalo lontano dal cavo del pulsante home.
-
Se il connettore non si stacca facilmente, usa un asciugacapelli o un iOpener per scaldare e ammorbidire l'adesivo che fissa il connettore, quindi prova di nuovo.
-
-
-
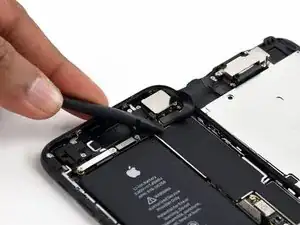
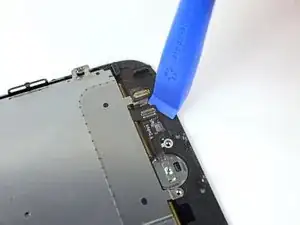
Capovolgi il gruppo display. Usa un asciugacapelli oppure prepara un iOpener e applica lo sul bordo retro del display per circa 90 secondi per ammorbidire l'adesivo sottostante.
-
-
-
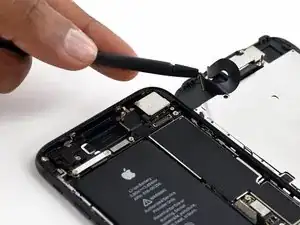
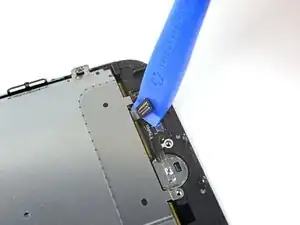
Usa con delicatezza una levetta di apertura per separare l'adesivo che fissa il cavo del sensore home/Touch ID al retro del pannello display.
-


Confronta la tua parte di ricambio con quella originale: potrebbe essere necessario il trasferimento di alcuni componenti o la rimozione di protezioni adesive dalla nuova parte prima di installarla.
Per riassemblare il tuo dispositivo, segui i passi descritti in ordine inverso.
Porta i tuoi rifiuti elettronici a un riciclatore certificato R2 o e-Stewards.
La riparazione non è andata secondo i piani? Vai sulla nostra comunità Risposte per trovare aiuto nella risoluzione dei problemi.

8 commenti
I read through this guide for fun and I must say it's %#*@ good,It's by far the most informative and it's full of great never mentioned tips too ensure you don't cause damage,I rarely see any precautions outside of the basics,like remove the battery connection first and we all know what can happen when you don't so GREAT WRITE UP
Just to be clear. I understand that the Touch ID won’t work if the logic board is not paired (the same as before). But are you also saying that an original home button won’t even click on another logic board? As in, if I take my whole screen and put into another phone, the click won’t work either?
Yes. On the iPhone 5s - 6s you lost touch ID functionality but on The 7 and 8 series, you lose all home button functionality as well.
I found another article on the ifixit website saying it’s absolutely NOT possible to replace the iPhone 7 home button:
https://www.ifixit.com/News/9020/no-fix-...
What’s the story?
Thomas -
Can anyone confirm 7/7P's pentalobe screws have a ring of seal near the screw head?
Cooper Chase -
Confirmed, the screws have a black ring seal around the head.
rcheing -
Can’t get the display front
Bernadette Pfeifer -
From personal experience, I highly recommend before doing this procedure or any other, that you do a backup of your phone (preferably local) in case your procedure goes south.
ballina5ny -
I purchased the repair tools with the replacement battery from iFixit. The tools include a screw driver and three heads none were labeled 3.4 mm. I think the one that fit the pentalobe screws was labeled Y000. The guide should identify the screw driver head supplied by the kit not 3.4mm.
Mark Lieberman -
in the iphone 7 replacement battery kit from iFixit, the screwdriver that fits the 3.4 mm pentalobe screws is labeled P2 (and not Y000)
Jan-Tijn Oppermann -
3.4 mm is the height of the screw and is not related to the screw driver code.
Ahmad Vaziri -
the screwdriver PH000 does not work i wasted two screws and now they dont have the 4 cross mark they are now a circle, i buyed it all from Paraguay and it doesnt work, had to assembly back the parts because i got stuck like i mention with some screws, well im just going to send to a professional to install, thanks
Martin Frutos, Nuñez -
The bottom screws are Pentalobe, not Phillips.
Bram Driesen -
Before starting, I would recommend backing up your Iphone’s data just in case.
Jon Moylan -
If you managed to make it to this section, just send the phone into apple for 50 + 6 dollars shipping. The ribbon cables on the screen are designed to break. I can literally twist on the rest of the cable and it won’t fall apart but there is a diagonal section where it snaps. This is the fault of apple and the fault of ifixit for misrepresenting the fragility of the cables.
Ryan Huebert -
Had to reheat it a few times for a minute each with a hairdryer to get the seal to break after pulling and rocking the suction
Cynthia Lamb -
I’m technically challenged. Is there a premier national service who can professionally install a replacement battery got my 7 +?
Richard -
Do the screws come out in total?
YVES THEUGELS -
They may come out or may not. If you loosen as much as you can and they don't come out you should still be able to pry open the bottom. Once you get the screen off you can then push the screws out from the inside.
Anthony Falabella -
Is it the P2 you should use for the bottom??
YVES THEUGELS -
I heated the bottom of the phone with a hairdryer and then used a syringe to put a couple of drops of acetone directly into the bottom two screw holes. I GENTLY pulled on the screen with the suction cup and used the pry tool to GENTLY separate the screen. The sealant is applied around the entire display so be very careful pulling it off so you don’t break the fragile display cables.
Anthony Scaminaci -
At first it was very difficult to open, per instructions. I used a heat/ice pack and nuked it for 1 minute. The pry tool wasn’t working so I carefully used my pocket knife to wedge the cover open. The rest of the procedure went well until I cracked the glass while trying to get the top right corner to pop off. Other than that mistake, all went well. Tip: before setting the new battery, attach the battery connector first and leave enough room for the taptic engine, or better yet, place the taptic engine before adhering the replacement battery. This way you’ll have a small gap between the two, whereas mine barely fit. Good job on hosting the video, Gwendyl.
Klaus Preiss -
I love the fact that the screw bit and shaft are magnetic! I almost lost a screw and found it attached to the magnet.
I used a heat/ice pack and nuked it for 1 minute. At first the display cover was very difficult to open with the pry tool, per instructions. The pry tool wasn’t working so I carefully used the blade of my pocket knife to wedge the cover open. The rest of the procedure went well until I cracked the glass while trying to get the top right corner to pop off. Other than that mistake, all went well. Tip: before setting the new battery, attach the battery connector first and leave enough room for the taptic engine, or better yet, see the taptic engine in place before adhering the replacement battery. This way you’ll have a small gap between the two, whereas mine barely fit because I placed it almost too low.
Good job on hosting the video, Gwendyl.
Klaus Preiss -
I replaced the lightning connector assembly and reassembled. The old one did not 'click' into the cable and had corrosion inside, it needed the cable to be placed in a specific way to charge. The new part - does not recognize that a charger is plugged in at all.
I backtracked the assembly - took it apart, put it back again - and find that every thing on the part works - the mic, speakers, taptic engine.
The original problem with the cable still persists. Any ideas?
H K -