Introduzione

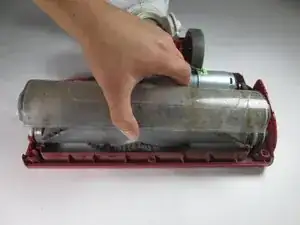
Quando l'aspirapolvere non riesce a raccogliere la polvere o la risputa fuori, controlla la spazzola rotante in cerca di danni. Le setole mancanti o rotte, e una spazzola rotta, possono essere la causa del problema.

  1. xnOGmoJSpmtjF2EB
    xnOGmoJSpmtjF2EB
    RcOVR1DKE6VJlxiJ
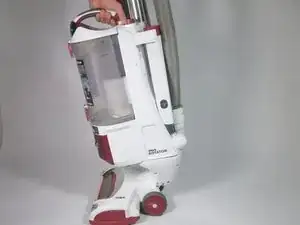
    • Tira il manico mentre premi il tasto di rimozione per rimuovere il corpo dell'aspirapolvere.

  2. bJ6WxHwORUOkP26G
    bJ6WxHwORUOkP26G
    PBQ6uB3jY1VAsvlk
    • Gira la base dell'aspirapolvere a testa in giù per accedere alla parte inferiore.

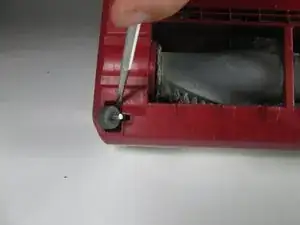
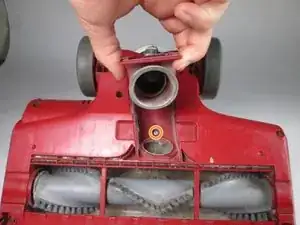
    • Rimuovi le due piccole ruote con uno spudger in metallo.

  3. q1t1UgGBmYxMXlhh
    q1t1UgGBmYxMXlhh
    XjBxntSCT1FTEj3a
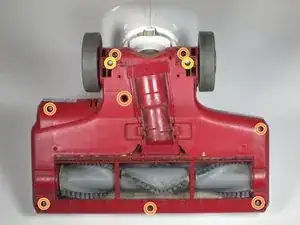
    • Svita le nove viti da 16 mm usando un cacciavite a croce Phillips #2. Premi sulle alette laterali al centro del pannello e tirale verso l'alto per scoprire la vite sotto la connessione del tubo.

    • Svita le due viti da 13,5 mm con un cacciavite a croce Phillips #2.

    For Step 3, the text refers to 9 16mm screws, but the photo shows only 8 of them. You will find the 9th screw underneath the housing for the hose, the red tube in the center. Lift up carefully.

    CeCe -

    Excellent fixit right out of the box thanks

    thanks for taking time to do it

    xx19912 -

    On my vacuum there are not 9 Phillips head screws. There are 2 Phillips head screws and 7 star head screws. If you have any sense at all when you put your vacuum back together you will throw away these star head screws and replace them with Phillips head screws of like thread and length.

    paulmarra1956 -

    There is no need to remove the rear wheel axle screws to remove the top.

    Marc -

    OMG Thank you CeCe! I was scratching my head looking for that last screw

    K C -

    I can’t find the right bit for these screws. What size/type are they??? Mine are not star bits…

    Cant find the right tool -

    On other vacuum models Shark uses Torx security screws. The Torx/Star screwdriver/bit needs to have a hole in the end to accommodate the pin inside the Tork screw head.

    mwarrenus -

  4. wSxlUBspBohQxRmR
    wSxlUBspBohQxRmR
    FmZKbpEYs3IFCbKi
    • Tira la copertura verso l'alto e mettila da parte.

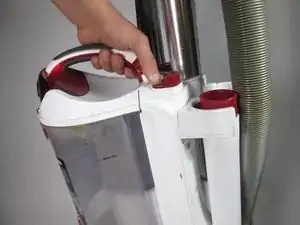
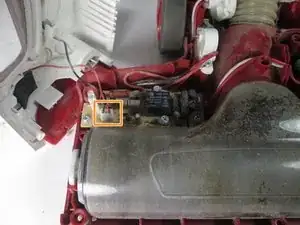
    • Rimuovi il cavo collegato alla base premendo sul suo connettore e tirandolo verso l'alto.

  5. sTEEaYSTmSCHhhUJ
    sTEEaYSTmSCHhhUJ
    AlhX2HBOZB22HwAP
    • Svita le due viti da 11 mm con il cacciavite a croce Phillips #2.

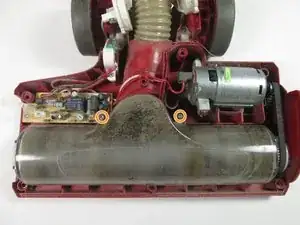
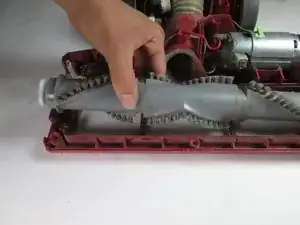
    • Solleva la copertura della spazzola rotante.

  6. bQy3hvJxl5XlWMfq
    • Tira fuori la spazzola rotante.

    The photos were perfect. Followed the directions perfectly step by step and I was able to reassemble and I had no screws left over! Thanks (59yr old Nana)

    Jill Richards -

    I Found one on the bloody trash about an hour ago. Bleeding wankers! Throwing away a great bloody piece like it, is bloody crazy I say. !#off, it's mine now!

    William Fabiano -

Conclusione

Per rimontare il tuo dispositivo, segui le istruzioni in ordine inverso.

Samuel

Membro da: 06/10/16

307 Reputazione

6 commenti

Good day, I have a rotator lift away NV500 my belt indicator light stopped working but I was still getting suction. I replaced the filters and hep filters,as well as changed the belt. I cleaned off the dust and then carefully put the vacuum back to gather. I went to plug it in all worked until I pushed the roller brush indicator on and it still did not work. What else could it be? Any suggestions.

I await your reply

Angela

Angela Cox -

I have the same issue…brush roller will not work.

csweetccr -

Same here what would be wrong with it

Johnnie Twyman -

Great instructions - the 11mm hidden screws plus one more were tricky to find. Thanks so much for the great graphics and very clear disassembly steps; I almost gave up and was going to take it to a dealer for a costly repair fee. Thanks again!

Mathew Curran -

Great directions and guidance - many thanks!

Mathew Curran -

I found no 11mm screws, + type. On my machine all the screw were T10H or T15H security type screws.

sharan stanwood -