
Introduzione
Guida solo prerequisita per rimuovere il telaio centrale di un Samsung Galaxy S10e. Del telaio intermedio fanno parte la bobina di ricarica wireless e la bobina NFC.
-
-
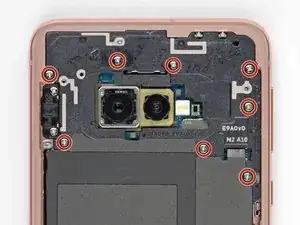
Rimuovi le otto viti a croce Phillips da 3,9 mm che fissano il telaio intermedio superiore al telefono.
-
-
-
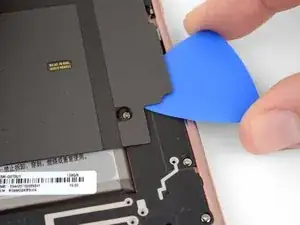
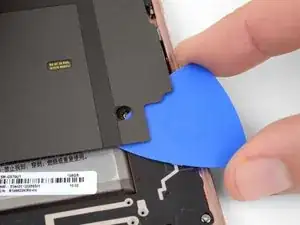
Fai scorrere un plettro di apertura sotto l'angolo inferiore destro del telaio intermedio superiore per separare l'adesivo che lo tiene attaccato al telaio intermedio inferiore.
-
-
-
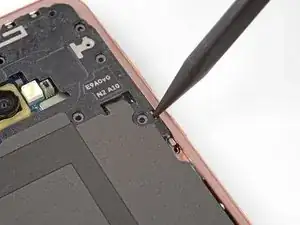
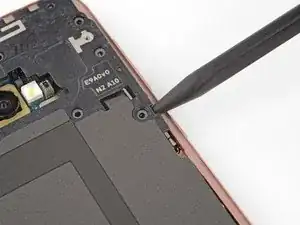
Inserisci la punta di uno spudger nel piccolo intaglio sul bordo destro della parte in plastica del telaio intermedio superiore, vicino al pulsante Bixby.
-
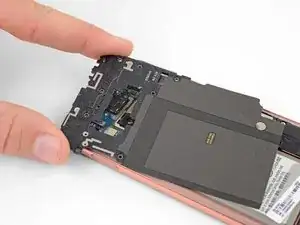
Usa la punta dello spudger per sollevare il telaio intermedio dalla scocca del telefono.
-
Porta i tuoi rifiuti elettronici a un riciclatore certificato R2 o e-Stewards.
La riparazione non è andata come previsto? Prova delle soluzioni di base ai problemi, oppure rivolgiti alla nostra comunità Risposte per trovare aiuto.

Again, criminal lies! These screws have different length! Take notes which are where! There are at least 4 versions of antenna/coil modules, so each time it may be a little different.
Someone fromjapan -
Interesting observation! I did not see this comment until after I reassembled the midframe and closed everything, so I can not confirm. If true, I either got lucky or it didn't matter.
WL1 -
I'll note this and see about maintaining the same order for reinstallation -
Gee Foe -
Mine appeared to be all identical, so it was easy
Gee Foe -
The screws on my SM-G970F/DS were all identical.
James Beegle -
The screws in my phone were also identical. I think the "criminal lies" commenter above was confused and was using these instructions to repair a different phone. Too many of his or her comments are just not relevant to this job.
MikeT-NYC -