Introduzione

Sostituisci il vetro curvo per far sembrare il tuo iPod Nano di quinta generazione come nuovo.

  1. tqsQP4hmm1ViTtsW
    tqsQP4hmm1ViTtsW
    Cmg1al5GwuC2hEkt
    bjEVlvUPsKOGkBWV
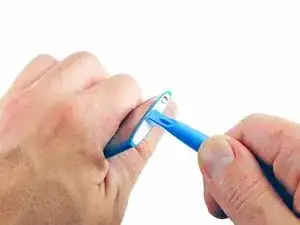
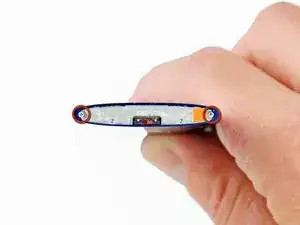
    • Infila uno strumento di apertura per iPod tra la copertura esterna e il bordo superiore vicino allo schermo.

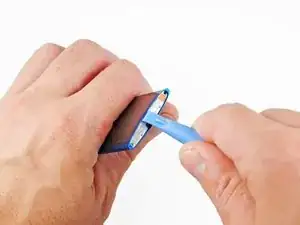
    • Sollevando lo strumento di apertura per iPod, fai leva per rimuovere il bordo superiore del dispositivo.

    • Il bordo è incollato con dell'adesivo e può richiedere parecchia forza per essere rimosso.

  2. OKnHRbj3gTQE3qTr
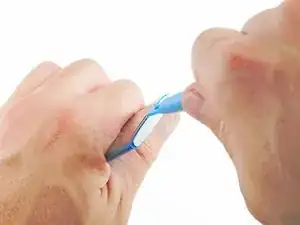
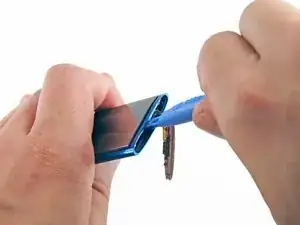
    • Usa uno strumento di apertura per iPod per rimuovere l'interruttore hold dal suo supporto in metallo.

  3. CmYxxu342QlfWCWN
    • Svita le due viti da 3,2 mm.

    • Queste viti sono inclinate verso la copertura esterna e sono molto piccole. Usa un cacciavite appuntito e stai molto attento a non spanarle.

  4. 6MDFV4EeOGRDMKYM
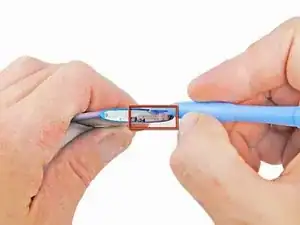
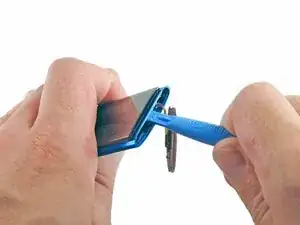
    • Infila uno strumento di apertura per iPod tra la copertura esterna e il supporto in metallo dell'interruttore hold vicino al bordo superiore dello schermo.

    • Mentre tiri leggermente verso l'alto lo strumento di apertura, tira fuori dall'iPod il supporto in metallo dell'interruttore hold.

    • Il supporto in metallo dell'interruttore hold è ancora collegato all'iPod da un sottile e fragile cavo a nastro. Stai attento a non strapparlo.

    My ribbon broke.

    I see that on the pictures further down, you removed the covering plate, which I would suggest to do, as it'll put less weight on the ribbon.

    Luckily, we can find spare ones. In fact it doesn't sell alone, it's with the earphones jack.

    Michel Raj -

    could you elaborate more as to how did you remedy the broken ribbon?

    michael deaner -

    is the broken ribbon fixable?

    michael deaner -

    is the broken ribbon fixable?

    michael deaner -

    I am new to this my ribbon broke when I was taking out the battery  doesn't  the new battery ribbon connect to the one connected to the end switch, by that I mean can I connect the new battery ribbon to the end switch ribbon?,where it broke?

    michael deaner -

  5. eqSOH2HFnInuMkBW
    eqSOH2HFnInuMkBW
    mhPVVNhyeEgRBoAb
    • Il vetro è tenuto fermo da dell'adesivo lungo tutti i quattro lati. Nei passaggi seguenti, lavora attentamente per evitare di rompere il vetro.

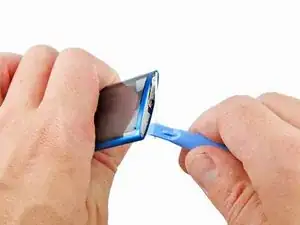
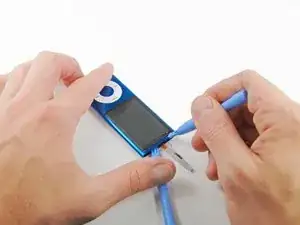
    • Infila uno strumento di apertura per iPod tra lo schermo e il vetro dal bordo superiore del dispositivo.

    • Ruota lo strumento di apertura verso il retro del dispositivo, sollevando leggermente il bordo superiore del vetro dalla copertura esterna.

    • Il vetro non si alzerà molto. Non provare ancora a rimuovere del tutto il vetro, o è probabile che romperai lo schermo.

    I would recommend using a heat gun.

    raul mald -

    At this point, I find it helps to separate the lock switch from the top metal casting. You then have just the switch dangling on the fragile ribbon cable. Much less likely to snag or break the ribbon. Just loosen (Don't remove completely) the two Phillips screws. The heavy clunky casting bit can be removed.

    Pete Green -

    You can remove this lens with virtually zero risk to the LCD underneath:

    Get a couple guitar picks or spudgers ready, and another old spudger. Using a hot glue gun, glue the old spudger into the very middle of the lens. Let the glue cool completely.

    Using a heat gun pointing up from the bottom, heat the 3 edges of the shell around the top and sides of the lens. Avoid getting heat on the lens or hot glue as it will soften.

    Using the spudger as a handle, pull up on the lens to get the top edge started and get your guitar picks/spudgers under the sides at the top of the lens.

    Complete removal as above.

    Using a spudger/guitar pick, start to peel an edge of the hot glue loose to remove old spudger from lens; then clean any residue with alcohol.

    Paul K -

    “couple of” guitar picks

    kenneth keen -

    After destroying one iPod, I learned from my mistakes. Heating it with a hair dryer to loosen the adhesive helped a lot. You need to get the tool between the glass and the lcd display; be very careful not to put pressure on the display!

    Cheryl Berk -

  6. x6BAkUS4cuUPfOUV
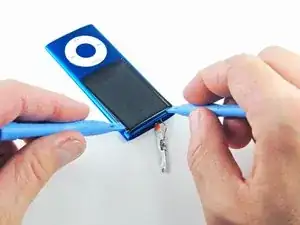
    • Mentre sollevi lo schermo con lo strumento di apertura per iPod, infila un secondo strumento di apertura tra la copertura esterna e la parte sinistra del bordo superiore del vetro.

    • Rimuovi il primo strumento di apertura dall'iPod posto tra il vetro e l'LCD nella parte superiore del dispositivo.

    The iPod I repared had a cracked screen. Caution here because it doesn't pop out that easily. I had to apply some force on the plastic opening tool while using another tool to take out the shards (who are glued to the side).

    matthiasvercaemst -

    Mujhe sirf LCD chahiye bhai

    Azam -

    Bhai, ye admi angrezi hai. Os ko Urdu samaj nahi ata hai.

    ian h -

    90% guaranteed you will destroy the LCD in this step. You just dont know how much for to use and if you stress the LCD too much, even with a plastic tool it will be damaged.That’s why ifixit sells those too. My advice is to first completely follow this guide, and if successful, and only then , start ordering parts.

    Omar van Hees -

    Since the display is probably 99 percent broken, I decided to use a different method. I heat the ipod on my 3-printer heating bed to around 70 degrees Celsius, then I take a suction cup and pull on the display glass. When the glue is warm enough, the glass rises and you can carefully detach the glass with an opening pick. the display remains completely intact greeting Andre

    Andre Marten -

  7. M5KQmrRiYOqHZnoW
    M5KQmrRiYOqHZnoW
    mqDRYKAXTcc1Lfiu
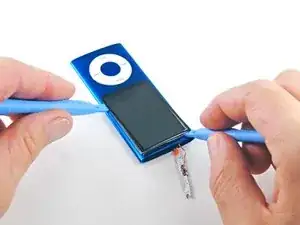
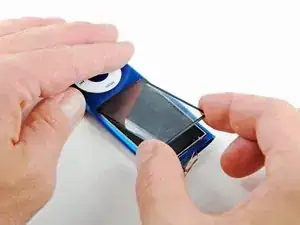
    • Facendo una leggera leva con lo strumento di apertura per iPod, infila un secondo strumento di apertura tra la copertura esterna e il bordo destro del vetro.

    • Fai scorrere il secondo strumento di apertura lungo il bordo destro del vetro per separare l'adesivo.

  8. Xs1HlfTMS6KPomnq
    Xs1HlfTMS6KPomnq
    TQR6OJJDC1yxcmvC
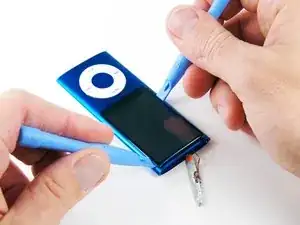
    • Con uno strumento di apertura per iPod ancora tra il vetro e la copertura esterna, infila un altro strumento simile tra la copertura esterna e il bordo sinistro del vetro.

    • Fai scorrere lo strumento di apertura per iPod lungo il bordo sinistro del vetro verso la base del dispositivo per separare l'adesivo.

  9. MTxN4WTZFDXDClBs
    • Sollevando il vetro dal bordo superiore dell'iPod, rimuovi il pannello di vetro dall'iPod Nano.

    It might be a good idea to remove all the adhesive from the screen before trying to slide the internals out. I had a nightmare trying to get mine out, ended up cutting my thumb and finger from holding onto the edges of the screen too tight trying to wiggle it out. And then to top it off, I broke the hold switch ribbon cable too. I don’t know how much the screen glue vs the battery glue was responsible for making it difficult to remove. Also when sliding it out, be careful the lip on the lower edge of the button hole doesn’t snag on the thin steel frame around the screen.

    edorp -

    Is it really needed to remove the glas? Can‘t you just slide out the logic board when glas remains?

    Michael Westermeier -

Conclusione

Per rimontare il dispositivo, segui le istruzioni in ordine inverso.

Matthew Newsom

Membro da: 06/01/10

39426 Reputazione

6 commenti

If the glass is cracked, you may not have to remove the end of the ipod to pry out the glass. In my case, I was able to carefully (with out putting pressure on the screen below) get the glass out in pieces.

tony1 -

This step by step guide is perfect for replacing the glass! There is no need to remove the click-wheel or the camera bezel - as seen in may other videos and guides. So stay away from the click wheel if you can - it's just glued in (there is no snap!) and it's really hard to put back in place again. And yes, ideally you can remove the glass without opening anything. It is just glued in and the new one will go in from the top. Good Luck!

Stefan Georgi -

I gave my homie my 8 gig when i bought my 16 gig. his girl dropped it and the glass screen cracked. took me no more then 5 minutes and i had it as good as new! Whoop Whoop, danke fo the instructions!

steven -

Dear Steven, To me exactly the same happened, although I was the person who got the Ipod and dropped it. So I do understand how to get the glass out, but how do I put a new one in? Just insert it and put everything back on? Should I use glue when I put the screen in? Or will it just stay there on its own? Thanks!

myrthe569 -

this was great and super easy! thanks so much

solinvictusetc -

Worked well until the lock cable came off. Any way to fix the lock cable? Also the bezel took forever to get back into place.

Brian Garrison -