Introduzione
Rimuovi o sostituisci le viti pentalobe in un iPhone 7 Plus.
Strumenti
Ricambi
-
-
Spegni il tuo iPhone prima di iniziare lo smontaggio.
-
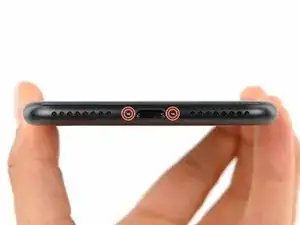
Rimuovi le due viti pentalobe da 3,4 mm sul lato inferiore dell'iPhone.
-
Conclusione
Per rimontare il tuo dispositivo, segui queste istruzioni in ordine inverso.

4 commenti
Can anyone confirm 7/7P's pentalobe screws have a ring of seal near the screw head?
Hey Cooper,
There is no seal on the screw. The head of the screw simply pushes against the lip of the screw well, without using any sort of pneumatic seal, o-ring etc.
As Talon says, it is part of the casing.
I not recall seeing one. If there is one I would expect it to be part of the casing.
Talon -
as the costumer said, there is a sealant but not noticeable
The recommendation of discharging the battery is completely unnecessary. Even a 25% charged battery can explode. Completely ridiculous suggestion.
pargoff -
The risk of thermal runaway on these batteries decreases with the battery's SOC (state of charge). Below 50% charge the risk is fairly low, and at 25% charge the risk of a thermal event is near zero. If I recall correctly, the same suggestion appears in Apple's official (non-public) service manuals for the iPhone.
Jeff Suovanen -
@jeffsu Yes, that is correct. Apple does require all certified staff to discharge the battery below 25%. This is an industry standard for all LiION batteries. If you don’t want to do this, just make sure to not puncture the battery and disconnect it first thing.
iHelpU.Tech -
Hang on a second here, doesn’t the Ifixit part I ordered come with the seals? The display assembly? It doesn’t. Now I have to wait another week?!
Vanessa Pinter -
How do you turn off if the screen isn’t responding to touch?
adam -
The replacement battery came with the seal—but how do you put it on???
lkollar -
Instructions for replacing the seal are here: Sostituzione guarnizione adesiva display iPhone
bester -
I just found the instructions on how to install the seals AFTER I was completed and had to figure it out. Maybe, just maybe you should link this somewhere on the guild instead of buried in a comment. Just a thought.
Charles Meitin -
Step 1 is: Read through all the steps and comments or the method prior to starting on this Step 1. There's a lot of much needed information and experience that you can learn from which will reduce the chance of struggling, wasting time or even breaking your device.
My favourites are:
Use a hot water bottle.
Label all screws you remove with their size and location on a piece of paper with double sided sticky tape.
Test the lightning assembly at step 13
There is a Standoff driver bit in the box, don't use a screwdriver.
etc...
Neil Eriksen -
A tip for looking out for all those little screws. I used an ice block tray, for all the little screws etc. I numbered each with the step number, as in the instructions, but not all steps have bits to look out for. Where two different size screws are used I had a tray for each size and marked step a and step b. For this I coloured each tray sticker with the colour of the screw as shown in the instructions. All this worked a treat with no confusion or using the wrong part.
Herb
Herb Adler -
The screw size for those with a screw set is P2.
Gareth Flandro -