Introduzione
La parte destra del tuo MacBook Pro non emette suoni? Segui questa guida per sostituire il subwoofer e lo speaker destro.
Strumenti
Ricambi
-
-
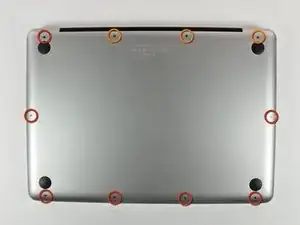
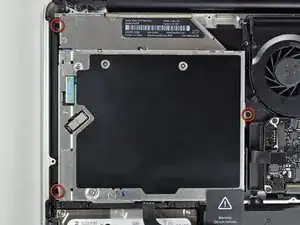
Rimuovi le dieci viti seguenti, che fissano il case inferiore al MacBook Pro Unibody da 13":
-
Sette viti con testa a croce da 3 mm.
-
Tre viti con testa a croce da 13,5 mm.
-
-
-
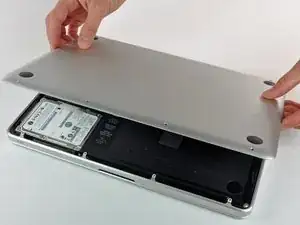
Solleva leggermente il case inferiore e spingilo verso la parte posteriore del computer per liberare le linguette di montaggio.
-
-
-
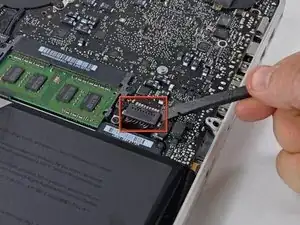
Mediante l'estremità piatta di uno spudger, sollevare il connettore del cavo della batteria dal connettore femmina sulla scheda logica staccandolo da questa.
-
-
-
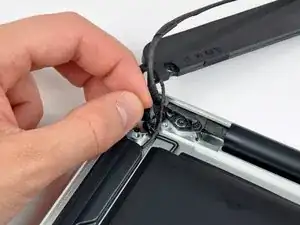
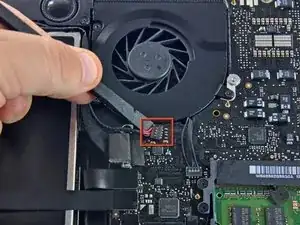
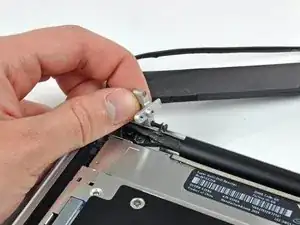
Usando l'estremità piatta di uno spudger, stacca delicatamente dalla scheda logica il connettore del cavo dell'altoparlante/subwoofer di destra. Stai attento a non sollevare la presa. Tira il connettore verso l'unità ottica.
-
-
-
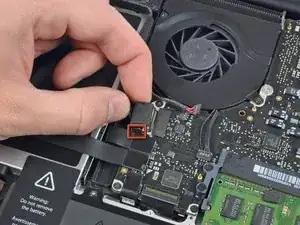
Tira il connettore del cavo della fotocamera in direzione dell'unità ottica per scollegarlo dalla scheda logica.
-
-
-
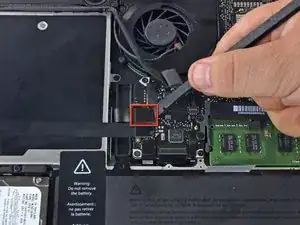
Usa l'estremità piatta di uno spudger per staccare il connettore dell'unità ottica dalla scheda logica.
-
-
-
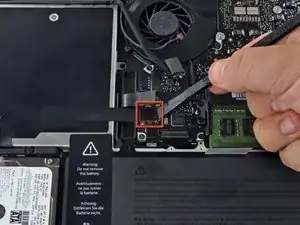
Usa l'estremità piatta di uno spudger per staccare il connettore del disco fisso dalla scheda logica.
-
-
-
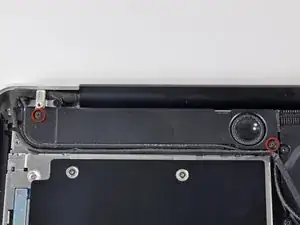
Rimuovi le due viti a croce Phillips che fissano il subwoofer al case superiore. Quella di destra è da 5 mm, quella di sinistra da 3,9 mm.
-
-
-
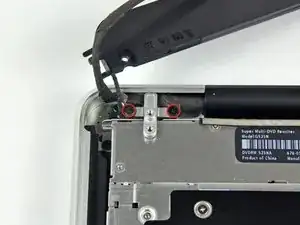
Rimuovi le due viti Phillips da 8,4 mm che fissano la staffa del cavo della fotocamera al case superiore.
-
Solleva dal case superiore la staffa del cavo della fotocamera.
-
-
-
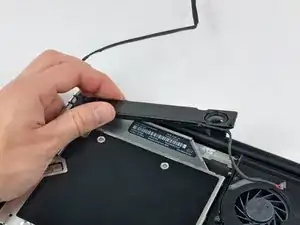
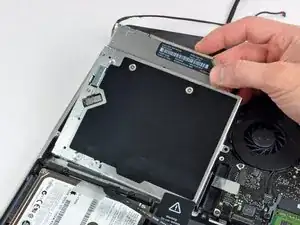
Rimuovi le tre vite a croce Phillips da 2,5 mm che fissano l'unità ottica al case superiore.
-
Solleva l'unità ottica dal suo bordo di destra e tirala via dal computer.
-
-
-
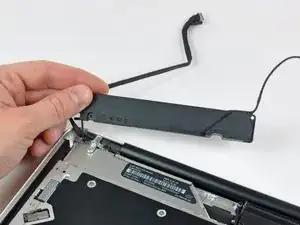
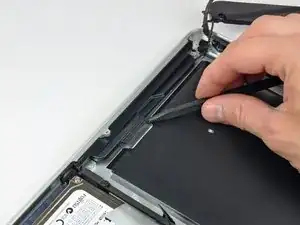
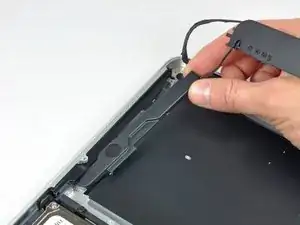
Usa la punta dello spudger per far leva sullo speaker destro e sollevarlo dall'adesivo che lo tiene fermo sulla scocca superiore.
-
Per riassemblare il dispositivo, segui le istruzioni nell'ordine inverso.

4 commenti
Thank you iFixit
Thanks ifixit for the super guide. I followed the steps and now my mac works properly again!
Toni -
Thank you iFixit!
I too snapped the right speaker/subwoofer cable connector right off the mother board, but with patience and a little research, I learned how to solder the thing back on. How about a Warning!!!!! inserted at that step.? I only saw that there were comments AFTER I gingerly tried to pry the connector as instructed. It would help to show how the parts fit together as is done with the fan cable connector. Those instructions (the fan cable connector instructions), helped me better understand what I was prying apart and gave me an idea of how best to do it, and how the speaker/subwoofer cable connector connected to the board, as well as how to position the “pads.”
So, I learned from my mistake, which is a good thing. Nonetheless, I would have preferred to learn BEFORE I snapped off the cable connector, LOL!
Thanks Again for this incredible site.
Compare the short screws carefully before reinstalling them. The shouldered screws go in the holes on the front edge.
David Kilbridge -
Before I started removing any screws I took a piece of paper and drew the bottom of the laptop and put a piece of double-sided tape in the spot where each screw goes. That way when I took out the screws, I could put them on the tape so I knew exactly which screw went in which spot. I did the same thing for dismantling the inside on another sheet of paper, then a third sheet for the screen after getting the front glass off.
mastover -
I use a similar technique: I print out the iFixit manual for the job, and Scotch-tape down the screws/brackets/cables I remove at each step next to the component descriptions. That way, when I'm reassembling, the bits are taped right next to the photo of where they came from.
adlerpe -
That's exactly what I do for all my repairs! It's the best way to keep track of all of the parts ' original location and to make sure that you don't miss any parts during reassembly.
joyitsjennie -
Great idea and one I use often
Thomas Overstreet -
Excellent idea! Thanks for sharing it here.
Laura Sharkey -
I used a 00 that fit but the screws were very tight so I used a tiny paintbrush with some wd40 on it and put it around the edges of the screws. Worked like a charm
valentinedhdh -
I use a magnetic mat and place the screws in order on that :)
Cary B -