Introduzione

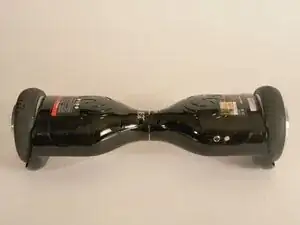
This guide will show you how to remove and replace the outer shell of your SwagTron T1

  1. hASamQQ2pH5X2Q1c
    • Ensure that the SwagTron is off.

    • Turn the SwagTron upside down to see the underside.

  2. AyLoCfiNNPUSusko
    AyLoCfiNNPUSusko
    A1SfRjgBH1Ps4FDx
    4PbF3Xqm2IGcYGLc
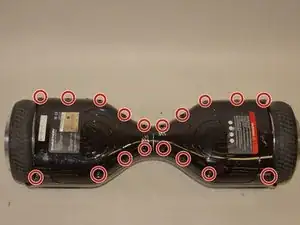
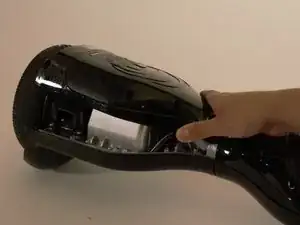
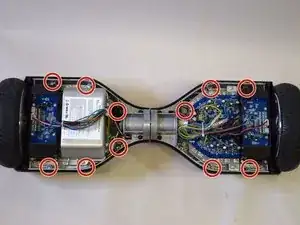
    • Unscrew the eighteen 10mm screws that secure the back panels using a Phillips #2 screwdriver.

    • The screws are tightly in place. It will take effort to screw them out.

    • The panel is still attached to the SwagTron by wires that go to the motherboard.

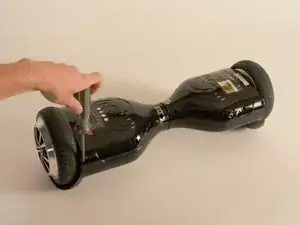
    • Carefully lift the panels off

    The panels don’t come off after removing the screws. Could they be also glued in place?

    uygar_selman -

    Same issue here with the T882. Resorted to trying to pry the shell off but haven’t been able to yet. The closer I get to the center, the harder it is.

    Victoria Milhoan -

    FYI - there are stickers over two of the screws (one on each side). Once the stickers are removed, and the screws taken out, the shell came off easily.

    Victoria Milhoan -

    THANK YOU! The screws were under the stickers near the center.

    Liz Vance -

    I removed all the screws from the panel, and I am pulling and tugging and I can only get one side loose but not the other. Anyone else experience this?

    MS R -

  3. Fhn43eU1NvIfQ6fI
    Fhn43eU1NvIfQ6fI
    xJmZeRWNmbCI6ebv
    nYUdyMupFkQGYxCB
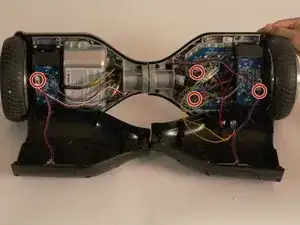
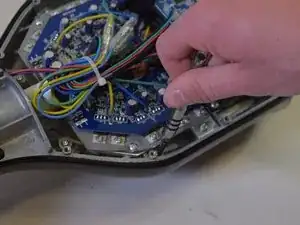
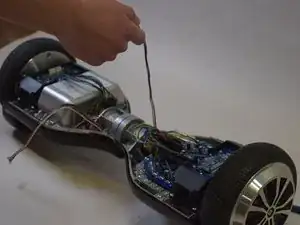
    • Follow the wires from the panels to the motherboard.

    • You may need to cut any zip ties that are holding the wires together.

    • There is one connection on the battery side and three on the other side that must be removed.

    • These connections may be difficult to remove. Try to securely press the connection and pull firmly.

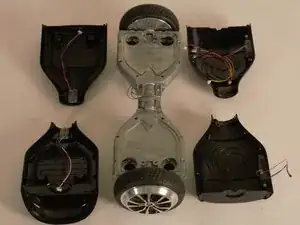
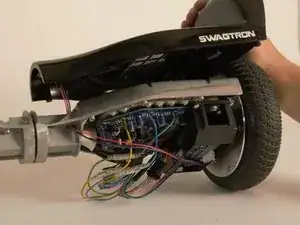
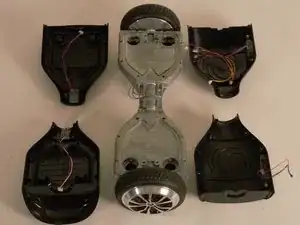
    • Your back panels are now completely removed.

    Where can I buy the shell

    Julio Barahona -

    Where can I buy the battery?

    Daniel O'Brien -

  4. UdMwGpFfOVENAft3
    UdMwGpFfOVENAft3
    YxbZs35UhGIiVLKD
    • Unscrew the twelve 10mm screws that connect the metal chassis to the top plastic panel.

    • These screws will be low into the SwagTron.

  5. RhptdWqmGhfopbUu
    • Turn the SwagTron right side up and slightly lift up the panel.

    • Be careful to not pull too hard because the panel is still attached to the SwagTron by wires.

  6. yY2hExAdla6cgZQQ
    yY2hExAdla6cgZQQ
    2DHM2rskVLnNwPct
    gCwxGFqZTmKKhALN
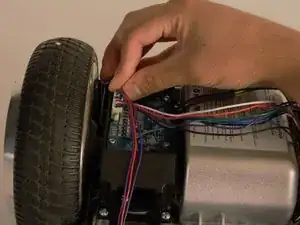
    • Turn the SwagTron over and disconnect the wires from the motherboard.

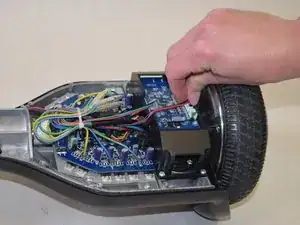
    • Follow the wires to the underside of the SwagTron.

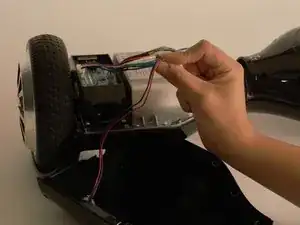
    • Carefully remove the cord and the panel together.

    • All the panels are now free from the SwagTron.

Conclusione

To reassemble your device, follow these instructions in reverse order.

Gloria Whang

Membro da: 14/04/17

179 Reputazione

4 commenti

Where did you ind a replacement shell for the Swagtron T1? I need to buy a new one, but can’t seem to find a place to buy it online.

Syd Jensen -

Where can I buy a Swagtron T1 replacement shell?

Syd Jensen -

Syd any luck finding a replacement shell?  I need to order the same kind and cannot find it online.

Craig -

Amazon.com Keyword: CertiCable

Jesse Griffis -