Introduzione

  1. k4Bst31lvs6QBEWZ
    k4Bst31lvs6QBEWZ
    QVtuqPArGpIVgWH2
    hsTddYxhxqnyb1LW
    • Attention: Disconnect the power cord of the device from the outlet!!

    • Remove the screw with Phillips screwdriver.

    • Pull the metal lever upwards to pull it off

  2. CoZI5McyE3cDdlBb
    CoZI5McyE3cDdlBb
    MYVJjMjoJWgZ1KZn
    • Remove the water tank and the attachments (drip pans, etc.)

    • Remove all the water from the machine

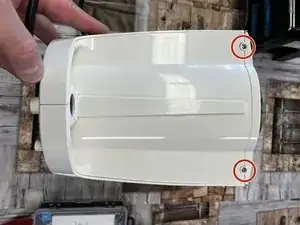
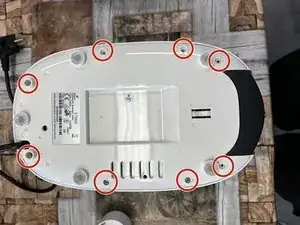
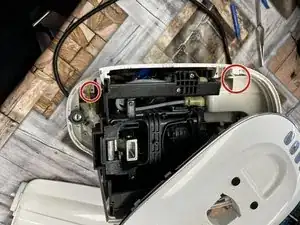
    • Remove the screws on the back (behind the water tank) with the tensioner 2.0 bit or a screwdriver

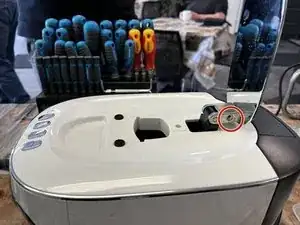
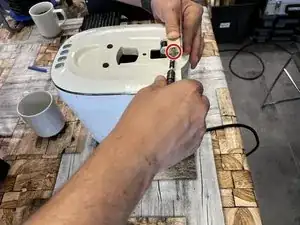
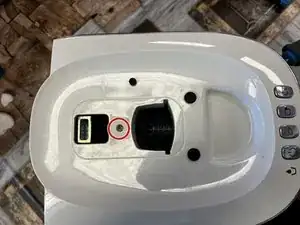
    • Remove the screw in the lid with a Phillips screwdriver

  3. EM4rkAU6YfdUZ2NP
    • Turn the machine over

    • Remove the 8 Phillips screws

  4. caIgghaFZPl6KsBu
    caIgghaFZPl6KsBu
    MbSHr4jWWlSYoRTy
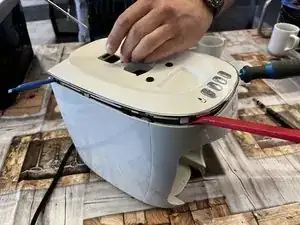
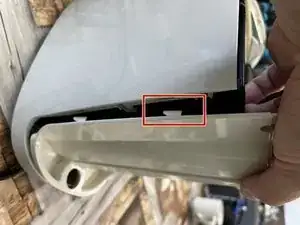
    • Run a spudger around the lid to loosen the clips.

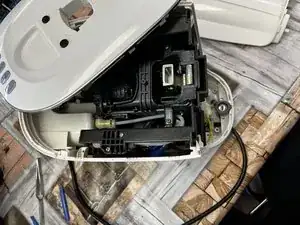
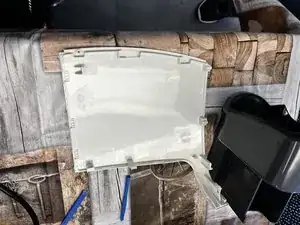
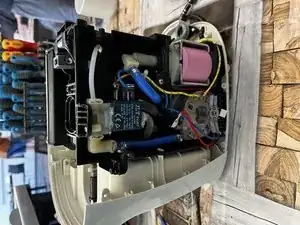
    • Carefully lift off the lid (cable control unit!)

    There is a one important missing step before runing a spudger around the lid to loosen the clips.
    there is one additional screw under the red (Max )button , you need to remove the selecon lid cover unscrew this last one before trying to remove the Lid

    Farkad Ba -

  5. JoUXATIBwCfqjXW1
    • Pull out the back cover upwards

  6. 6VZKmSJY3i5W1LIn
    6VZKmSJY3i5W1LIn
    Qeu2ypHcrVlKLEr3
    hCwGt4bhyCQoxGBH
    • remove the 2 screws with a Phillips screwdriver

    • Remove the right side panel

Conclusione

Work through the steps in reverse order to reassemble your device.

hainzy

Membro da: 23/03/23

5227 Reputazione

0 commenti