Introduzione

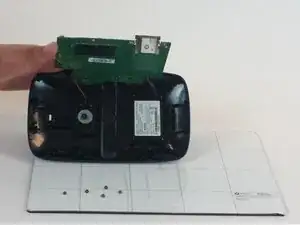
After removing the covering of the device, the main battery will be located underneath the motherboard. The purpose of this battery is to allow the device to operate at full capacity.

  1. XbQMqEs2yyvUu1S1
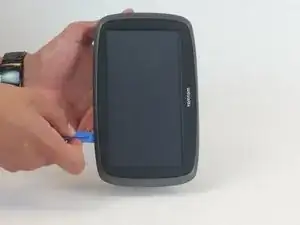
    • Use the iFixit opening tool to pry open the TomTom Go 60 S. Start from a corner and drag the tool around the device.

  2. SjZE2UorNNGGMAZM
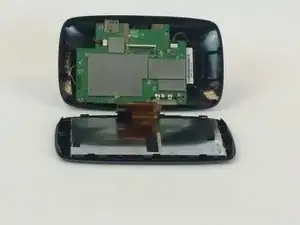
    • Your device should now look like this. Make sure to disconnect the screen from the motherboard by removing the flap connecting both, so you have ample room to work on the device.

  3. ndwRQrelNlKNBWhs
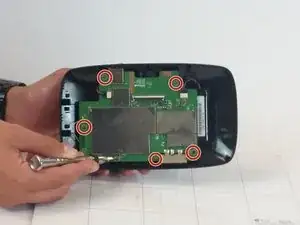
    • Remove all the screws that are marked in the image with a Philips #000 screwdriver and over a magnetic work mat.

    Watch it with these screws. Tom Tom do not want you repairing their stuff so they glue these into the threads. Make sure that you have exactly the correct driver tip that matches the screw head( looks like ph series rather than czs). I had to apply considerable axial force to prevent the screw head from being damaged. One did get damaged so I had to slot the head with a Dremel! Risky with the heat generated.

    Simon Wainwright -

  4. HkGZPErZhP2YdOvL
    • Disconnect battery wires from motherboard, so that you can remove the Lithium-Ion battery.

  5. KFDCKfkdVe3MwYLq
    • Detach from holster and replace Lithium-Ion battery.

Conclusione

To reassemble your device, follow these instructions in reverse order.

Tomy Peralta

Membro da: 04/10/16

133 Reputazione

0 commenti