Introduzione

  1. KqU1FprsE2NlWUsA
    KqU1FprsE2NlWUsA
    EbLDN1YNTbGQFkxh
    • Make sure your computer is turned off and the computer is not plugged in.

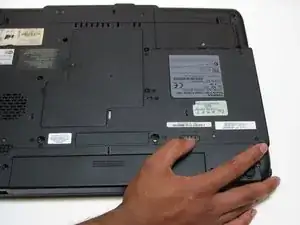
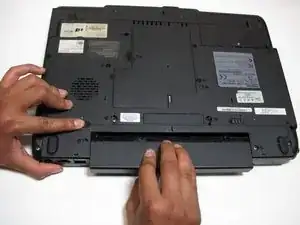
    • Turn your laptop upside down, and slide the right release tab outward.

    • Using you left hand, hold the left release tab towards the left side and then pull the battery out.

  2. tXLvWnLi4U1Y3Rax
    • Flip the laptop over so it is rightside up, and open the laptop all the way so that the screen is horizontal.

  3. LQc2HHWncdVvUgvX
    LQc2HHWncdVvUgvX
    xQyLFRuQOoCHFY6h
    gPE31PQq15U14ATr
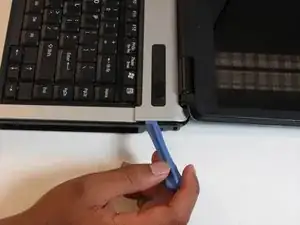
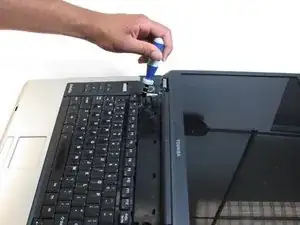
    • Using the plastic opening tool, pry off the panel above the keyboard, starting near the right front speaker.

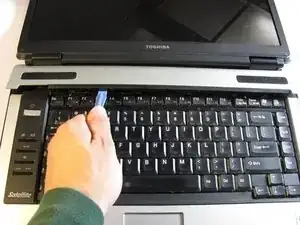
    • Use the plastic opening tool to pop off tabs along the length of this panel.

    • This may feel like you're about to break something, but as long as you work your way down the panel and don't yank it out, the laptop will be fine.

  4. 5M5pFByilfvBgQgk
    5M5pFByilfvBgQgk
    XFZSVBrqUKbqS1PB
    • Unscrew the two 4.5 mm screws holding the keyboard on with the Phillips #1 screwdriver.

  5. SJcqJLHAYB1ScUns
    SJcqJLHAYB1ScUns
    FnpeqHDKgslnOLRT
    1oTWYcCsmKXlZxgP
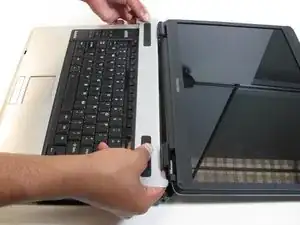
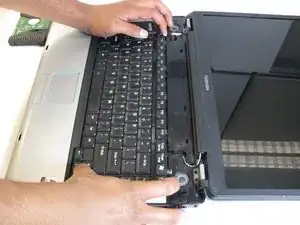
    • Lift the keyboard gently from the side closest the screen.

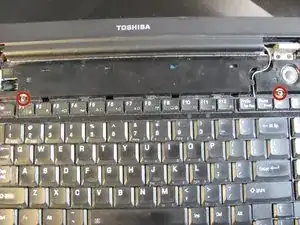
    • Pull out the ribbon connecting the keyboard to the laptop.

  6. CpIis6xXevPNZdmV
    CpIis6xXevPNZdmV
    aUVrh6nJyFiXOJhZ
    aAJBGC1idcJCKEIi
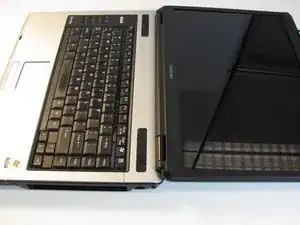
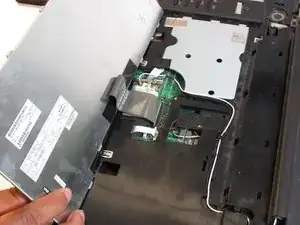
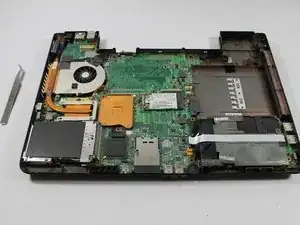
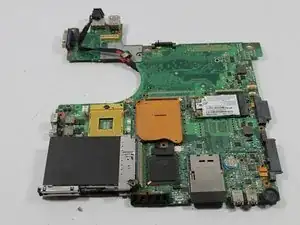
    • Remove the upper half of laptop and place bottom half in the center of your workspace.

    • Remove the one 2.00mm phillips screw.

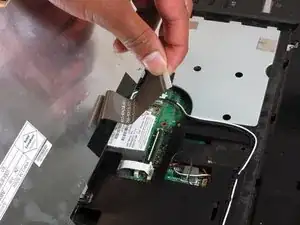
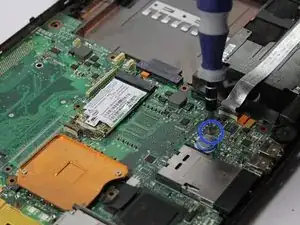
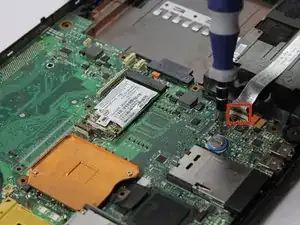
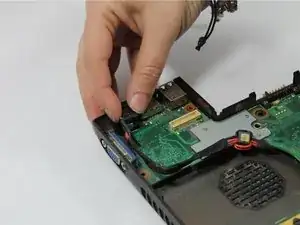
    • Remove the ribbon cable connecting the USB ports to the motherboard.

  7. rwrcnxUHtShXWFwI
    rwrcnxUHtShXWFwI
    muZKkRc3jAhHgNIu
    P2adcpss2tN4NdZL
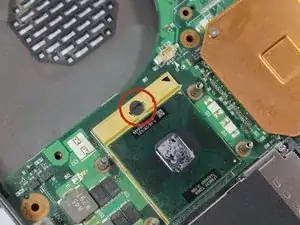
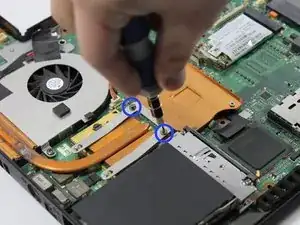
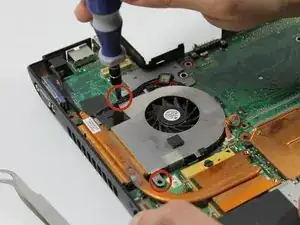
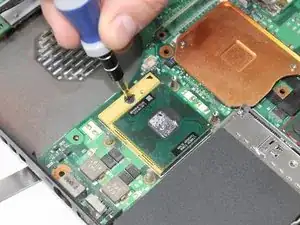
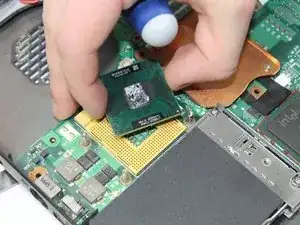
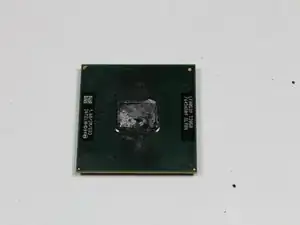
    • Remove the two 2.5mm phillips screws holding the spring retainer for the heat sink.

    • Remove the two 4.0mm phillips screws holding the fan in place.

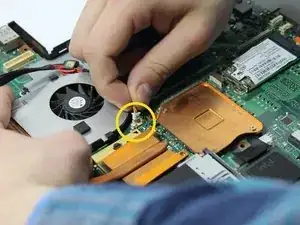
    • Remove the fan power connector.

  8. p4DjPVCswXP2Cnqk
    • Lift fan and heat sink out of case.

  9. E61praWZ3LIG3Ugm
    • Lift the power jack straight up and out of the slots that hold it in.

  10. JEvuGy3WDIWHHJOd
    JEvuGy3WDIWHHJOd
    clg6IvJVE1lO3VcU
    • Lift the motherboard out of the bottom case.

  11. UKHmhYsDJ5sxHJVx
    UKHmhYsDJ5sxHJVx
    wDMq6t5aTENEAfdj
    • Rotate the locking screw holding the CPU in, counter clockwise 180 degrees.

  12. wZ2lw2EIxSO1IwTx
    wZ2lw2EIxSO1IwTx
    PZiYHMNKx5jShZwV
    vtxDByauHYO5mkgv
    • Lift CPU straight out of place.

    • Hold CPU by the sides so you do not damage the small pins.

Conclusione

To reassemble your device, follow these instructions in reverse order.

Josh

Membro da: 12/03/14

685 Reputazione

Un commento

When I replaced the old battery by the new one ,a message "4 minute to full charge ".some one told me there is a process to do .what is this process???

salah_saleh59 -