Introduzione

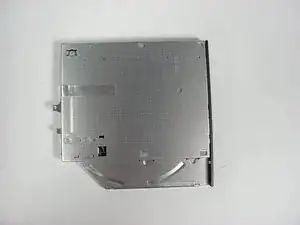
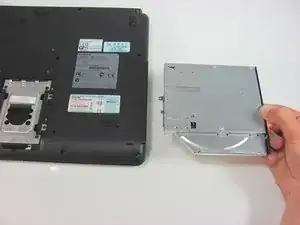
The optical drive reads the CD/DVD when inserted into the laptop. It is not unusual for the optical drive to go stop working or malfunction as there are numerous moving parts. This device is designed to be easily replaced in the case it does malfunction.

  1. 6PvUPOJHQIYAYUfL
    6PvUPOJHQIYAYUfL
    yoZEVkKjxVJCDQBl
    LVIwIUaeQqSgEQxQ
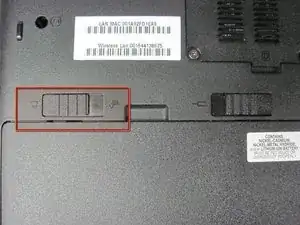
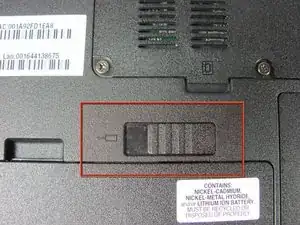
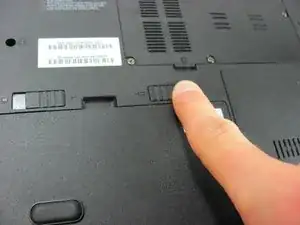
    • Make sure the battery lock switch is switched to the unlocked position.

    • The battery is unlocked when the battery lock switch is slid to the side with an image of an unlocked lock.

  2. THHqDxNA6MXFkTwi
    THHqDxNA6MXFkTwi
    vwNqrMfSEBV5ITIL
    • Slide the battery release switch to the left.

    • The switch is spring loaded, so you must hold the switch in place while removing the battery.

  3. XPvCrG255Cx3wDUL
    XPvCrG255Cx3wDUL
    mirIw4JqnSe4HREv
    • Using a finger, lift up the battery.

    • The battery release switch must be held in place.

  4. 3uy5BPmQvQOQcQc4
    3uy5BPmQvQOQcQc4
    QohYAcfbFTI3sXxZ
    XLnBCSWtILJyCS1v
    • Remove the two screws holding the hard drive panel down.

    • These screw are permanently fastened to the panel; they are designed to be removed only partially.

  5. TRwjVtTOESsHpDZA
    • Use a finger to lift up on the tab and remove the panel.

  6. KRaUC12UBhkUUEDJ
    KRaUC12UBhkUUEDJ
    YOZHl5nnVDoroQ4h
    • Remove the screw that holds in place the optical drive.

    • One 4.6 mm Phillips screw.

  7. IimTnlD1WRxaSISX
    IimTnlD1WRxaSISX
    BB4uUFarnOBWMJnJ
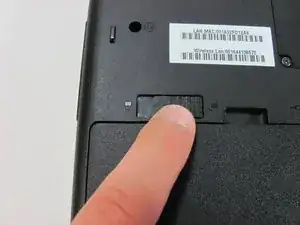
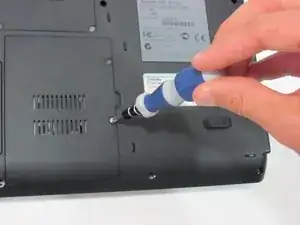
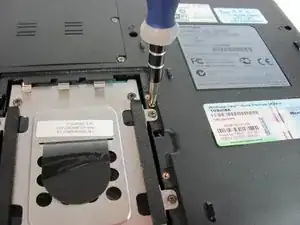
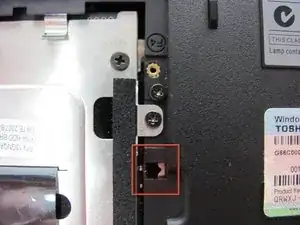
    • Locate the small rectangular hole and insert the spudger.

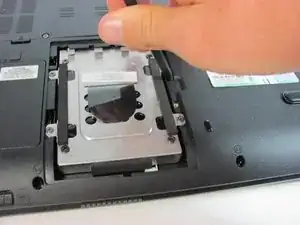
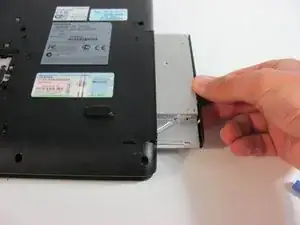
    • Gently slide the metal flange to the right to dislodge the optical drive.

  8. hGIPgj6ToRw4qSB1
    • The optical drive will become partially exposed.

  9. qmbqjMQtT5Pnhi6A
    qmbqjMQtT5Pnhi6A
    MxTTaBxCmmRhqCCg
    • Pull the optical drive to remove it from the computer body.

Conclusione

To reassemble your device, follow these instructions in reverse order.

Stephen Sippel

Membro da: 16/04/13

194 Reputazione

0 commenti