Introduzione

Use this guide to remove the Toshiba Satellite P55t-A5116 RAM.

  1. CADLvF5LdkXipRSr
    CADLvF5LdkXipRSr
    wts6drfPDYm2lJ4I
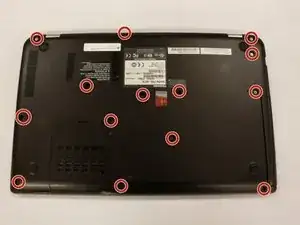
    • Close laptop and turn it upside down

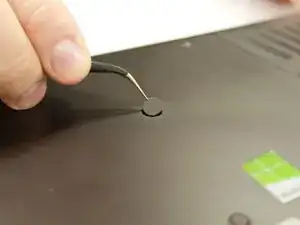
    • Remove the 14 circular rubber covers with tweezers along with one smaller more cylindrical rubber cover.

  2. THlrAcKoxvU2OKvH
    THlrAcKoxvU2OKvH
    bbVIAQOKKVIPOmmJ
    • Using the #PH0 screw head, remove 14 (5.7 mm) screws from the back casing.

  3. j13kleImC3UAxvqp
    j13kleImC3UAxvqp
    oxSsXPVEeFRRsNIL
    vKamp5fhccpD6QGg
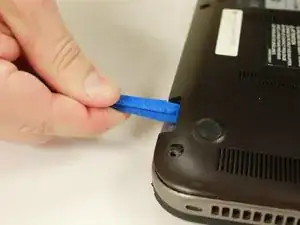
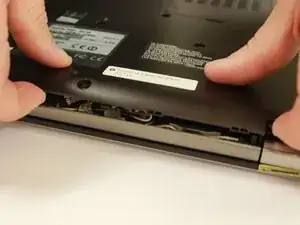
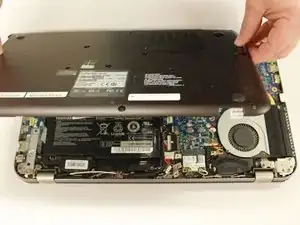
    • Gently pry off the bottom case with the plastic opening tools.

    • Find the seam between the back case and the rest of the laptop casing.

    Great write-up of process, BUT VERY IMPORTANT step to insert after Step 3: With the back off, you will have access to the wide ribbon cable for the keyboard.  See the 2nd and 3rd photos in Step 17 below.  Before doing anything else, flip up the ribbon clamp and remove the ribbon.  Inspect the underside (electrical contact side) of the cable and blow out the connector.  Carefully fully reinstall ribbon cable, but before clamping top back down, pull cable out about the width of a hair.  Then push clamp down.  This will allow tiny pins to contact a fresh spot on the exposed runs.  Then test.  This 100% fixed multiple problems with my keyboard without doing anything else (after buying a new keyboard, now just a spare…)  and saved a TON of time and trouble.  I think some people replace the keyboard and think this is what fixed it, but doing the above would have worked.  I suspect after a few years some galvanic corrosion develops that affects the tiny connections.  This makes new connections which work perfectly.

    Steve Chamberlin -

  4. p3GDSfwIATeEendT
    p3GDSfwIATeEendT
    nerAy426Rw4cXSce
    W1fQOFy5IFGLTlQ1
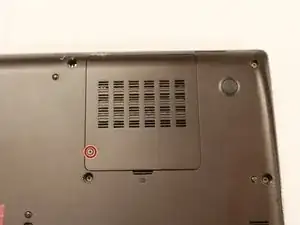
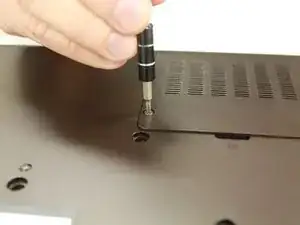
    • Locate the RAM cover on the back of the Laptop.

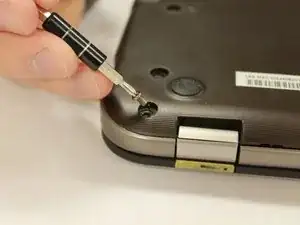
    • Using the #PH0 screw head, remove 1 (5.7mm) screw.

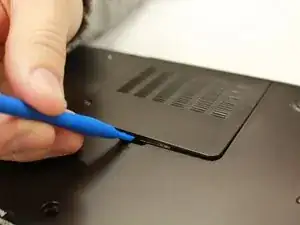
    • Use the plastic opening tool to remove the RAM cover.

  5. ABWBuS14J23AYeuN
    ABWBuS14J23AYeuN
    KRDbF2xFuRu1Fqk6
    5jAOYywdGFpDXvSF
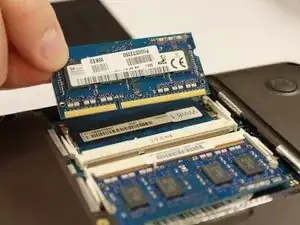
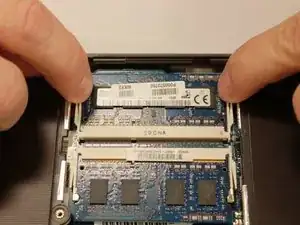
    • Pull out the latches on either side.

    • The RAM should pop up.
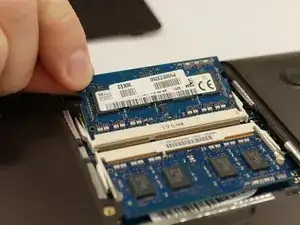
    • Remove the RAM.

    • Repeat for other side.

Conclusione

To reassemble your device, follow these instructions in reverse order.

Brittany Castillo

Membro da: 19/01/17

878 Reputazione

Un commento

I’m confused… it only seems like Step 4 and Step 5 are necessary. Does the battery need to be removed before replacing the RAM? If that’s why Steps 1-3 are there, there’s a lot of steps/information missing. It just goes from “take off the bottom case” to “remove the RAM cover of intact laptop”.

Douggy -