Introduzione

Use this guide to replace the circuit board housing the status LEDs beneath the power button.

  1. yMUJPMnCJJuiSO6X
    yMUJPMnCJJuiSO6X
    14IrWYZVEVr1aEfS
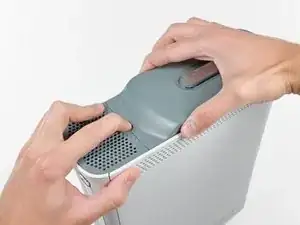
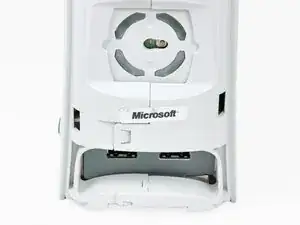
    • Grasp the hard drive assembly and press the release button while lifting its front edge.

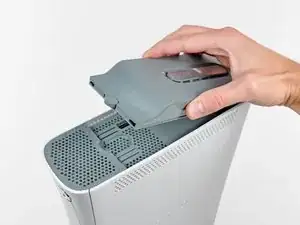
    • Remove the hard drive assembly from the top vent.

    WARNING: Just replacing the drive will not make it work correctly. Microsoft has married the drives to the motherboard. Hence, in order to get full operation out of the drive you'll have to perform more steps not listed here. Search in the FAQ on this specific topic for more details. Otherwise, before buying a new drive, try cleaning the inside of the old one and/or replace the belt involved in opening and closing the drive door.

    - Good Luck

    Eric -

    Thanks..helped!

    joseph zulu -

    bress the button and lift with the same hand! i thought mine was stuck because of this pic!!!

    Maths with Luigi -

  2. J6CIpEaLOoYAQHxb
    • Stand the console vertically with the bottom edge facing up.

    • Throughout the following opening procedure, the finger of an Xbox 360 opening tool can be used in place of a spudger.

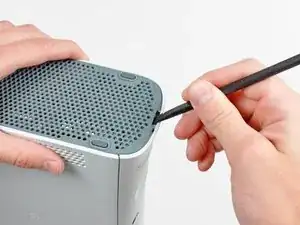
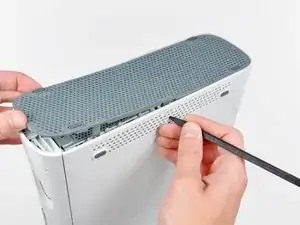
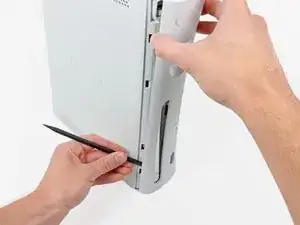
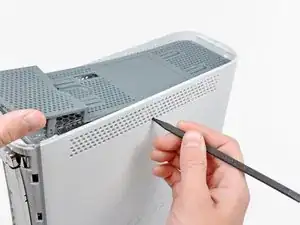
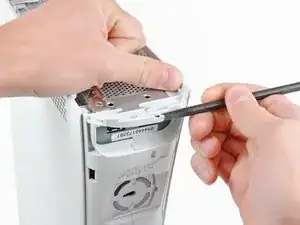
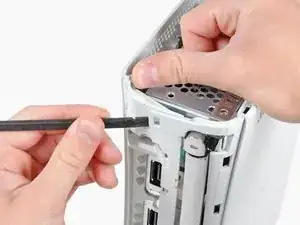
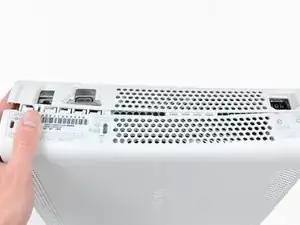
    • Insert the flat end of a spudger or the edge of an Xbox 360 opening tool into the small gap at the front edge of the bottom vent.

    • Pry the front edge of the bottom vent away from the faceplate.

    You can avoid this step by pulling the front cover off. Just make sure you don't break the springs for the USB bay area.

    Repair Doctor -

    Hello, thank you ifix for this guide, I followed this guide, I got stuck at some point but I resolved it. Also I want to share this resource: Step by Step guide to fix Xbox 360 errors it helped me go through all the things associated with Xbox 360 and the troubleshooting of errors. Hope this can also help you all.

    Christopher Sage -

  3. ELe3ImNHnfjH5CMS
    ELe3ImNHnfjH5CMS
    XlYWdcnwtOrB1W3S
    NJBPRBLSExTr3Den
    • In the next few steps, you will use the tip of a spudger or the finger of an Xbox 360 opening tool to release the clips along the left and right sides of the bottom vent. Their locations are highlighted in red.

    • You will insert the tool into the holes molded into the white plastic side case pieces.

  4. MacUdYZ1EwkBWQmW
    MacUdYZ1EwkBWQmW
    kL3iWK2V1YIMoyBX
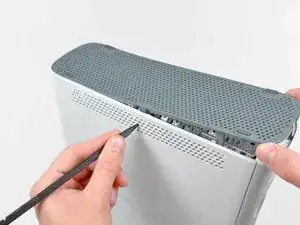
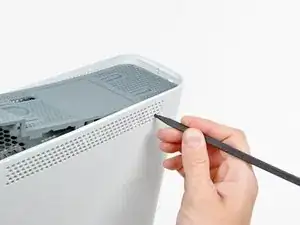
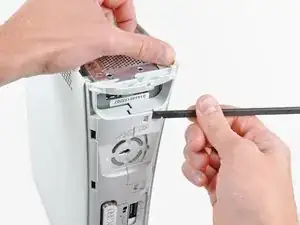
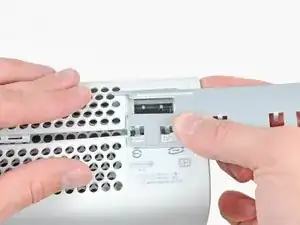
    • To release the clips, work from the front edge of the bottom vent.

    • While slightly lifting the front edge of the bottom vent, use the tip of a spudger to push the clips closest to the front of the bottom vent towards the inside of the console.

  5. vPypAIcA45sMw4Y4
    vPypAIcA45sMw4Y4
    o6vXGPFRiS5OhrXC
    • Repeat the same process to release the two center clips on the bottom vent.

  6. HS2EJegmA2DGOAE1
    HS2EJegmA2DGOAE1
    3VgWioIEgIExHeDa
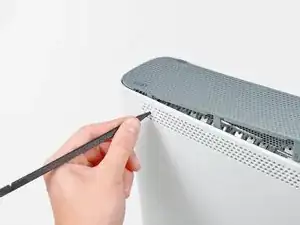
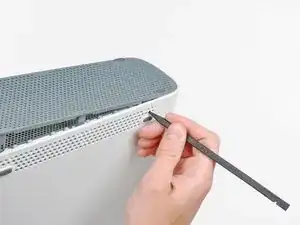
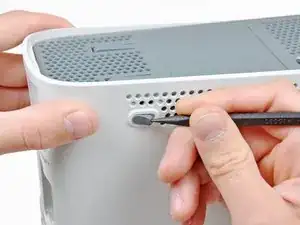
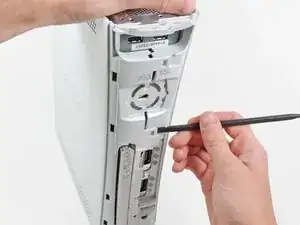
    • Use the tip of your spudger to release the clips on the bottom vent nearest the back of the Xbox.

  7. IIcCSDqQGMSuBFJW
    • Remove the bottom vent from the 360.

  8. K34QYfxVrrftatym
    K34QYfxVrrftatym
    ytuwV2efqMfxRndW
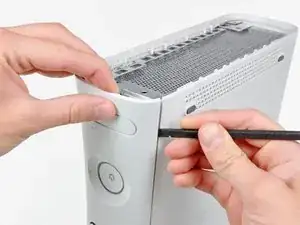
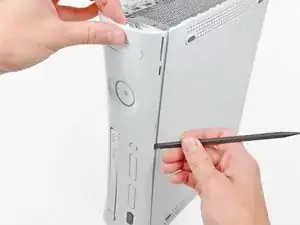
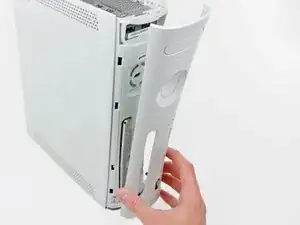
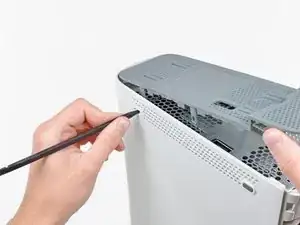
    • Insert the flat edge of a spudger between the faceplate and the outer casing near the power button.

    • Run your spudger along the edge of the faceplate to release the clips securing it to the front of the console.

    • You may also accomplish this task by using the edge of the Xbox 360 opening tool, but it may scratch the plastic case.

    • Alternatively, you can use your hands to carefully pull the faceplate away from the Xbox.

    The faceplate just pulls off, using a tool is completely unneccessary. https://beta.support.xbox.com/help/xbox-...

    Erik Tomlinson -

  9. xM4CxhxJnIT4eHCA
    • Repeat the same motions as previously mentioned to release the left side of the faceplate.

  10. uqjqI2HkmxeYCGNH
    • Remove the faceplate from the front face of the console.

  11. HMMFtOmkPd6YTvo4
    HMMFtOmkPd6YTvo4
    CM3dOusgANm2syl1
    • Stand the console vertically with the top edge facing up.

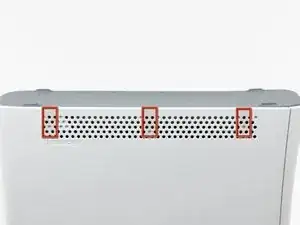
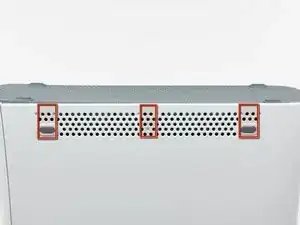
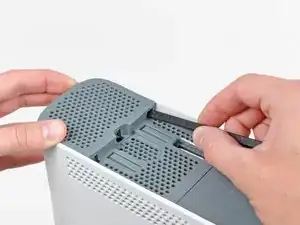
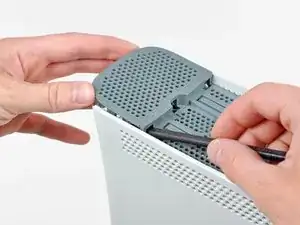
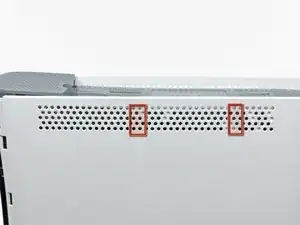
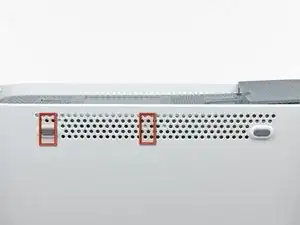
    • The top vent is secured to the console via clips. The first two clips are located underneath the top vent closest to the faceplate, as shown in the pictures.

  12. hLQONPwYWw5wwuku
    hLQONPwYWw5wwuku
    vG3S2NKpGQNSJi2m
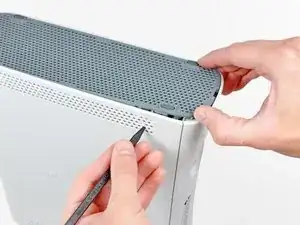
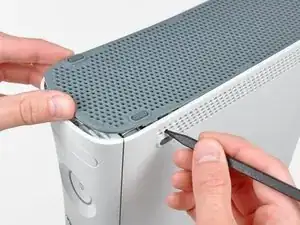
    • Insert the flat end of a spudger into the small gaps previously mentioned to release the clips.

    • You may also use the long finger of an Xbox 360 opening tool to accomplish this task.

    I found it easier to open these clips using the pointy end of the spudger rather than the flat end. Just slide it in against the side of the case and the clip will pop off.

    dave -

  13. Jcd3cuuefWPTrKGO
    Jcd3cuuefWPTrKGO
    ESFwEvEAkCyE1Y51
    GHihpIrQVQUlSBCN
    • In the next few steps, you will use the tip of a spudger or the finger of an Xbox 360 opening tool to release the clips along the left and right sides of the top vent. Their locations are highlighted in red.

  14. cLODuehWcnPCYpHx
    cLODuehWcnPCYpHx
    ZNDntxLmkPnmgeDd
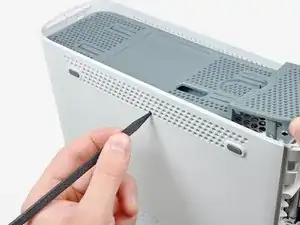
    • To release the clips, work from the middle of the top vent.

    • While slightly lifting the front edge of the top vent, use the tip of a spudger to push the clips closest to the center of the top vent towards the inside of the console.

  15. 3NS6J5nJKAOQxDdZ
    • Use the tip of your spudger to release the clip on the top vent nearest the back of the Xbox's upper case.

  16. satartHPCh3cCoKK
    satartHPCh3cCoKK
    pfYZbHEZFGAGpkAw
    • The last clip is hidden underneath the rubber foot nearest the back of the console.

    • Use the tip of your spudger to release the clip on the top vent nearest the back of the Xbox.

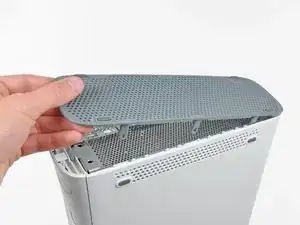
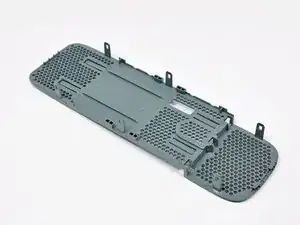
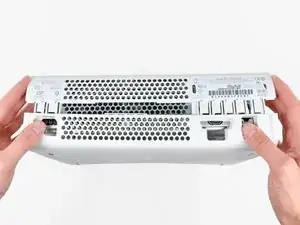
    • Remove the top vent from the 360.

  17. IyFVa2YVF16dYNPr
    • Stand the console vertically with the top edge facing down.

    • Carefully peel the warranty sticker off the console.

    There is an alternate to breaking the seal. If you open the back first starting with the opposite side of the sticker you can get the rear to "Clam Open" retaining the seal.

    Eric -

    LOL “Romove the warenty seal”

    Alexander Wiand -

  18. bfLLW2eb1mul2OvC
    bfLLW2eb1mul2OvC
    nGyMgcPrm6q5alKf
    PatF4YGqcIFHXTGM
    • The upper and lower cases are attached via several latches, located in the front and back of the console. These latches must be disengaged to separate the upper case from the console.

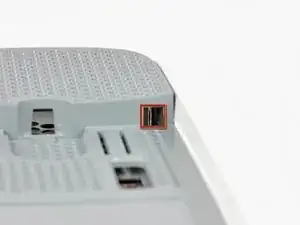
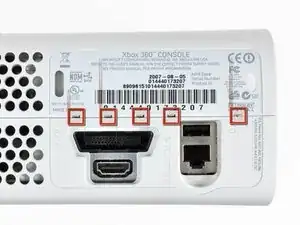
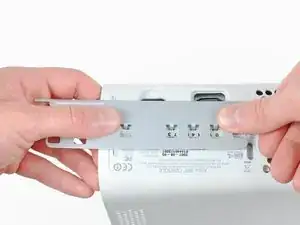
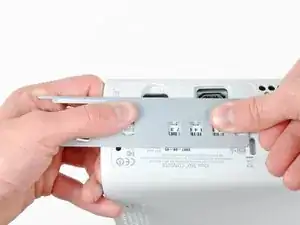
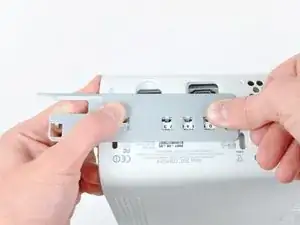
    • Use the flat end of a spudger to release the following latches:

    • Above the front-facing USB ports.

    • Beneath the front-facing USB ports.

    • Above the Memory Unit slots.

  19. 3xXd6DhVwt4ibPIW
    • Insert the flat end of a spudger and pry upwards to release the last remaining latch located above the eject button.

  20. G54PXDV62XGnhhuV
    • Slightly lift the front portion of the lower case to ensure that the latches in the front have been completely released.

  21. xCaY2FIFFFI4Isfv
    xCaY2FIFFFI4Isfv
    RSrCtVYWkTQCbQaq
    • The upper and lower cases are held together by seven release latches located on the back of the console. Their locations are highlighted in red.

  22. Yujni1lYPGpADBlS
    Yujni1lYPGpADBlS
    kOdJT5HjlrWoW44h
    FaKq6NRVtQOZjelM
    • Press the Xbox 360 opening tool down into the clips securing the lower case to the upper case near the I/O ports.

    • While pressing down on the tool, push the lower and upper cases apart to separate the retaining clips.

    I didn't have an XBox tool, so I followed instructions in this video for this step (https://www.youtube.com/watch?v=qaxIB6cX...) to pry it open with your fingers and a screwdriver.

    Nick Karnik -

    The small (metal) women's hair clip is best for un-latching the tabs. The screw drivers just make the holes bigger.

    Denny Ross -

    You can also use the pointed end of a plastic spudger to push each clip free while you separate the case with your free hand.

    Michael Carson -

  23. IAAAOka4GMbPLtIU
    IAAAOka4GMbPLtIU
    r1n4vHDX1G6iMJg5
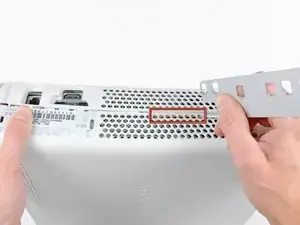
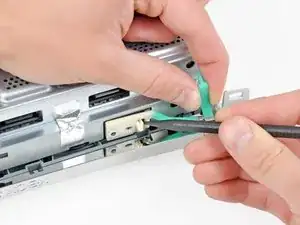
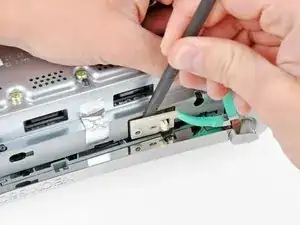
    • While pushing the upper and lower cases apart, use the tip of a spudger or the finger of an Xbox 360 opening tool to push the long clip highlighted in red toward the center of the 360.

    • The clip should release, leaving the clips near the power connector as the only thing holding the upper and lower cases together.

  24. ONLOcaEGdYN5F5XJ
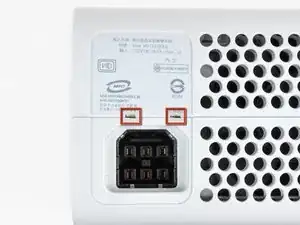
    • Press the Xbox 360 opening tool down into the two remaining clips near the power connector.

    • Push the upper and lower cases apart to fully release the retaining clips.

  25. jrKfppdCFKeYeJTs
    • Orient the console so that the front portion is facing downwards.

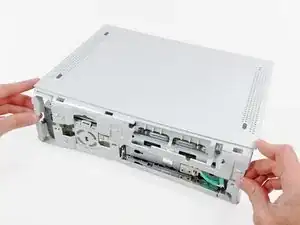
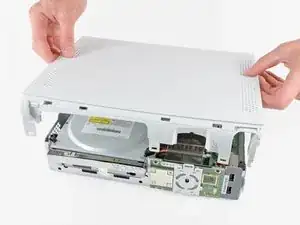
    • Grasp the back portion of the lower case and lift it upwards to separate it from the console.

    • Be careful not to excessively bend the lower case near the power plug, as it can crack easily.

  26. vKpq2mTLPKe6FEdf
    vKpq2mTLPKe6FEdf
    hPMYNsCmxTPh1auj
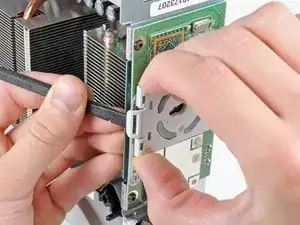
    • Use the tip of a spudger to release the clip securing the eject button to the metal casing.

    • Insert the flat end of a spudger between the eject button and the optical drive.

    • Pry the eject button off its retaining posts and remove it from the 360.

    • This can also be accomplished using an Xbox 360 opening tool.

  27. xWrVtTRiATabXKR5
    • Remove the six silver 64 mm T10 Torx screws securing the upper case to the metal casing.

  28. xK4P5MWDdRargYm4
    • Orient the console so that the upper case is facing upwards.

    • Lift the upper case straight up and remove it from the console.

  29. ZSmjLcCYQEUKygYa
    ZSmjLcCYQEUKygYa
    FRQvN2yl6RUUDVyC
    HtEeYorMfpLy5gAh
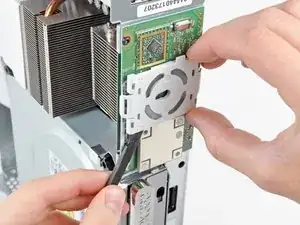
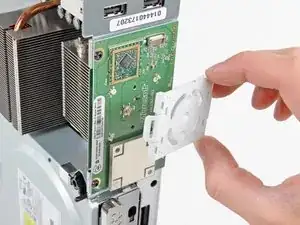
    • Use the flat end of a spudger to release the clips securing the plastic RF module shield along the top and the left edge of the power button board.

    • Lift and remove the RF module shield from the console.

  30. YPRNWTHSPQIPHQyS
    • Remove three 5.6 mm T8 Torx screws securing the RF module to the metal chassis.

  31. R4FPd3kN3NPn4BrL
    R4FPd3kN3NPn4BrL
    qoKHwOaglTpVAHTY
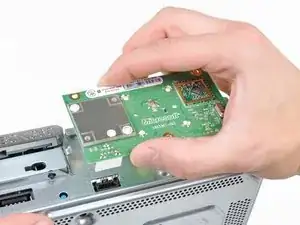
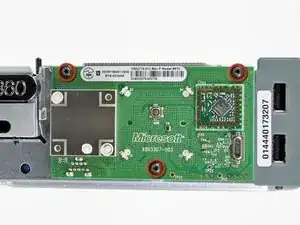
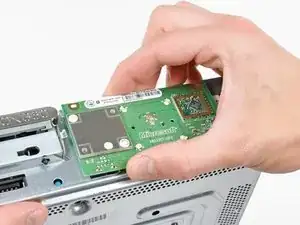
    • Grasp the RF module and lift it straight up to disconnect it from its socket on the motherboard.

    • Remove the RF module from the console.

    I can fix it now after reading your article,and I bought Gotor RF board on amazon,it looks good.

    Maybe it can help you.

    1261693729 -

Conclusione

To reassemble your device, follow these instructions in reverse order.

Walter Galan

693762 Reputazione

Un commento

Just out of curiosity, what does it mean when there is the marking AC above the chipset to the right of the Microsoft logo? Is it a different kind of board? Or just a variant on the console lifetime?

Jonathon Theys -