Introduzione

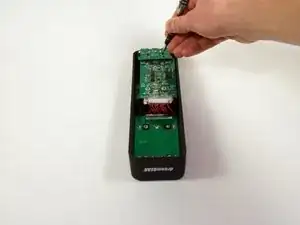
The motherboard is the heart and soul of any electronic device. Learn how to replace it!

  1. fWXOkYmkGGgbe6jE
    fWXOkYmkGGgbe6jE
    5YYOfLwMIIuK3EtV
    • Remove the rubber foot pads on the bottom of the device using a plastic opening tool.

  2. xYZwFrCVpBBmHfS6
    xYZwFrCVpBBmHfS6
    jdMYOrHSGHjvXGyG
    • Remove the six 2 mm PH0 screws on the bottom of the device.

    • Four of those screws are located under the foot pads.

  3. CW5EChNAKIKbwTxh
    • Gently remove the bottom of the device.

  4. S3okWpXCPoVDXtOr
    S3okWpXCPoVDXtOr
    6fQYQwJyMWyJGIbn
    • Remove the four 1.8 mm J1 screws.

    • Remove the two 2mm PH0 screws.

  5. 6VXuMDTcSWennQvk
    • Gently pick up the mother board

    • Pick the mother board straight up or you may risk damaging the mini-USB charging ports.

  6. HTFG12rGmqtPXACJ
    HTFG12rGmqtPXACJ
    ZrDKWbfvJAEKSkUT
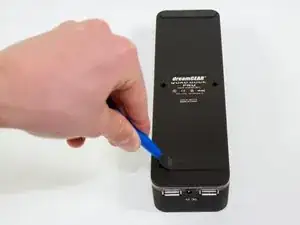
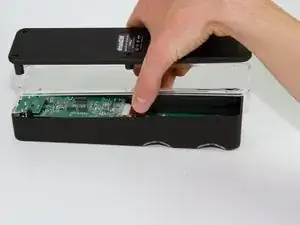
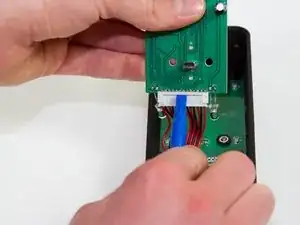
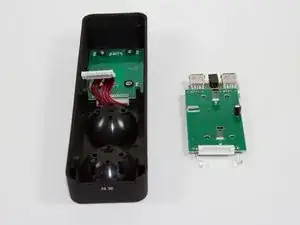
    • Use a plastic opening tool or similar tool to gently pry the power ribbon cord out of its port.

Conclusione

To reassemble your device, follow these instructions in reverse order.

Jacob

Membro da: 11/03/15

757 Reputazione

0 commenti