
Introduzione
Your optical drive no longer works? Does it refuse to read CDs and DVDs? He grinds then ejects them all? All is not lost, all it takes is a little cleaning that won't cost you anything.
Strumenti
-
-
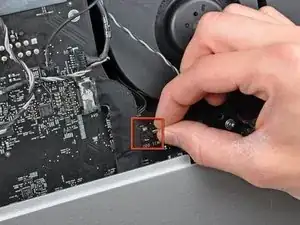
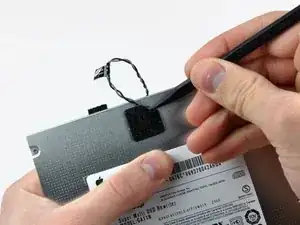
Pull the optical drive thermal sensor connector straight away from its socket on the logic board.
-
-
-
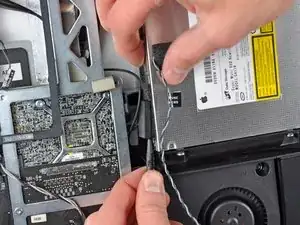
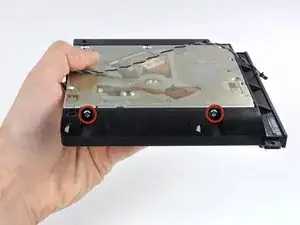
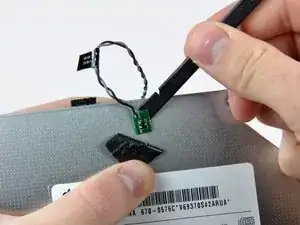
Insert a spudger between the optical drive connector and the optical drive.
-
Twist the spudger to slightly separate the optical drive connector from the optical drive, then use your fingers to pull the connector away from the drive.
-
-
-
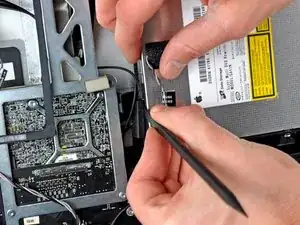
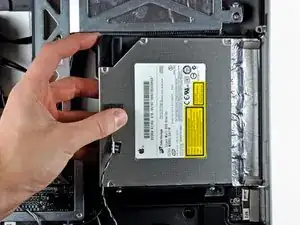
Lift the left edge of the optical drive slightly and pull it away from the right side of the outer case.
-
During reassembly, note that there are two holes in the optical drive face plate into which two stubby plastic posts must engage for proper positioning.
-
-
-
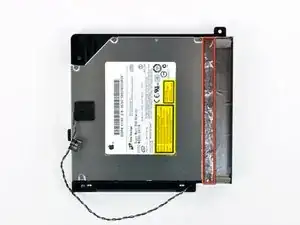
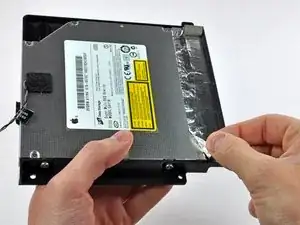
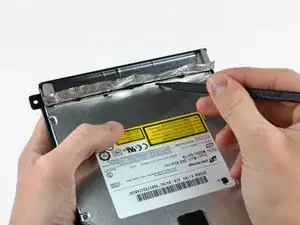
Peel back the portion of aluminum tape highlighted in red, leaving the rest attached to the black plastic optical drive bracket.
-
-
-
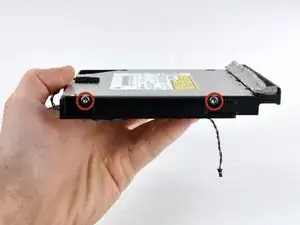
Use the tip of a spudger to press each of the optical drive bracket tabs out of their slots on the bottom of the optical drive.
-
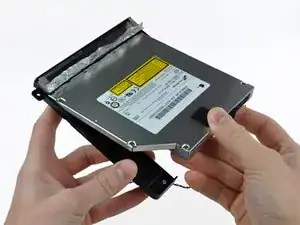
Rotate the optical drive bracket slightly away from the optical drive.
-
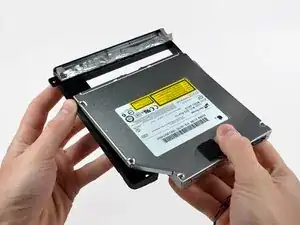
Pull the optical drive bracket away from the open end of the optical drive, minding any tabs that may get caught.
-
-
-
Use the tip of a spudger to peel back the piece of foam tape covering the optical drive thermal sensor.
-
Use the flat end of a spudger to carefully pry the thermal sensor up off the adhesive securing it to the optical drive.
-
If you have a disc or anything else stuck inside your optical drive, we have a guide to fix it.
-
-
-
Follow all super drive replacement steps for disassembly. Step 8 is absolutely unnecessary for the repair. Do not peel off the sensor from the optical drive.
-
Once the reader has been disassembled, all you have to do is unscrew the 5 small screws from the reader cover (the side where there are the labels). Remove the cover once the screws have been removed;
-
Plug in your vacuum cleaner and gently vacuum the entire interior, including the lens (beware of vacuum cleaners that are too powerful).
-
With a cotton swab previously dipped in rubbing alcohol, gently clean the lens.
-
reassemble the cover with the screws and reassemble everything.
-
Once everything is reassembled, start and cross your fingers. Usually it's just a dust issue.
-
Enjoy!!!
-
To reassemble your device, follow the instructions in reverse order.

Is it possible to use the DVD drive after installing the SSD, or is there no space left?
Joel -
Yes, it is possible. The SSD fits below the dvd drive; it doesn't replace it
Dan -