Introduction
With this guide, you can replace the SSD (Solid State Drive) currently in your Lenovo Yoga C930-13IKB laptop. An SSD is a newer kind of data storage device that does not have any moving parts, unlike the common Hard Disk Drives (HDD). SSDs are faster, more durable, and use less energy. The SSD can be replaced if it is faulty or if you would like to upgrade it.
The SSD card is easy to access and remove. You only need to remove the back cover to access the SSD, and then remove the fasteners attaching the SSD to the motherboard. For this guide, you will need a plastic opening tool, a T5 Torx screwdriver, and a Phillips #00 screwdriver.
-
-
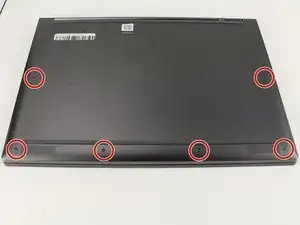
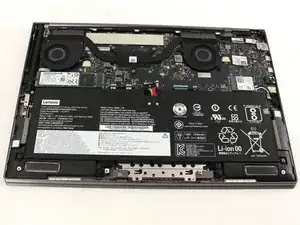
Flip the device over so that the underside is facing up.
-
Remove the six 3.5 mm T5 Torx screws.
-
-
-
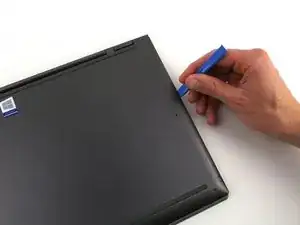
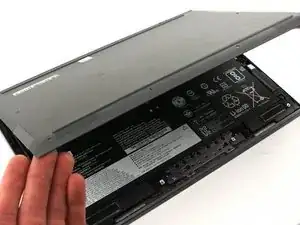
Pry off the back cover using the plastic opening tool.
-
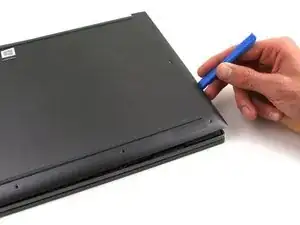
Loosen the back cover in multiple spots using the opening tool, then remove the whole back.
-
-
-
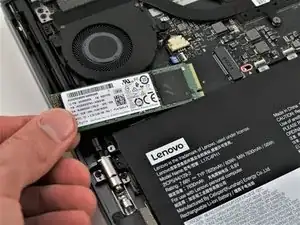
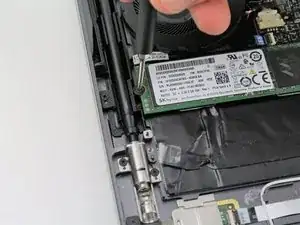
Remove the screw ( 2 mm with a 5 mm head) that connect the SSD to the motherboard using a Phillips #00 screwdriver.
-

To reassemble your device, follow these instructions in reverse order.

3 comments
I need to remove the stripped screw on the SSDs non-slot-end because Lenovo tightened it down with a military grade drill. To replace, it wasn’t mentioned which size screw was there.
Ty for the info but I'm looking to get windows installed onto the blank new hard drive so I can actually run and use it, lol! Unfortunately, the "automatic" registration process didn't work and my product key isn't to be found. In fact, my Microsoft account doesn't even have it registered as a device. But it does have it as a device I loaded apps from the Play Store though. So, there's proof it existed. Anywho, I'm stuck trying to get Windows on it before I re-install the hard drive. Any ideas are more than welcome! Thanks, M.H.
Good guide. I took the following steps and it went quickly and smoothly. Less than an hour start to finish:
1. I purchased a Samsung 980 (not Pro, but should also work).
2. Disabled bitlocker on my old SSD. I also backed up the key for future ref.
3. Downloaded and installed the Samsung SSD Magician and migration tools.
4. Put the new SSD into an external enclosure ($18 on Amazon).
5. Ran the migration software and copied my windows 11 to the new SSD.
6. Shutdown the laptop and swapped the SSDs.
7. Rebooted into windows.
8. Ran the Samsung Magician software and updated the SSD firmware.
9. Done and perfect.