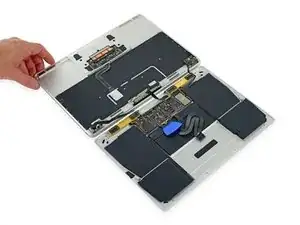
Introduzione
Guida solo prerequisita per l'apertura del MacBook senza scollegare del tutto la copertura inferiore.
-
-
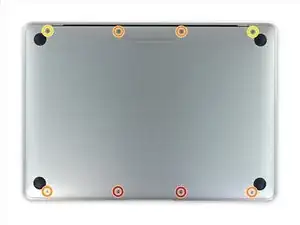
Svita le seguenti otto viti che tengono ferma la copertura inferiore:
-
Due viti Pentalobe P5 da 1,8 mm
-
Quattro viti Pentalobe P5 da 2,9 mm
-
Due viti Pentalobe P5 da 6,1 mm
-
-
-
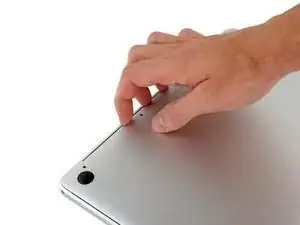
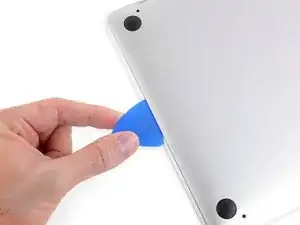
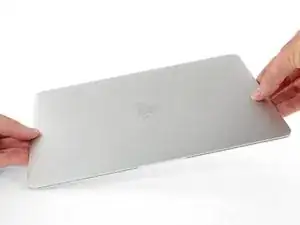
Infila le dita tra la copertura inferiore e quella superiore, iniziando dal retro del MacBook, tra le cerniere.
-
Tenendo una presa salda, solleva costantemente la copertura inferiore finché non si separa leggermente da quella superiore.
-
-
-
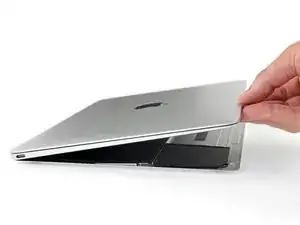
Mentre tieni ferma la copertura inferiore, gira attentamente il MacBook in modo che il logo Apple sia rivolto verso l'alto.
-
-
-
Solleva insieme la copertura superiore e lo schermo dal bordo anteriore ad un angolo di circa 45°.
-
-
-
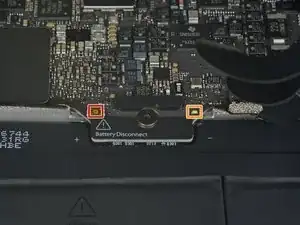
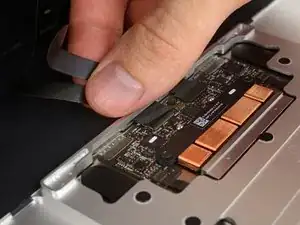
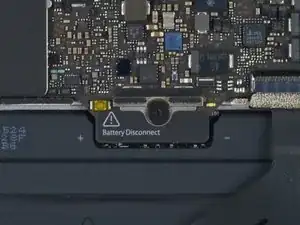
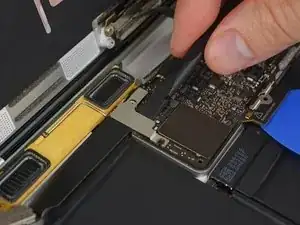
Usa la parte piatta di uno spudger per tenere premuto il tasto dorato " battery disconnect".
-
Se il LED di alimentazione è acceso, continua a tenere premuto il tasto finché il LED si spegne, quindi rilascialo. Questo può richiedere fino a 10 secondi.
-
Se il LED non si accende, rilascia il tasto dopo 5-10 secondi. Premilo ancora per 5-10 secondi, quindi rilascialo. Infine, premilo ancora per 5-10 secondi e rilascialo.
-
-
-
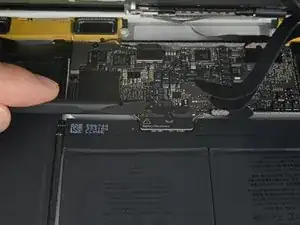
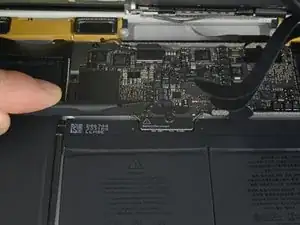
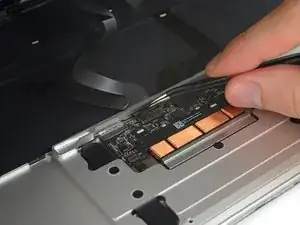
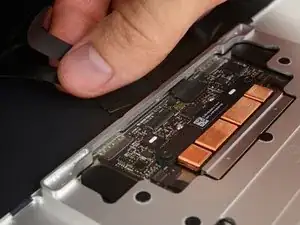
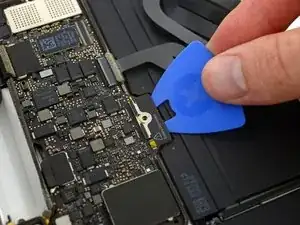
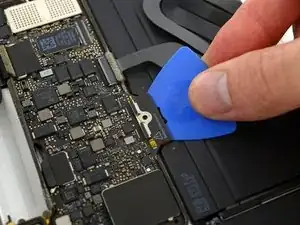
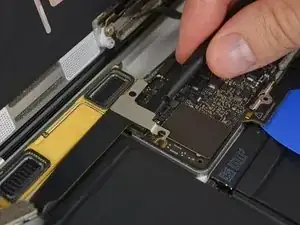
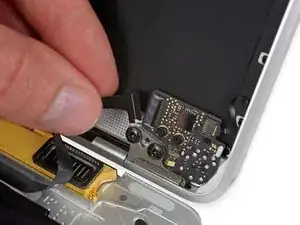
Usa delle pinzette per rimuovere il nastro nero che copre il connettore ZIF del cavo del trackpad.
-
-
-
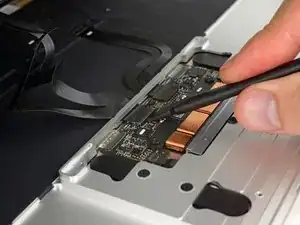
Usa uno spudger per ruotare attentamente verso l'alto l'aletta di bloccaggio sul connettore ZIF del cavo del trackpad.
-
-
-
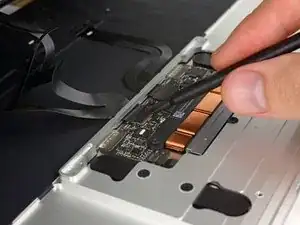
Scollega il cavo a nastro del trackpad dal trackpad stesso tirandolo delicatamente attraverso la sua fessura nella cornice.
-
-
-
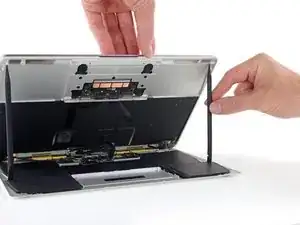
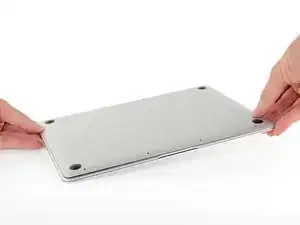
Ruota attentamente il MacBook in modo che la copertura inferiore sia appoggiata al piano.
-
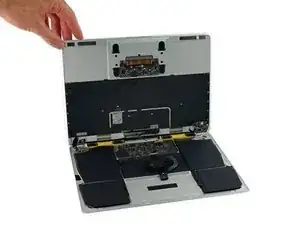
Ruota la copertura superiore/gruppo dello schermo ad un angolo di circa 90° e appoggialo contro qualcosa di robusto in modo da non doverlo tenere.
-
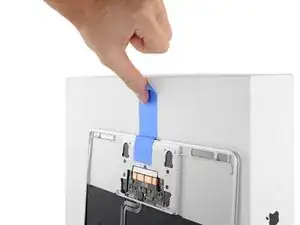
Aggiungi un pezzo di nastro adesivo vicino al trackpad per fissarlo alla copertura superiore ed evitare dei movimenti accidentali.
-
-
-
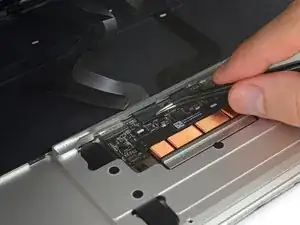
Come precauzione aggiuntiva, puoi scollegare fisicamente la batteria infilando un blocco per batterie tra la scheda madre e il connettore della batteria.
-
-
-
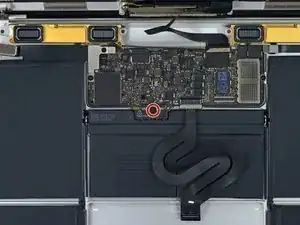
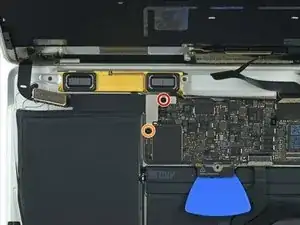
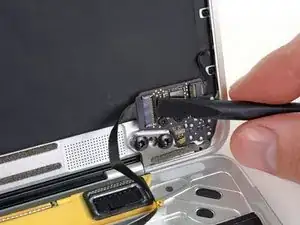
Svita le due viti che tengono ferma la copertura del cavo della porta USB-C.
-
Una vite Tri-Point Y00 da 1,1 mm
-
Una vite Torx T5 da 3,5 mm
-
-
-
Usa la parte piatta di uno spudger per scollegare la copertura del cavo della porta USB-C tirandola verso l'alto dalla scheda madre.
-
-
-
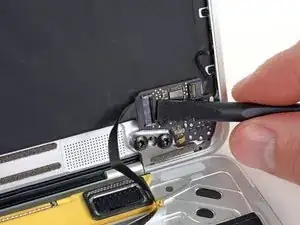
Usa uno spudger per ruotare verso l'alto l'aletta di bloccaggio sul Connettore ZIF del cavo della scheda della presa jack.
-
-
-
Scollega il cavo a nastro della scheda della presa jack sfilandolo parallelamente al connettore ZIF.
-


Per rimontare il dispositivo, segui le istruzioni in ordine inverso.

If, like me, you didn’t have a P5 Pentalope screwdriver but did have one that fits an iPhone.
You can sand down the tip until it’s the right size.
Stuart -
Thank you Stuart! I would never have thought of this and it worked perfectly.
R McP -
Hello,
where do I plug the USB-C to USB-A cable on MacBook MacBook Pro (Retina, 15-inch, Mid 2015)
I can’t any port suitable for USB-c !??
sissi -
My MacBook had P4 pentalobe screws, notP5
Greg Lavardera -
Big thanks to Jeff for such thorough and detailed instructions. This is definitely a more advanced repair so if you're not comfortable with making such repairs, like having experience working on iPhones, computers, etc., you might think twice before attempting. It's very helpful to read all the instructions thoroughly before starting. Plan on 3 to 4 hours—the battery removal along with its adhesive is a real $@$*-show, but totally doable if you followed Jeff's recommendations.
I'll post a few tips in the comments on each step that I think is worth noting but I will mention here one of the trickier steps. ZIF connectors on the flat cables can be a little tricky, especially if you have never done these. Before attempting to do the first one (step 8) review the others in steps 16, 20, and 25. You'll get a better sense of how these little retaining flaps flip up and what they actually look like when you study each photo in each step—they are very tiny and fragile.
Steven Gibson -
Just finished replacing the battery. I followed the directions that came with the battery instead of this guide. In short, Steps 15 to 35 are not necessary. You don't have to completely disassemble the laptop to replace the battery.
Andrew Mohan -
Thanks. I skipped it too and it worked.. It was a painstaking to remove the two side batteries as the cables were connected. But a little patience gets the job done. I did however remove the audio jack connector but from the audio board. Removed the display connector and the usb-c bracket to get the bottom case free.
Paras Tolani -
READ EVERY STEP, AND EVERY COMMENT FOR THAT STEP BEFORE ATTEMPTING! Go slow. Think first. Be organized. No probs.
David Nagle -