
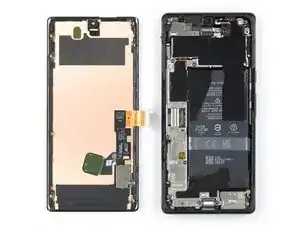
Introduzione
Questa guida di riparazione è stata redatta dallo staff di iFixit ma non è stata approvata da Google. Leggi di più sulle nostre guide qui.
Questa è una guida prerequisita! Questa guida fa parte di un'altra procedura e non è pensata per essere usata da sola.
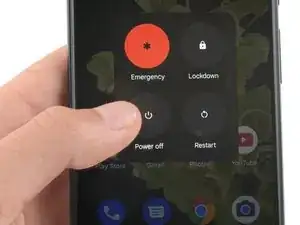
Usa questa guida per disconnettere la batteria del tuo Google Pixel 6 Pro.
-
-
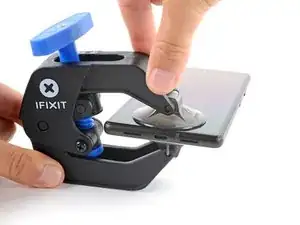
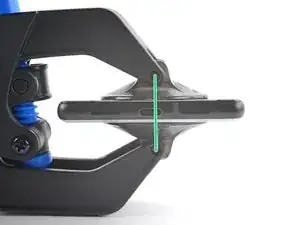
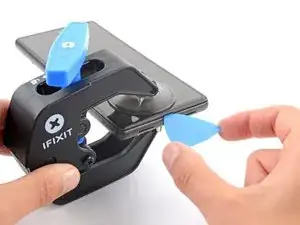
Tira indietro la maniglia blu per sbloccare i bracci dell'Anti-Clamp.
-
Fai scorrere le braccia oltre il bordo sinistro o destro del telefono.
-
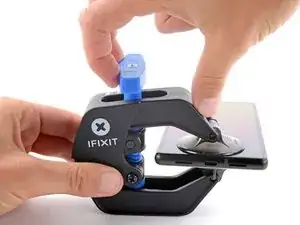
Posiziona le ventose vicino al bordo inferiore del telefono, una nella parte anteriore e una nella parte posteriore.
-
Premi le tazze insieme per fargli fare presa.
-
-
-
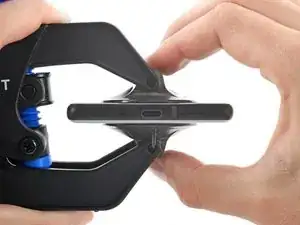
Tira in avanti la maniglia blu per bloccare i bracci.
-
Ruota la maniglia in senso orario di 360 gradi o fino a quando le ventose iniziano ad allungarsi.
-
Assicurati che le ventose rimangano allineate l'una con l'altra. Se iniziano a scivolare fuori allineamento, allenta leggermente le ventose e riallinea i bracci.
-
-
-
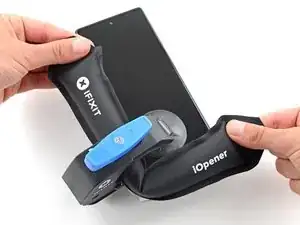
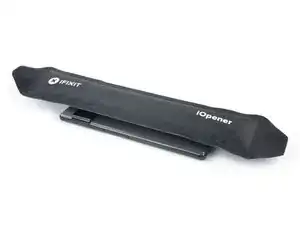
Riscalda un iOpener e fallo passare attraverso i bracci dell'Anti-Clamp.
-
Piega l'iOpener in modo che poggi sul bordo inferiore del telefono.
-
Attendi un minuto per dare all'adesivo la possibilità di staccarsi e presentare uno spazio di apertura.
-
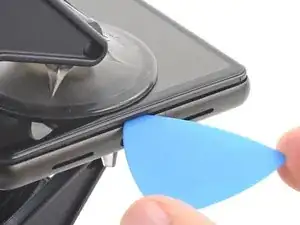
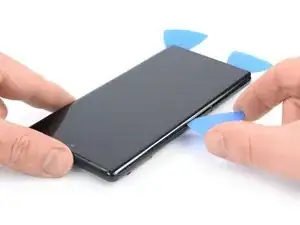
Inserisci un plettro di apertura sotto la cornice dello schermo quando l'Anti-Clamp crea uno spazio sufficientemente ampio.
-
Salta i due passaggi successivi.
-
-
-
Applica un iOpener riscaldato sullo schermo per ammorbidire l'adesivo sottostante. Applica l'iOpener per almeno 3 minuti.
-
-
-
Quando lo schermo è caldo al tatto, applica una ventosa sul lato inferiore dello schermo.
-
Solleva lo schermo, compreso il suo telaio di sicurezza, con la ventosa per creare un piccolo spazio tra lo schermo e telefono.
-
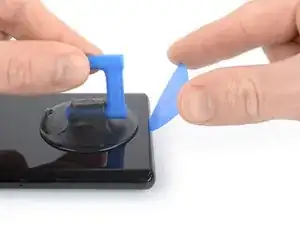
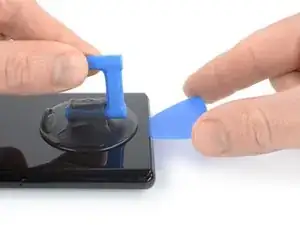
Inserisci un plettro nello spazio tra la cornice dello schermo e il telefono.
-
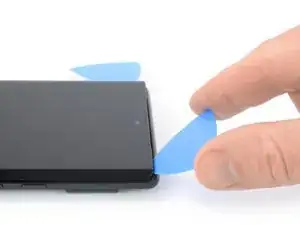
Fai scorrere il plettro verso l'angolo inferiore sinistro dello schermo per tagliare l'adesivo.
-
Lascia il plettro in posizione per evitare che l'adesivo si riattacchi.
-
-
-
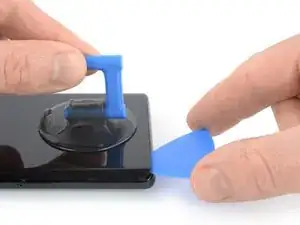
Inserisci un secondo plettro sul bordo in basso e fallo scorrere verso l'angolo inferiore destro dello schermo per tagliare l'adesivo.
-
Lascia il plettro in posizione per evitare che l'adesivo si riattacchi.
-
-
-
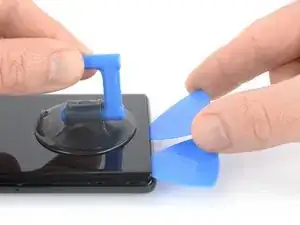
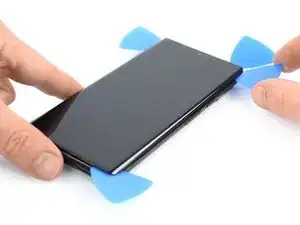
Inserisci un terzo plettro sotto l'angolo inferiore sinistro dello schermo.
-
Fai scorrere il plettro lungo il bordo sinistro dello schermo per tagliare l'adesivo.
-
Lascia il plettro nell'angolo in alto a sinistra per evitare che l'adesivo si riattacchi.
-
-
-
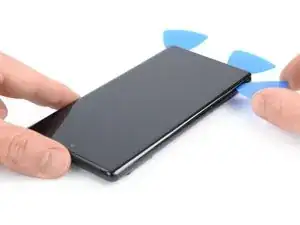
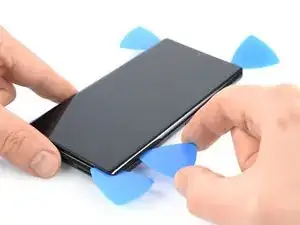
Inserisci un quarto plettro nell'angolo in alto a sinistra dello schermo.
-
Fai scorrere il plettro lungo il bordo superiore del telefono per tagliare l'adesivo.
-
Lascia il plettro nell'angolo in alto a destra per evitare che l'adesivo si riattacchi.
-
-
-
Inserisci un quinto plettro e fallo scorrere lungo il bordo destro del telefono per tagliare l'adesivo rimanente.
-
-
-
Piega con cautela lo schermo sul lato sinistro del telefono come se aprissi la copertina di un libro.
-
-
-
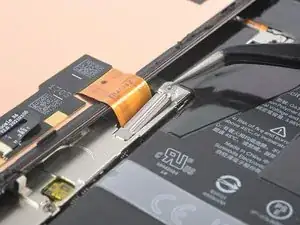
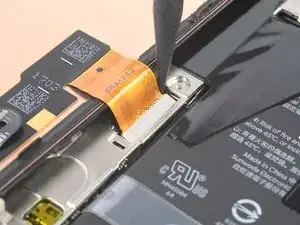
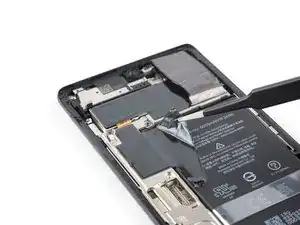
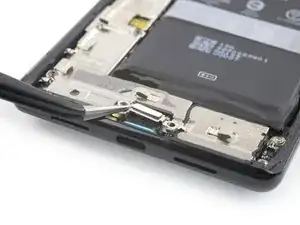
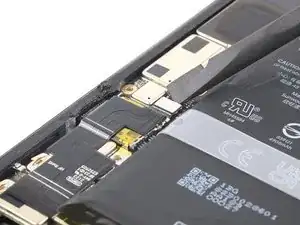
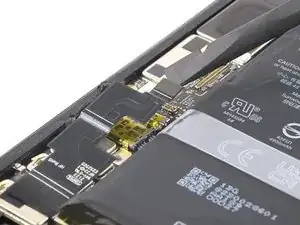
Usa un cacciavite Torx T3 per rimuovere la vite Torx Plus 3IP lunga 2,0 mm che fissa la staffa metallica del cavo del display.
-
-
-
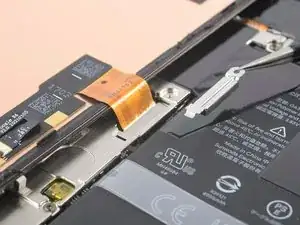
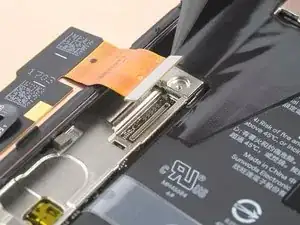
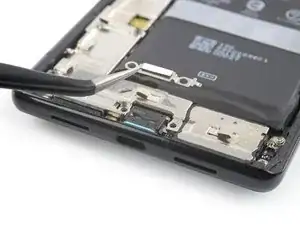
Usa un paio di pinzette per rimuovere la staffa metallica che si trova sopra il connettore del cavo del display.
-
-
-
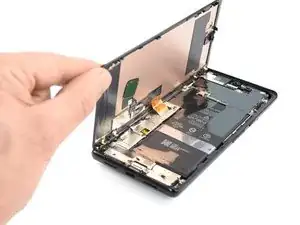
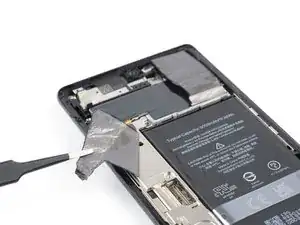
Usa uno spudger per scollegare il cavo a nastro del display sollevando il connettore dalla sua presa.
-
-
-
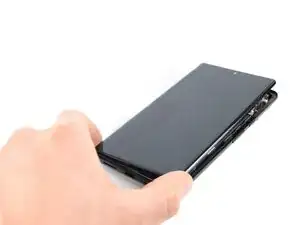
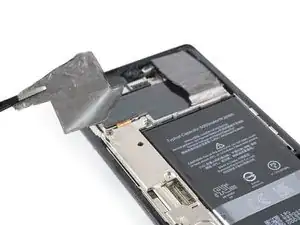
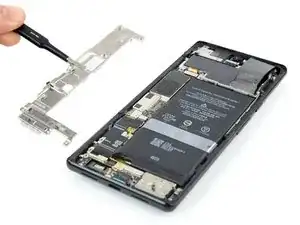
Rimuovi lo schermo.
-
Se hai sostituito lo schermo, controlla il foro della fotocamera frontale e l'incavo del sensore sul tuo nuovo schermo di ricambio e rimuovi eventuali pellicole residue.
-
Questo è un buon momento per testare il tuo telefono prima di chiuderlo. Collega temporaneamente lo schermo, accendi il telefono e verifica che funzioni come previsto. Prima di continuare con il rimontaggio, spegni il telefono e scollega lo schermo.
-
Segui questa guida nel caso in cui stai utilizzando delle strisce adesive tagliate su misura.
-
Segui questa guida nel caso in cui stai utilizzando un foglio adesivo pretagliato.
-
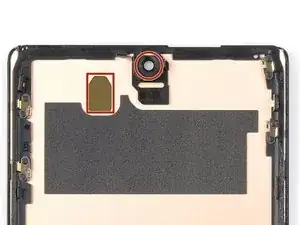
Se stai installando uno schermo nuovo, segui questa guida per calibrare il sensore di impronte digitali.
-
-
-
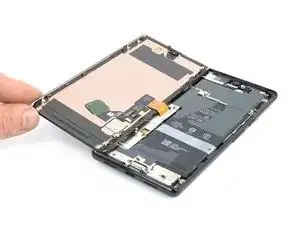
Applica un iOpener scaldato o una pistola termica sul vetro posteriore per staccare l’adesivo sotto alle pellicole di grafite sopra la batteria. Lascia l’iOpener appoggiato per almeno due minuti.
-
-
-
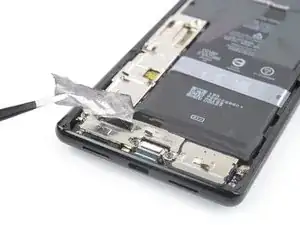
Usa un paio di pinzette a punta smussata o un'unghia pulita per staccare con cura la pellicola di grafite nera dal bordo inferiore della batteria e dalla protezione della scheda madre.
-
Rimuovi la pellicola di grafite.
-
-
-
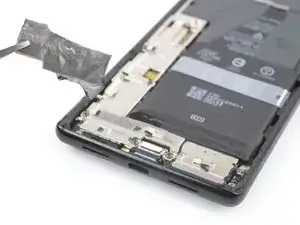
Usa un paio di pinzette a punta smussata o un'unghia pulita per staccare con cura la pellicola di grafite nera dall'angolo in alto a destra della batteria.
-
Piega la pellicola di grafite in direzione della fotocamera frontale per avere libero accesso alla batteria.
-
-
-
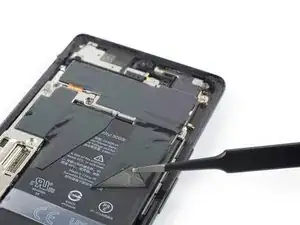
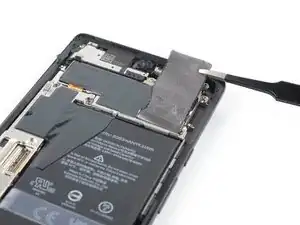
Usa un paio di pinzette a punta smussata o un'unghia pulita per staccare con cura la pellicola di grafite nera dal bordo sinistro della batteria e dalla protezione della scheda madre.
-
-
-
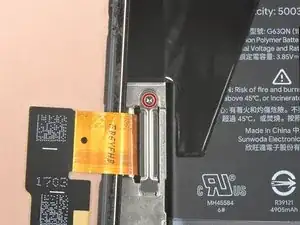
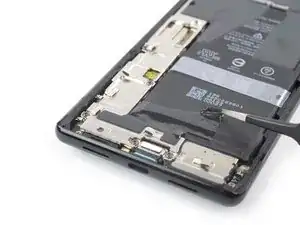
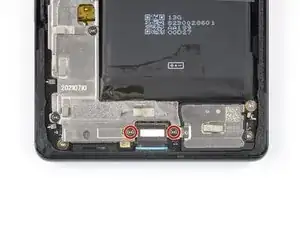
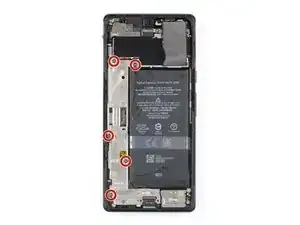
Usa un cacciavite Torx T3 per rimuovere le cinque viti lunghe 5,1 mm 3IP Torx Plus che fissano la copertura della scheda madre.
-
-
-
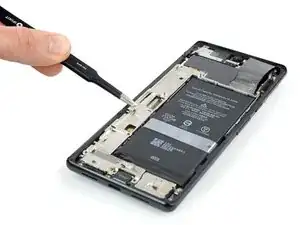
Usa un paio di pinzette o le dita per rimuovere molto delicatamente la copertura della scheda madre.
-


Per riassemblare il dispositivo, segui queste istruzioni al contrario.
