Introduzione
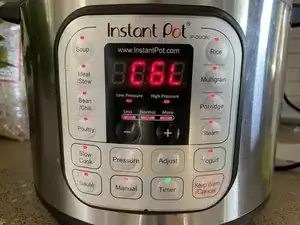
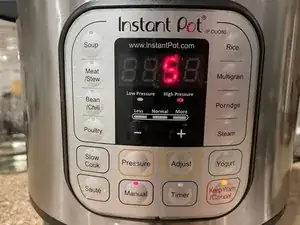
La tua Instant Pot mostra il temuto errore C6 mentre emette degli allarmanti bip? Segui questa guida per diagnosticare cosa non va ed imparare come risolverlo!
Gli errori C6, C6L, e C6H significano che uno dei sensori della pressione non sta funzionando. Il più delle volte è dovuto ad un accumulo sui contatti del sensore. Pulire i contatti probabilmente risolverà il problema.
Questa guida è stata scritta per una Instant Pot DUO80, ma la procedura generale può essere applicata a diverse pentole a pressione elettriche, in quanto la maggior parte usano elettronica e sensori simili.
-
-
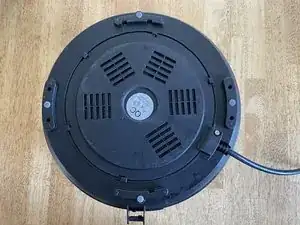
Gira la Instant Pot a testa in giù.
-
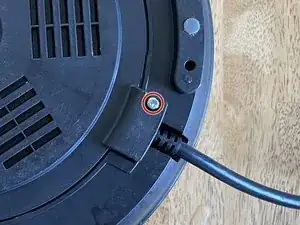
Usa un cacciavite Torx T15 per svitare la vite che tiene ferma la placca inferiore.
-
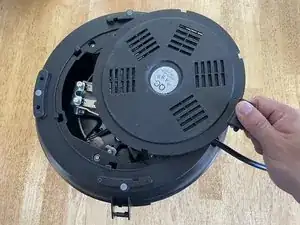
Ruota e rimuovi la placca inferiore.
-
-
-
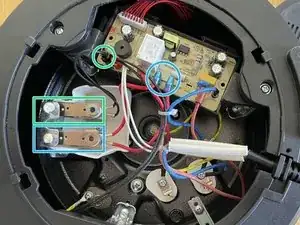
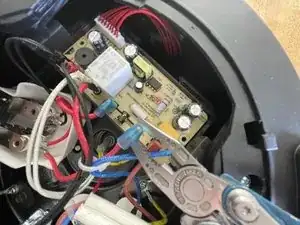
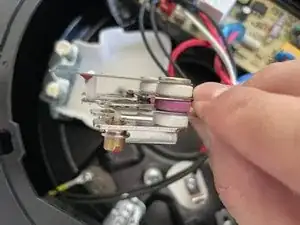
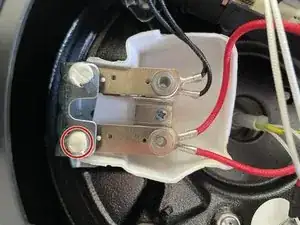
Il sensore T6L (bassa pressione) ed il suo connettore. Alcuni modelli potrebbero non averlo.
-
Il sensore T6H (pressione alta) e i suoi connettori.
-
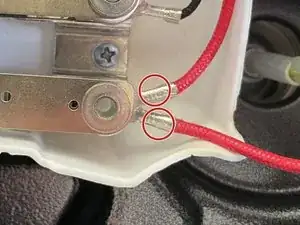
Le viti sotto la resina bianca sono delle viti di calibrazione.
-
-
-
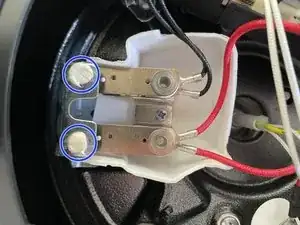
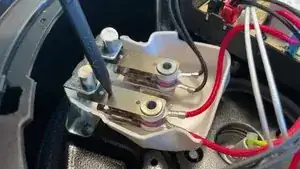
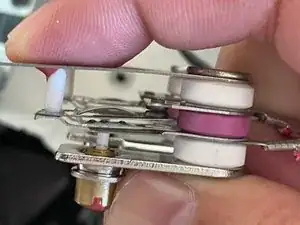
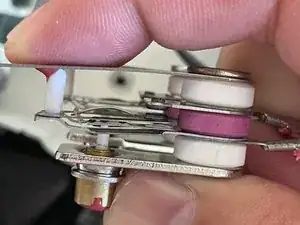
Usa uno spudger o le dita per premere con decisione la parte superiore del sensore. Dovresti sentire uno scatto rumoroso, il che significa che le strisce di metallo nel sensore si piegano come dovrebbero.
-
Ripeti per l'altro sensore.
-
Alcune volte, il solo piegare il sensore risolverà il problema. Rimonta attentamente la Instant Pot e controlla se funziona.
-
Se la Instant Pot non funziona, stacca la corrente e segui i passaggi seguenti per meglio diagnosticare il problema.
-
-
-
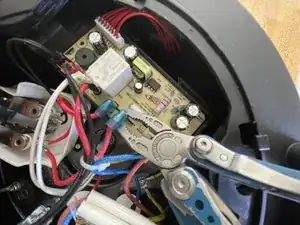
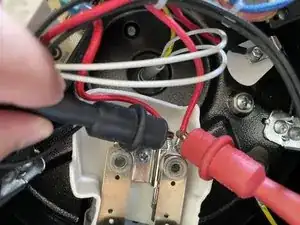
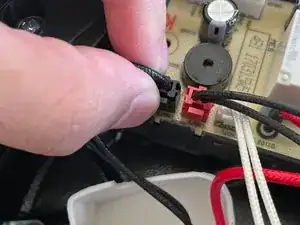
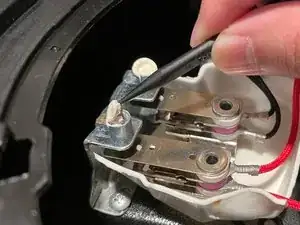
Usa delle pinze o le dita per sollevare e scollegare un connettore a forcella del sensore dalla scheda logica.
-
Questi connettori sono ben saldi. Fai ondeggiare delicatamente il connettore mentre lo tiri per liberarlo.
-
-
-
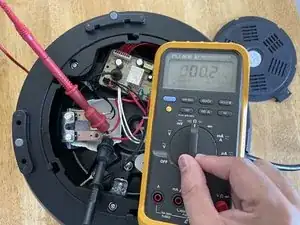
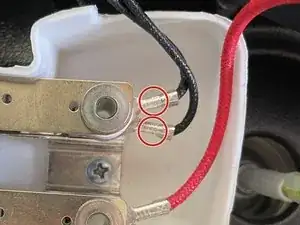
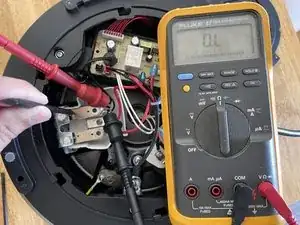
Collega i contatti di un multimetro/ohmmetro ad entrambe le estremità esposte del cavo del sensore, assicurandoti che i contatti non si tocchino.
-
Imposta il tuo multimetro in modalità resistenza o continuità.
-
-
-
Se il multimetro mostra una resistenza elevata o nessuna continuità, potrebbe significare che i contatti del sensore sono sporchi. Ricontrolla i contatti del multimetro ed assicurati che facciano contatto con i cavi.
-
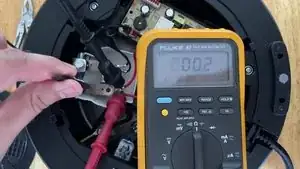
Usa uno spudger o le tue dita per premere con decisione sul sensore finché non scatta.
-
Il multimetro dovrebbe mostrare nessuna continuità (0.L nel mio caso). Se non lo fa, c'è un potenziale corto circuito: i contatti potrebbero essere fusi, o potresti dover sostituire il sensore.
-
-
-
Scollega il sensore della bassa pressione schiacciando il suo connettore sulla scheda logica per rilasciare il blocco, quindi tiralo verso l'alto.
-
Collega i contatti di un multimetro ad entrambe le estremità del cavo del sensore, assicurandoti che i contatti non si tocchino.
-
Imposta il tuo multimetro in modalità resistenza/continuità e provane la continuità, quando il sensore è a riposo, e quando è premuto.
-
-
-
Se le tue prove suggeriscono che potresti avere i contatti sporchi, o sospetti che i contatti siano fusi, segui i prossimi passaggi per rimuovere i sensori e pulirli.
-
Usa un cacciavite a croce Phillips per svitare la vite che fissa i sensori alla Instant Pot.
-
Solleva il gruppo del sensore dal suo alloggio.
-
-
-
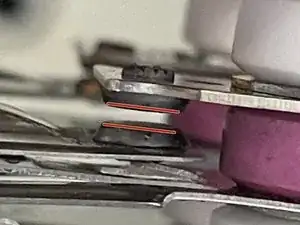
Premi sul sensore per aprire i contatti.
-
Usa della carta vetrata, una lima, o un pulitore per contatti elettrici per pulire i contatti. Assicurati di pulire entrambe le superfici di contatto.
-
-
-
Usa un multimetro per provare se il sensore funziona correttamente prima di rimontare la tua Instant Pot.
-
-
-
Installa il sensore di pressione di ricambio e riassembla l'Instant Pot.
-
Aggiungi 3 tazze di acqua all'Instant Pot e impostalo per cuocere sotto pressione elevata per cinque minuti.
-
Una volta trascorsi i cinque minuti, sfiata con un rapido rilascio.
-
-
-
Scollega la tua Instant Pot e smontala fino a quando potrai accedere ai sensori di pressione.
-
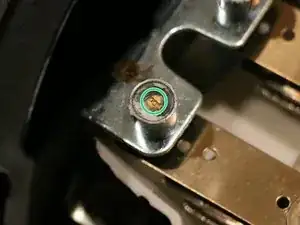
Utilizza uno spudger per sollevare l'adesivo bianco che copre la vite di calibrazione del sensore di pressione alta.
-
Questo rivela la testa piatta della vite di calibrazione.
-
Se il tuo Instant Pot sta sovrapressurizzando, usa un cacciavite per girare la vite in senso orario (avvitandola) di un quarto di giro. Questo fa sì che il sensore scatti e si spenga a una temperatura più bassa.
-
Se il tuo Instant Pot sta sottopressurizzando, usa un cacciavite per girare la vite in senso antiorario (svitandola) di un quarto di giro. Questo fa sì che il sensore scatti e si spenga a una temperatura più alta.
-
Riassembla l'Instant Pot e esegui il test di pressione nel passo precedente. Riaggiusta la vite di taratura secondo necessità.
-
Dopo aver tarato l'Instant Pot, copri la vite di taratura con del silicone o adesivo resistente al calore. Ciò impedisce che la vite di taratura si giri.
-


Per rimontare il tuo dispositivo, segui le istruzioni in ordine inverso.

46 commenti
We almost had to throw some food away because the “C6 L” error in the middle of making dinner. Your instructions were clear and fixed the issue. Thanks Arthur!
Kyle P -
Thanks for this helpful tutorial?
Great and informative presentation! The pictures show exactly what to do and make everything perfectly clear. In my case, I was able to clean the contacts and the pot is back to working order. It took more time to find my multi-meter than it did to fix the problem. As a bonus, I had to look up what a “spudger” is… Now I can stop calling it that “stick thingy.” ?
Jerry Z -