Introduzione
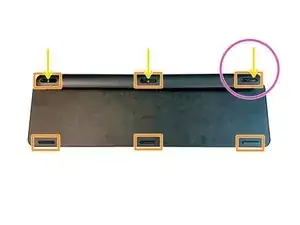
1. Rimuovere le alette di gomma sul retro:
Le tre alette superiori sono necessarie in questo passaggio ma rimuoverai comunque le tre inferiori in seguito, dunque è consigliabile rimuoverle tutte e sei assieme.
2. Svita le tre viti al di sotto delle tre alette in gomma superiori:
nel nostro caso l'adesivo le copriva
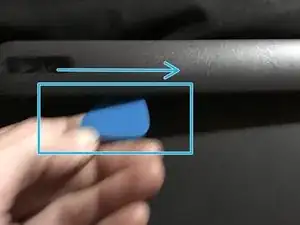
3. Usa il kit di strumenti /plettri di apertura iFixit per aprire il coperchio
4. Rimuovi la batteria:
Scollega e rimuovila, è leggermente incollata sulla parte posteriore
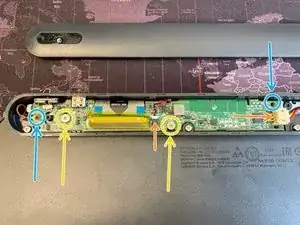
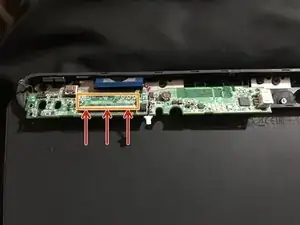
5. Svita la piccola vite nera sul PCB che blocca il cavo dell'antenna
6. Svita il PCB:
Tre tipi di viti a testa grossa in argento
7.Rimuovi il PCB
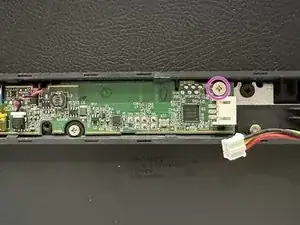
8. Scollega il cavo dati:
Solleva il nastro adesivo, poi la parte bianca / il connettore si tira su per rilasciare il cavo
9. Rimuovi tutte le viti nere e argentate
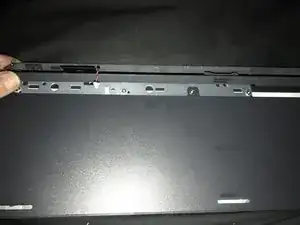
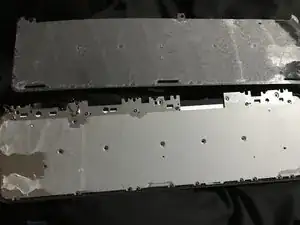
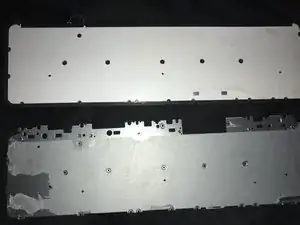
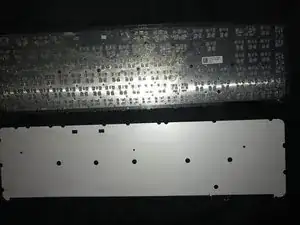
10. Il coperchio del pannello posteriore:
Inizia dalla parte superiore sinistra e solleva e tira molto lentamente fino a rimuoverla. È piuttosto robusta ma l'adesivo è molto forte, dunque prenditi il tempo necessario per questo passaggio.
11. Svita tutte le piccole viti nere e rimuovi la piastra metallica della base
Ho caricato delle immagini, guardale se necessario
Spero ciò ti aiuti e grazie a tutti quelli che hanno aiutato
Strumenti
-
-
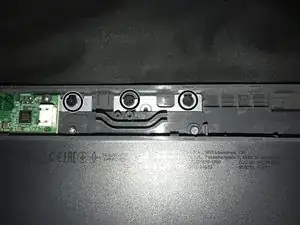
Rimuovi i piedini di gomma sulla parte posteriore
-
Svita le tre viti sottostanti a ciascuno dei tre piedini di gomma superiori
-
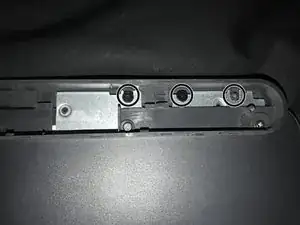
Nota che la vite più a sinistra è spostata verso destra e non è centrata
-
Usa un plettro di apertura in plastica per rimuovere la copertura.
-
-
-
Rimuovi la batteria, che è leggermente incollata dalla parte sottostante
-
Svita le due viti a croce Phillips (argentate e leggermente più grandi) che trattengono il PCB
-
Svita la piccola vite nera sul PCB nell'angolo in alto a destra
-
Rimuovi il nastro adesivo che fissa il cavo seriale (mettilo da parte, dovrai riapplicarlo durante il rimontaggio).
-
Rimuovi il piccolo jumper con i fili rossi/neri intrecciati che escono da esso.
-
Rimuovi il PCB
-

Per rimontare il tuo dispositivo, segui queste istruzioni alla rovescia.

12 commenti
Do you know how I can turn the keyboard backlight so it stays on, even if if t runs down the battery faster.
I really need that back light. I am willing to risk breaking my keyboard for the reward of having the light. If I am really lucky changing the circuit to add a manual switch for that dang back light :)
I have basic skills and I am still learning...
Thank to all the Content Makers and Fix-It guide makers...!
perhaps I could find the correct voltage for the light and prob with a test light to find the circuit for the back light with out damaging something important, like the old days_?
nazo -
Hello,
Excellent tutorial!
Could you show me where the 2 red and black wires are connected (data cable I think)?
Mine got cut by accident.
Bottom three feet are not blocking any screws or clips, they can remain.
There is a plastic film covering the screw holes, it can be peeled back and replaced.
Cristina Vasco -