-
-
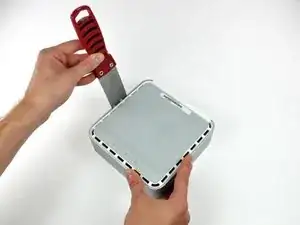
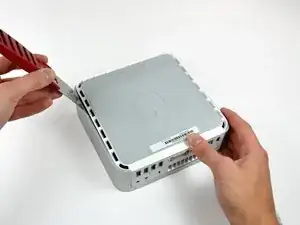
Per aprire il case, occorre una spatola. Una spatola sottile da 3,81 cm è l'ideale, tuttavia occorre levigarne il bordo. Strofinare il bordo corto della spatola in avanti e all'indietro su un foglio di carta vetrata a grana grezza (da 100 è ottimale) finché non si ottiene un bordo levigato.
-
-
-
Inserire con attenzione una spatola nella fessura fra il coperchio superiore e l'alloggiamento inferiore. Iniziare dal lato sinistro. Premere la lama finché non si avverte una certa resistenza (circa 0,95 cm).
-
Allargare delicatamente la fessura facendo leva sul manico della spatola verso il basso e lontano dal Mac mini.
-
-
-
A questo punto, inserire la spatola nella fessura sul lato dello slot dell'unità ottica del computer.
-
Far pressione sulla spatola verso il basso, mentre si opera lungo il bordo del Mac mini, finché l'alloggiamento inferiore non si separa ulteriormente da quello superiore.
-
-
-
Ripetere la medesima procedura indicata nei passaggi precedenti per il lato destro del Mac mini.
-
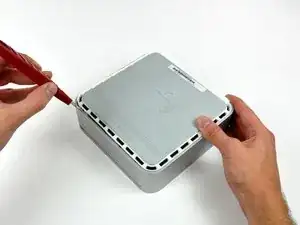
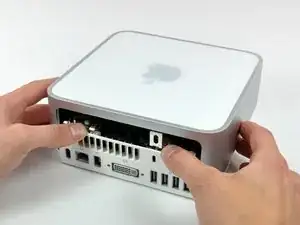
Capovolgere il Mac mini.
-
-
-
Premere leggermente le due linguette di fissaggio l'una verso l'altra e sollevare l'antenna AirPort dal proprio alloggiamento.
-
-
-
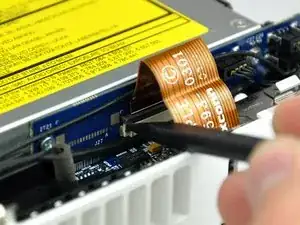
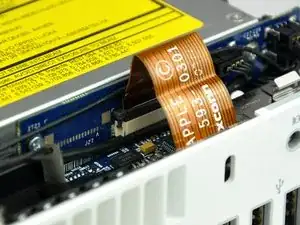
Utilizzare la punta di un inseritore per sollevare leggermente il lato sinistro del bloccacavo ZIF dal rispettivo connettore femmina.
-
-
-
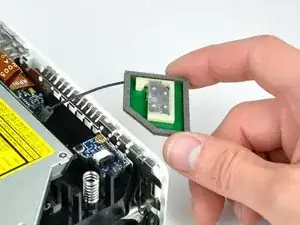
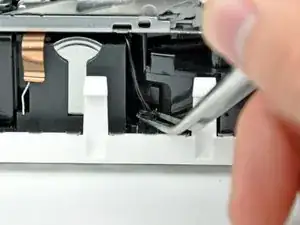
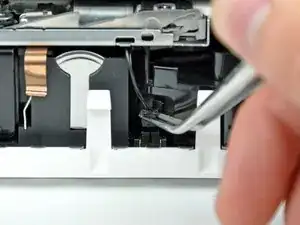
Mediante un paio di pinzette, sollevare connettore del cavo del sensore termico del disco rigido dal connettore femmina sulla scheda logica.
-
-
-
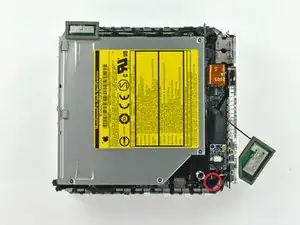
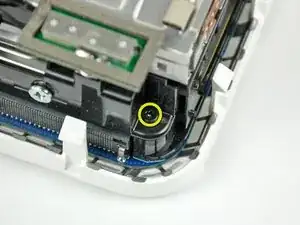
Rimuovere la vite con testa a croce incassata accanto al pulsante di alimentazione, che fissa il telaio interno all'alloggiamento inferiore.
-
-
-
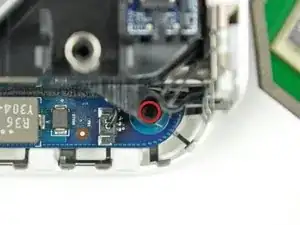
Rimuovere la vite con testa a croce incassata accanto alla spia della modalità sospensione, che fissa il telaio interno all'alloggiamento inferiore.
-
-
-
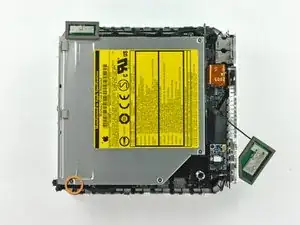
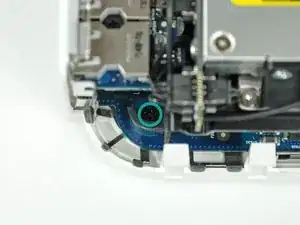
Rimuovere la vite con testa a croce dal telaio interno, in prossimità dell'antenna Bluetooth.
-
-
-
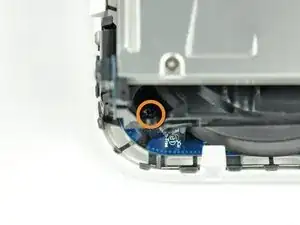
Rimuovere la vite con testa a croce accanto alle porte audio, che fissa il telaio interno al case inferiore.
-
-
-
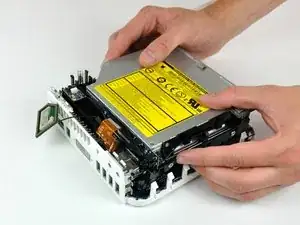
Sollevare delicatamente il telaio interno dall'alloggiamento inferiore, facendo attenzione a non incastrare il cavo dell'antenna AirPort o altri cavi.
-
-
-
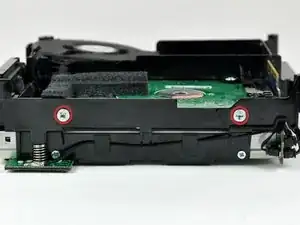
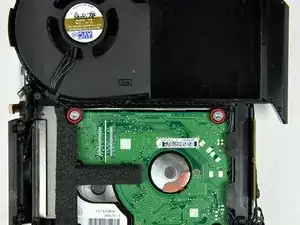
Rimuovere le due viti con testa a croce che la parte laterale del disco rigido al telaio interno.
-
-
-
Rimuovere le due viti con testa a croce che fissano la parte inferiore del disco rigido al telaio interno.
-
-
-
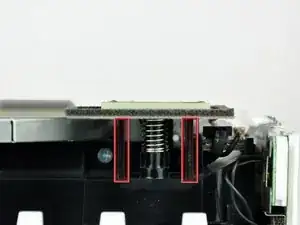
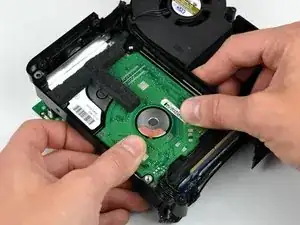
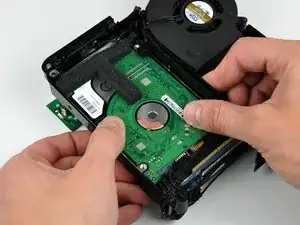
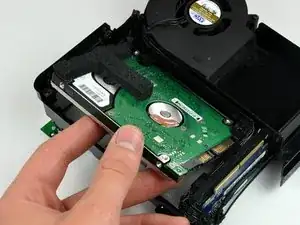
Far scorrere con i pollici il disco rigido verso l'altoparlante, scollegandolo dalla scheda di interconnessione.
-
-
-
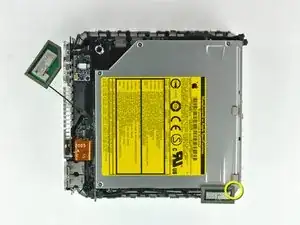
Estrarre l'unità ottica dal telaio interno.
-
Se stai installando un nuovo disco fisso, abbiamo una guida di installazione OS X per aiutarti a tornare rapidamente al lavoro.
-


Per riassemblare il dispositivo, segui queste istruzioni in ordine inverso.

16 commenti
The foam on the harddrive is attached with an adhesive tape - be careful to peel up the tape from the harddrive, rather than the foam from the tape.
robert -
I seemed to succeed - until I discovered my optical drive had broken. Disks do not mount, after some tries they eject. There was a LOT of dust inside my Mini, I think some got in the optical drive. A cleaning DVD and compressed gas didn't fix it. I wonder if it would be wise to seal the opening to the optical drive -- certainly before cleaning.
This was a failure for me, even though the memory and drive change went well.
Can't fault this guide.
* if you don't have a putty knife & you don't mind some scratches, a thin butter knife will do the trick for getting the case off.
*if you plan to replace hdd with an ssd - you may need to rejig some of the internal wires that run around the edges of the hdd/ssd: after I installed the ssd, and returned the wires to the tight track around the side and socket port end of the ssd, and turned the machine back on, there was a high pitch interference noises coming out the internal speaker every time the drive was active.
The solution: make sure the speaker wire isn't where it's *supposed* to be! There are three sets of wires, include the speaker pair. I reversed the positioning of these with respect to the SSD, i.e. I moved the speaker pair to be furthest away from the SSD, and *didn't* tuck them back in under the plastic lip beside the ssd connector port. I turned it back on, and no more high frequency whining whenever the drive is active
Rodders -
I used a tool for opening the back of watches to replace the battery (the type that have the non screw-on backs). Worked fine!
Mike Haines -
IMHO there are many steps not necessary. The guide is very good but i can't find the reason for steps 7-15. It is all about freeing the internal frame. As far as i know it is enough to remove the antennas and the 4 screws holding the optical drive?!?!
Markus Obdenbusch -