Introduzione
Usa questa guida per sostituire completamente il disco rigido. Per completare il lavoro, è necessario utilizzare il mastice per incollare i vecchi sensori termici al nuovo disco rigido.
-
-
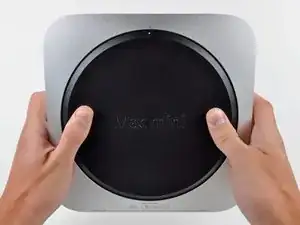
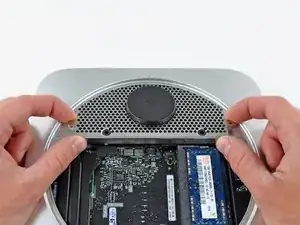
Posizionare i pollici negli incavi tagliati nel coperchio inferiore.
-
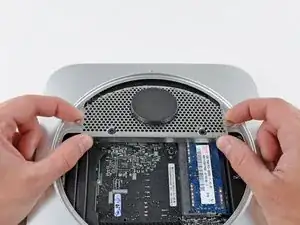
Ruotare il coperchio inferiore in senso antiorario finché il puntino bianco dipinto su di esso non è allineato con il cerchio in rilievo sul case esterno.
-
-
-
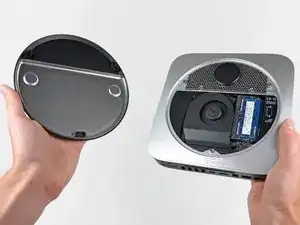
Inclinare il Mac mini abbastanza da sganciare il coperchio inferiore dal case esterno.
-
Rimuovere coperchio inferiore e conservarlo altrove.
-
-
-
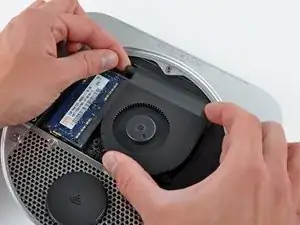
Rimuovere le due viti Torx T6 da 11,3 mm che fissano la ventola alla scheda logica, in prossimità della piastra dell'antenna.
-
-
-
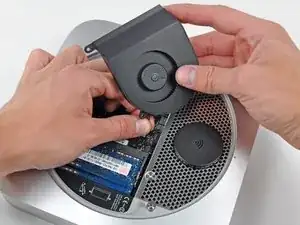
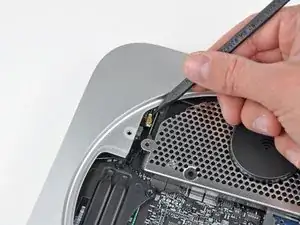
Sollevare la linguetta della ventola più vicina alla memoria RAM più vicina al distanziatore fissato al case esterno.
-
-
-
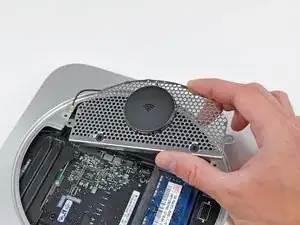
Sollevare la ventola dal Mac mini affinché sia possibile accedere al connettore.
-
Tirare con attenzione i cavi della ventola verso l'alto, per sollevare il connettore dal connettore femmina sulla scheda logica.
-
Rimuovere la ventola.
-
-
-
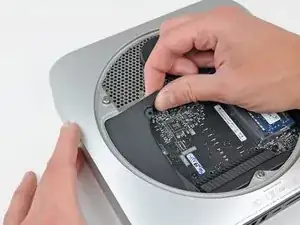
Sollevare la mascherina dall'estremità più vicina alla piastra dell'antenna.
-
Ruotare la mascherina fuori dal case esterno e rimuoverla dal Mac mini.
-
-
-
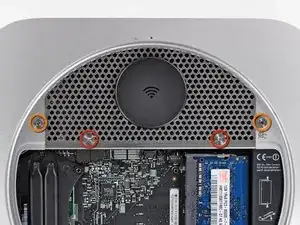
Rimuovere le viti seguenti, che fissano la piastra dell'antenna al Mac mini:
-
Due viti Torx T8 da 6,6 mm
-
Due viti Torx T8 da 5 mm o viti esagonali da 2 mm (vanno bene entrambi i cacciaviti)
-
-
-
Sollevare delicatamente la piastra dell'antenna dall'estremità più vicina alla memoria RAM.
-
Estrarre con attenzione la piastra dell'antenna direttamente dalla montatura rotonda nel case esterno.
-
-
-
Mediante la punta di un inseritore, scollegare con attenzione il connettore dell'antenna dalla scheda AirPort/Bluetooth.
-
-
-
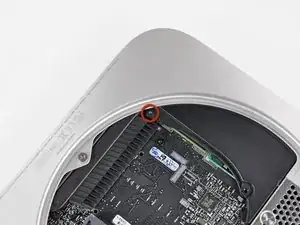
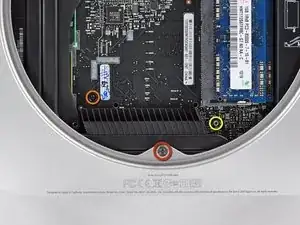
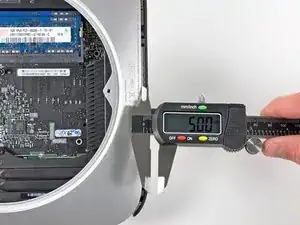
Rimuovere le tre viti seguenti:
-
Una vite Torx T8 da 5 mm o vite esagonale da 2 mm (vanno bene entrambi i cacciaviti)
-
Una vite Torx T6 da 16,2 mm
-
Un distanziatore Torx T6 da 26 mm
-
-
-
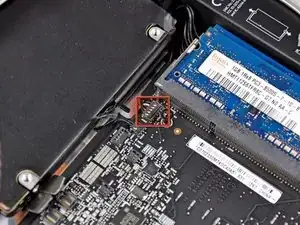
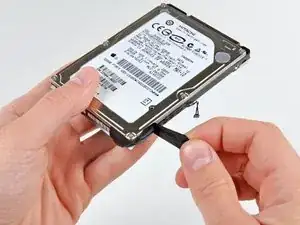
Estrarre con attenzione i fili da entrambi i sensori termici del disco rigido verso l'alto, per sollevare i connettori e rimuoverli dai rispettivi connettori femmina sulla scheda logica.
-
-
-
Utilizzare l'estremità piatta di un inseritore per scollegare i connettori del disco rigido e dell'unità ottica dai rispettivi connettori femmina sulla scheda logica.
-
-
-
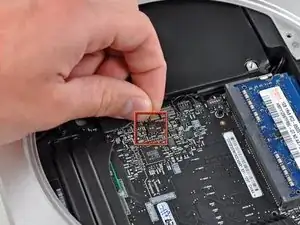
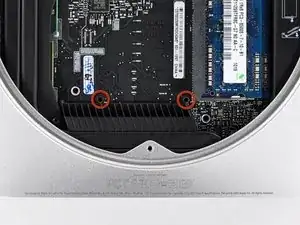
Inserire un attrezzo per la rimozione della scheda logica per Mac mini nei due fori evidenziati in rosso. Verificare che avvenga il contatto con il case esterno sotto la scheda logica prima di procedere con l'operazione.
-
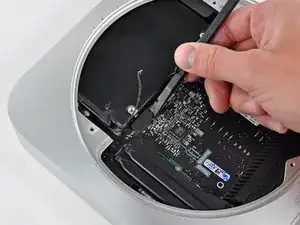
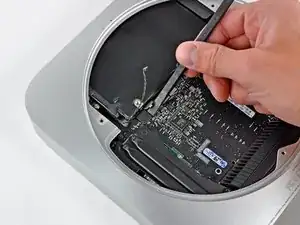
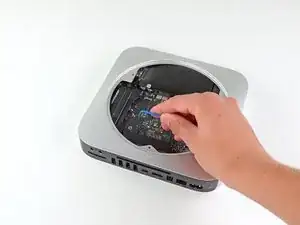
Tirare con attenzione l'attrezzo verso la scheda I/O. La scheda logica e il gruppo della scheda I/O dovrebbero scorrere leggermente fuori dal case esterno.
-
Interrompere l'operazione quando la scheda I/O è visibilmente separata dal case esterno. Rimuovere l'attrezzo per la rimozione della scheda logica per Mac mini.
-
-
-
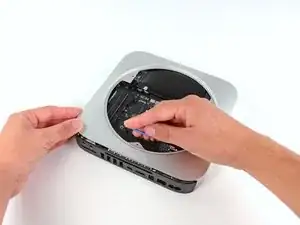
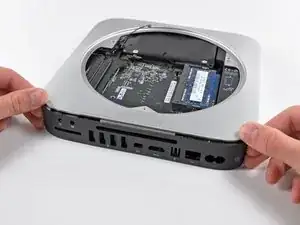
Premere contemporaneamente le due levette di plastica nei lati all'estrema sinistra e destra della scheda I/O verso la parte centrale di quest'ultima, rimuovendola leggermente dal case esterno.
-
-
-
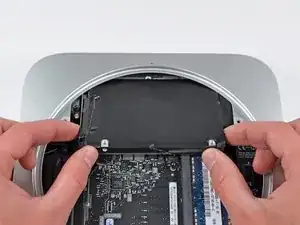
Sollevare il disco rigido dal bordo più vicino alla scheda logica e rimuoverlo dal Mac mini, facendo attenzione a non incastrare il connettore della memoria RAM e i cavi.
-
-
-
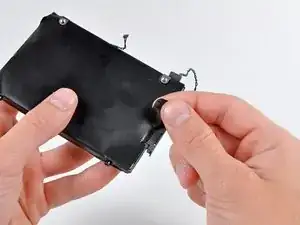
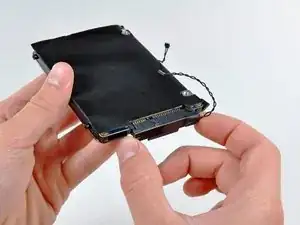
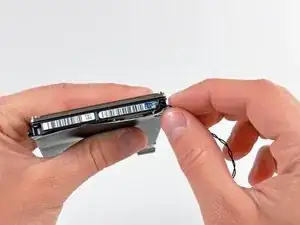
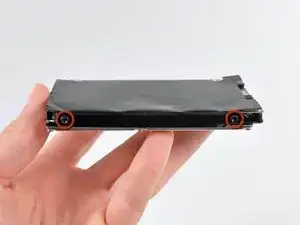
Rimuovere il pezzetto di nastro che copre il sensore termico facendolo aderire sul bordo del disco rigido.
-


Per riassemblare il dispositivo, segui queste istruzioni in ordine inverso.

37 commenti
These instructions and a little common sense can also be used to replace the lower hard drive in the server version of the Mac Mini. Luckily that was the drive that had failed in my case. Replacing the upper drive looks like a tougher proposition.
Fantastic guide, thank you very much Mr. Bookholt!
As with the above commenter, I accidentally mistook the fan's standoff for a screw and removed it while removing the fan. Also the top right fan screw's standoff came out along with it. I edited the guide with a note on this.
While replacing the antenna, it wasn't immediately clear why the screws weren't lining up, until I realized that two of the screws were in the (otherwise free-floating but for the back grommets) hard drive, I also added a note on that.
STEP 15: If you don't have the time to purchase the Mac Mini Logic Board Removal Tool, the round stock on a large binder clip is PERFECT for the job. It requires a little bending and cutting but it worked perfectly!!
And as jon jon stated, it works like a lever - not a pull. You can feel it kind of click in to the lever points below.
Bravo to ifixit.com for the easy to follow instruction!!
blavin -