Introduzione
L'aggiunta di un secondo SSD nel computer portatile offre diversi vantaggi, fra cui velocità più elevate, maggiore spazio di archiviazione e la possibilità di installare nuovi software senza problemi. Utilizzare questa guida per eseguire l'installazione mediante un case per disco rigido nell'alloggiamento ottico. Alcuni alloggiamenti delle unità hanno un'altezza di 7 mm, mentre altri di 9,5 mm. In base alle dimensioni dell'alloggiamento dell'unità, potrebbe essere necessario un distanziatore per posizionare correttamente l'SSD.
-
-
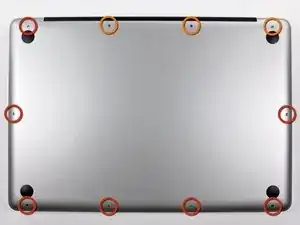
Rimuovi le seguenti 10 viti a croce Phillips che fissano il case inferiore a quello superiore:
-
Sette viti da 3 mm.
-
Tre viti da 13,5 mm.
-
-
-
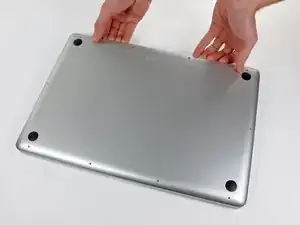
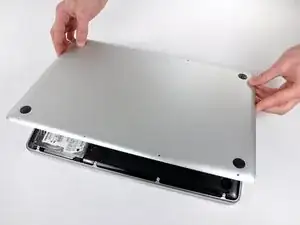
Usando entrambe le mani, solleva il case inferiore vicino alla griglia di aerazione per sbloccare le due clip che lo fissano al case superiore.
-
Rimuovi il case inferiore e mettilo da parte.
-
-
-
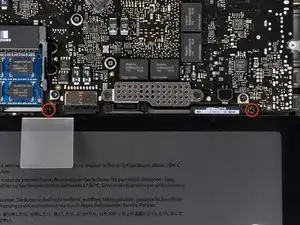
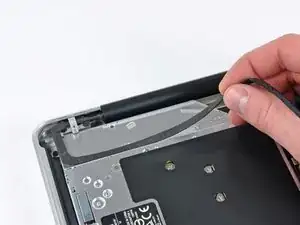
Usa la punta di uno spudger per piegare all'indietro l'aletta dell'adesivo con l'avviso di non rimuovere la batteria " Warning: Do not remove the battery" mentre rimuovi le viti Pentalobe a cinque punte celate al di sotto.
-
-
-
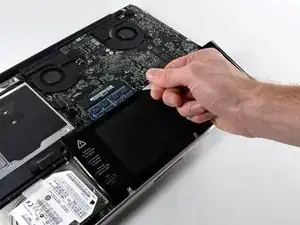
Solleva la batteria tirando la linguetta di plastica e falla scorrere lontano dal bordo lungo del case superiore.
-
-
-
Inclina la batteria all'indietro quanto basta per rendere accessibile il connettore del cavo della batteria.
-
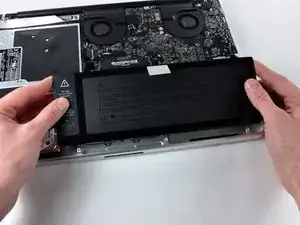
Tira via il connettore del cavo della batteria dallo zoccolo sulla scheda logica e rimuovi la batteria dal case superiore.
-
-
-
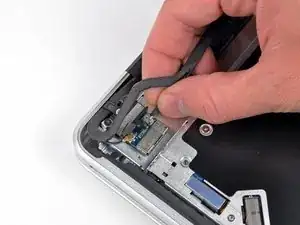
Trattenere l'estremità del fermacavo con un dito, mentre si utilizza la punta di un inseritore per sollevare leggermente l'altra estremità e ruotarla lontano dal connettore del cavo della fotocamera.
-
-
-
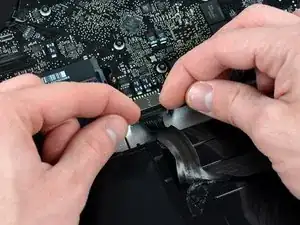
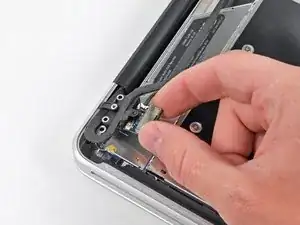
Scollegare il cavo della fotocamera, estraendo l'estremità maschio direttamente dal connettore femmina.
-
-
-
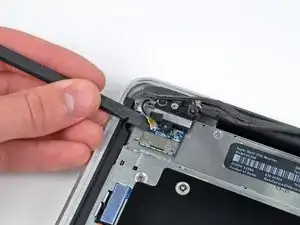
Scollegare il cavo del Bluetooth, estraendo l'estremità maschio direttamente dal connettore femmina.
-
Utilizzare l'estremità piatta di un inseritore per scollegare il cavo dell'antenna Bluetooth dal connettore femmina sulla scheda logica.
-
-
-
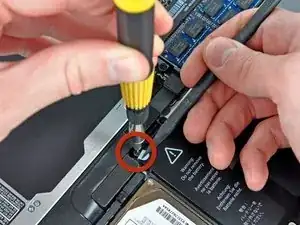
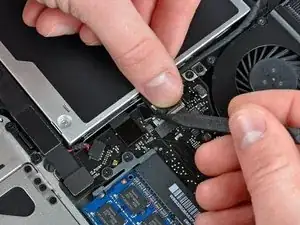
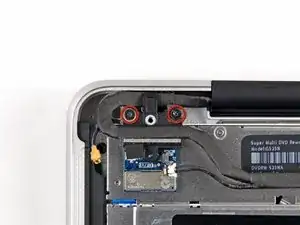
Rimuovere le due viti con testa a croce da 8 mm che fissano il fermacavo del Bluetooth/fotocamera al case superiore.
-
Sollevare il gruppo fermacavo/scheda Bluetooth dal case superiore.
-
-
-
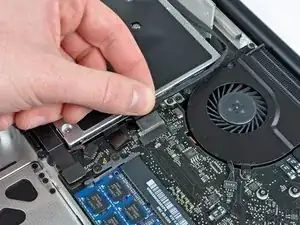
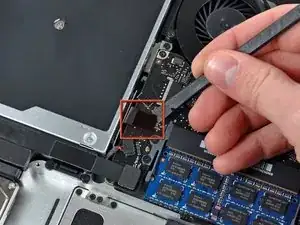
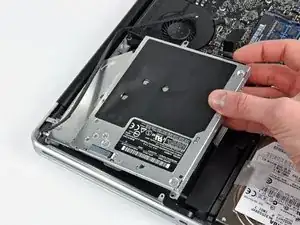
Utilizzare un inseritore per rimuovere il connettore dell'unità ottica dalla direttamente dalla scheda logica.
-
-
-
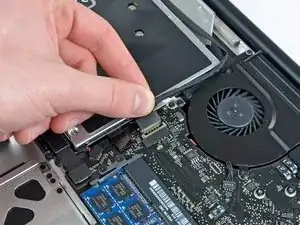
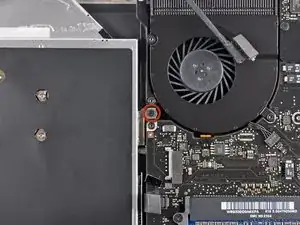
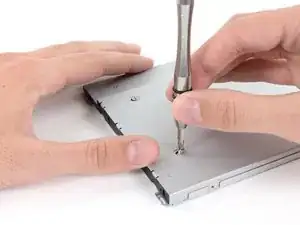
Rimuovere la vite con testa a croce da 3,5 mm che fissa la parte interna dell'unità ottica al case superiore.
-
-
-
Rimuovere le due viti con testa a croce da 3,5 mm che fissano la parte esterna dell'unità ottica al case superiore.
-
-
-
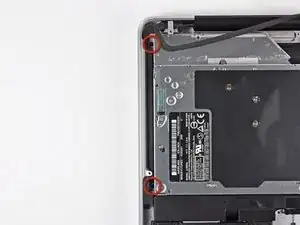
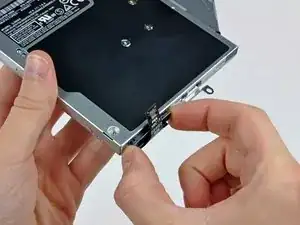
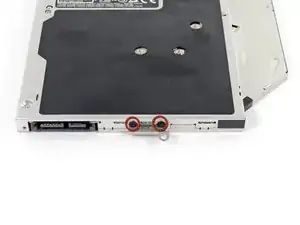
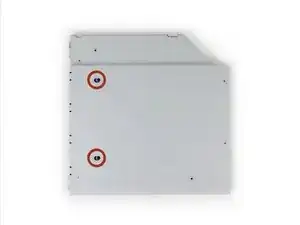
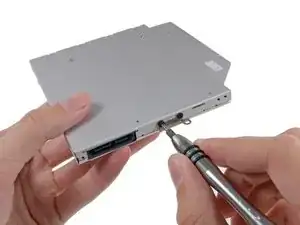
Rimuovi le due viti a croce Phillips #0 che fissano la piccola staffa metallica di supporto. Trasferisci questa staffa sulla nuova unità ottica o sul case esterno per hard drive.
-
-
-
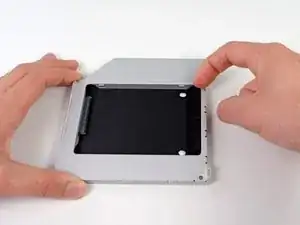
Rimuovi il distanziale di plastica dal case del disco rigido nell'alloggiamento dell'unità ottica premendo una delle clip poste da ciascun lato e sollevandolo dal case.
-
-
-
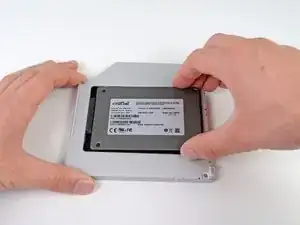
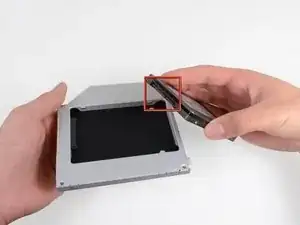
Verifica che i connettori del disco rigido siano rivolti verso il basso prima di posizionarlo nel case.
-
Posiziona il disco rigido delicatamente nell'apposito slot del case.
-
Tenendo saldamente il case in posizione con una mano, premi con l'altra il disco rigido nei connettori del case.
-
-
-
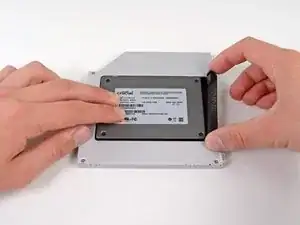
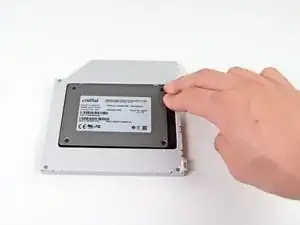
Una volta agganciato il disco rigido, reinserisci il distanziale di plastica tenendo il disco premuto contro la parte inferiore del case.
-
-
-
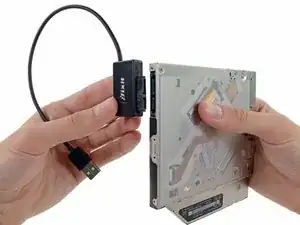
Collega la staffa dell'unità ottica al nuovo case mediante due viti con testa a croce Phillips #0.
-
Ricollega tutti i cavi rimossi dall'unità ottica originale nel case dell'alloggiamento ottico.
-
-
-
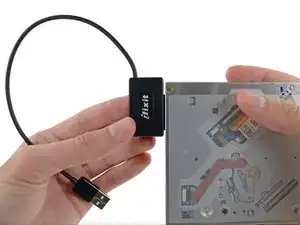
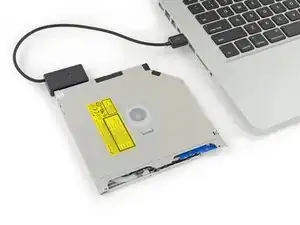
Non buttare via questo disco! Puoi ancora usare l'unità ottica esternamente con l'aiuto del nostro cavo USB per Unità Ottica SATA.
-
Allinea la spina del cavo SATA con la presa sull'unità e connettila bene.
-
Collega il connettore USB al tuo portatile e la tua unità ottica è pronta all'uso.
-


Per riassemblare il dispositivo, seguire queste istruzioni in ordine inverso.

6 commenti
FYI, according to an apple Genius, this modification prevents Apple from repairing the computer at all. And should you request a flat-rate repair, they would replace the super-drive. But I reckon it's worth it!
Vincent -
I have just gotten my second hard drive up and running after a few false starts. The main piece of advice I'd give you if you are going to do the same is, format the new hard drive via USB BEFORE you install it!
Physically installing the second hard drive was no trouble at all. The problem I had was formatting it inside the computer. This gave me multiple failed attempts using Disk Utility. When I tried to erase or partition the drive, after a long hang, I always got the error: "File system formatter failed."
I thought something might be wrong with the hard drive, and was about to return it. But then I thought I'd take it out of the computer and plug it in using the Silicone 2.5" Hard Drive Enclosure with USB 2.0 Cable. I ran erase in Disk Utility again and it worked! Now it's showing up in finder and I can start storing files on it.
Also, I must say the customer support from ifixit is great. I messaged them about this and some other issues I was having and I got a detailed response from them within a couple of days. Thanks guys!
After doing this for the first time and starting my computer it worked like a charm but after taking the drive back out to swap primary and secondary drives (so i could have my os installed on the bigger drive) it quit working. Now my secondary drive won't work at all. It won't show up in finder or DU. I'm fairly confident that i didn't break anything on the logic board. Any ideas?
jcbbnd -
May be helpful to have more distinct colors to identify the different screws.
Victor Caamano -