
Introduzione
Utilizzare questa guida per sostituire o aggiornare il disco rigido per ottenere maggiore spazio di archiviazione.
-
-
Poggiare l'iMac sul lato anteriore su un tavolo, con il bordo inferiore rivolto verso l'utente.
-
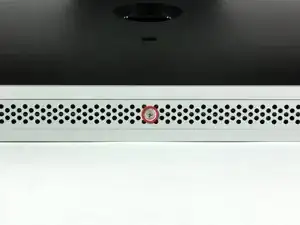
Allentare la vite con testa a croce al centro dello sportello di accesso.
-
Rimuovere lo sportello di accesso dall'iMac.
-
-
-
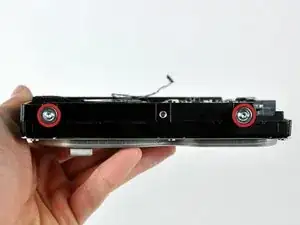
Rimuovere le 12 viti seguenti, che fissano la mascherina anteriore al case posteriore:
-
Otto viti Torx T8 da 13 mm.
-
Quattro viti Torx T8 da 25 mm.
-
-
-
Sollevare delicatamente la mascherina dal bordo superiore, lontano dal case posteriore.
-
Dopo aver rimosso il bordo superiore della mascherina anteriore dal case posteriore, ruotare la mascherina verso la staffa ed estrarla dal case posteriore.
-
Ruotare la mascherina anteriore lontano dal resto del dispositivo e adagiarla sul bordo superiore dell'iMac.
-
-
-
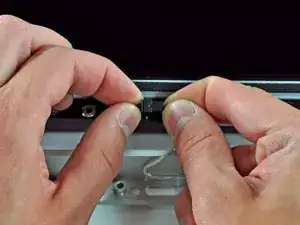
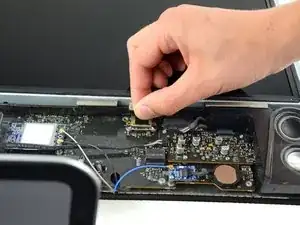
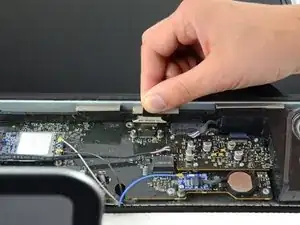
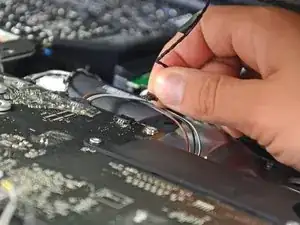
Rimuovere le due viti Torx T6 da 5,3 mm dal connettore dell'LCD.
-
Tenere saldamente la linguetta sulla parte superiore del connettore e rimuoverla dalla porta.
-
-
-
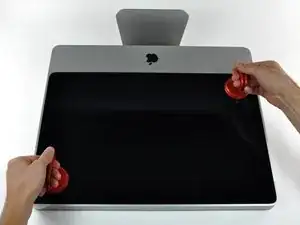
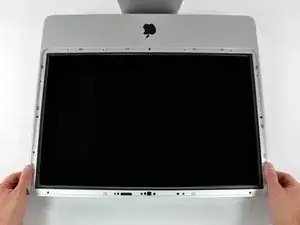
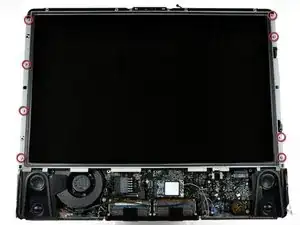
Posizionare le mani su entrambi i lati della parte inferiore del pannello del display e sollevarlo affinché sia possibile raggiungere i connettori all'interno.
-
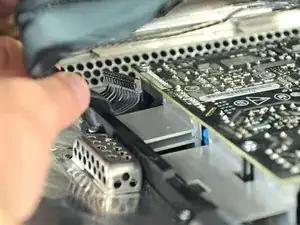
Tenendo il pannello del display con una mano, individuare e rimuovere il cavo del sensore termico del display dal connettore.
-
-
-
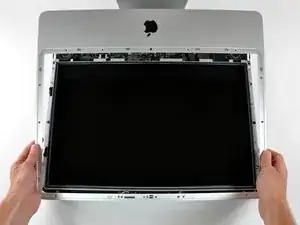
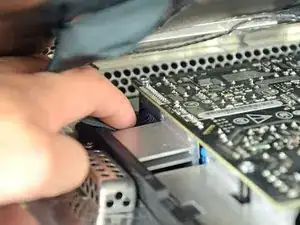
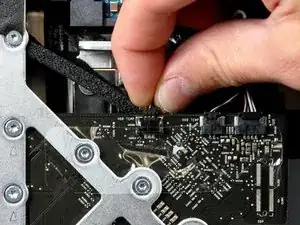
Tenendo ancora sollevato in display, premere saldamente il connettore del cavo dell'alimentatore con due dita per estrarlo dal relativo connettore femmina.
-
-
-
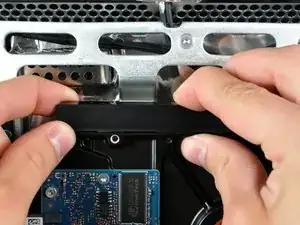
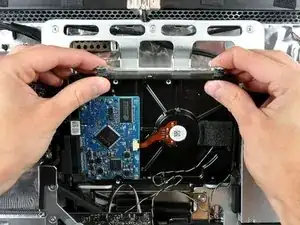
Per rimuovere la staffa del disco rigido, premere la parte centrale contro il lato del disco, ruotando il bordo superiore sinistro verso di sé.
-
Dopo aver liberato il bordo sinistro, ruotare la staffa verso il bordo destro del disco rigido.
-
Sollevare la staffa del disco rigido dal case.
-
-
-
Se presente, rimuovere il pezzetto di nastro che copre i cavi del sensore temperatura del disco rigido e dell'unità ottica.
-
-
-
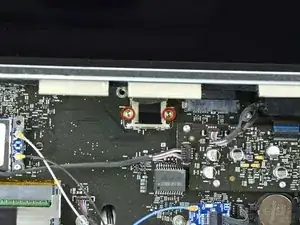
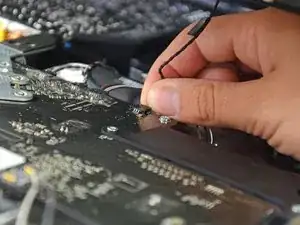
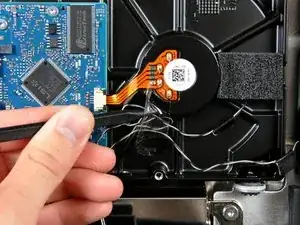
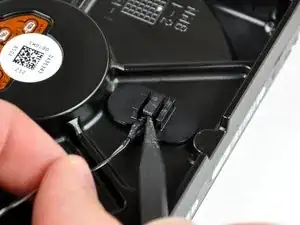
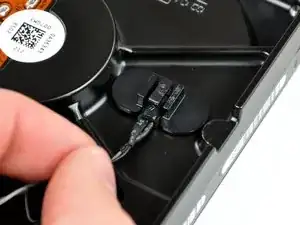
Scollegare il cavo del sensore termico del disco rigido dal connettore femmina sulla scheda logica.
-
-
-
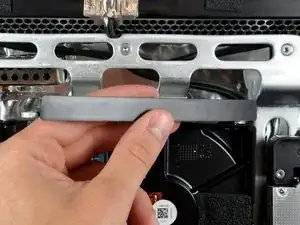
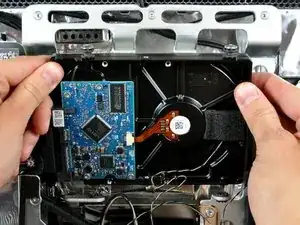
Ruotare la parte superiore dell'unità verso di sé, quindi sollevare il disco rigido direttamente dai piedini inferiori.
-
-
-
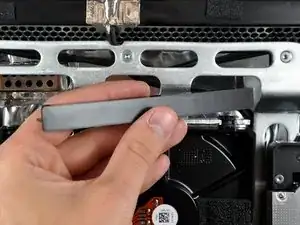
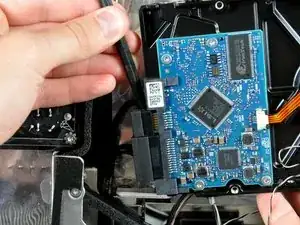
Inserire l'estremità piatta di un inseritore fra il cavo dati SATA e il bordo del disco rigido.
-
Ruotare l'inseritore per separare il cavo dati SATA dal disco rigido.
-
Scollegare il cavo dati SATA dal disco rigido.
-
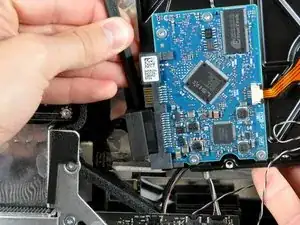
Sollevare il disco rigido dall'iMac, facendo attenzione a non incastrare il cavo del sensore termico.
-
-
-
Rimuovere i due piedini Torx T10 dal lato del disco rigido, vicino ai connettori dati e di alimentazione.
-
-
-
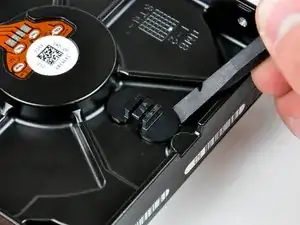
Per rimuovere il sensore termico del disco rigido, utilizzare l'estremità piatta di uno spudger per sollevare l'aletta centrale della staffa del sensore termico, applicando una leggera tensione al cavo del sensore.
-
-
-
Mediante l'estremità piatta di uno spudger, rimuovere la staffa del sensore termico del disco rigido dall'adesivo che la fissa all'unità stessa.
-
-
-
Con uno spudger rimuovi la piccola parte di schiuma EMI dal lato superiore del disco rigido.
-
Se stai installando un nuovo disco fisso, abbiamo una guida installazione OS X per farti riprendere subito il lavoro.
-


Per riassemblare il dispositivo, seguire queste istruzioni in ordine inverso.

17 commenti
Exellent instructions....
I just installed a new HD on my iMac 8,1. Intalled the OS from original disc, it was 10.5.2, I don't know how to upgrade the OS.
I did software update, but only got 10.5.8. ¿what can I do? I would like to install Yosemite at least...
Any help?
Dan N. -
You need to get to 10.6.8 via physical media, then app store update from there. I have read that Apple will send you a dvd for no cost, but the official price is $19.
I has a 8.1 as well , running Ubuntu 22.04 is great ! Stop obsolete OSX
Compatibilité du capteur thermique avec un SSD ?
DUBOIS -
Fonctionne tres bien car collé dessus et donc toujours froid
The grid won't fall off by itself. You'll have to help it. Use the smallest screwdriver you have; the Torx 6 worked fine for me. It should enter in one of the many holes composing the grid. Use it as a lever to ploy the grid a little bit. You may catch it with your fingers and that's it.
Be carefull not to damage the hole by a too strong leverage.
Laurent -
much more safer to use duct tape, instead of torx 6. (glue it along the length of the grid and pull). it will loose instantly and smooth;)
Hofmann78rus -
Anyone know a guide to replace the plastic piece this screw connects to? I accidentally forgot this step - went to remove the front bezel and bent the plastic piece the access door connects to.
Jason Augustin -