Introduzione
This guide exists to act solely as a prerequisite to other replacement guides. These steps are necessary for replacing any of the components mentioned in later guides and are aggregated here to simplify the guide making process.
Please note that this guide will require the removal of the phone's battery, and while this is a trivial task with this particular model, if your battery is swollen and stuck then prying at is could potentially cause it to rupture and explode.
Please power off your device and take it to a repair professional or someone else trained in safely disposing of the malfunctioning battery. As a general rule of thumb, always turn off any device you are working on.
Strumenti
-
-
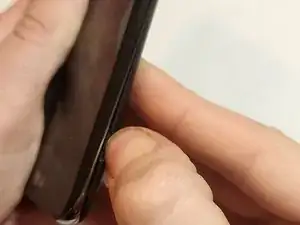
Find the indentation along the edge of the phone's back and pry open with your nail. A pry tool may help if you have short nails but shouldn't be necessary.
-
-
-
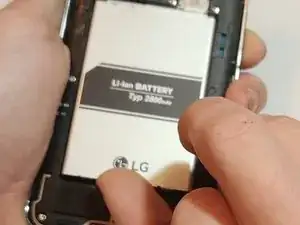
Pull the battery out of the back of the phone. A small indent is present to allow you to pry it out but you may also just flip the phone over and strike it gently against your palm.
-
-
-
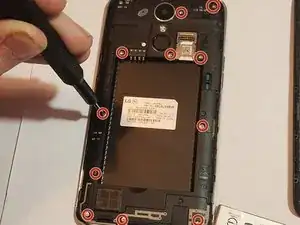
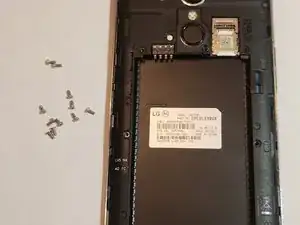
Unscrew all of the screws now visible on the back panel of the phone--11 in total. A #00 Phillips screwdriver works here.
-
The screws are M1.3 and 3 mm long.
-
-
-
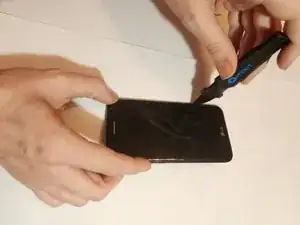
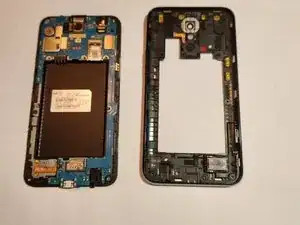
Insert the Jimmy into the small gap between the edge of the phone screen and body. Gently pry until it pops loose then remove jimmy and use your hands to slowly pry the body away from the screen
-
To reassemble your device, follow these instructions in reverse order.