Introduzione
If your LG Grace smartphone, model # LGL59BL, isn't taking clear images through the rear camera anymore, you may use this guide to replace the component. The rear camera is responsible for the majority of the photos you take with your phone and is almost always the higher fidelity camera on you device, making a malfunctioning one particularly frustrating. The specific way in which your camera is malfunctioning may vary, but following the troubleshooting wiki for this device will help you narrow down your possibilities.
Please note that this guide requires the removal of the phone's battery, and while this is a trivial task with this particular model, if your battery is swollen and stuck then prying at is could potentially cause it to rupture and explode. Please power off your device and take it to a repair professional or someone else trained in safely disposing of the malfunctioning battery. As a general rule of thumb, always turn off any device you are working on.
All-in-all this is a relatively simple replacement and requires no special skills, so if your camera has gone out don't be intimidated by the prospect of the repair. The component is also available for relatively cheap, so this repair may be the best financial option for you if the camera is all that needs to be repaired on your LG Grace.
Strumenti
-
-
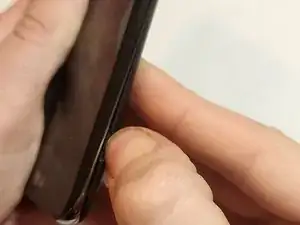
Find the indentation along the edge of the phone's back and pry open with your nail. A pry tool may help if you have short nails but shouldn't be necessary.
-
-
-
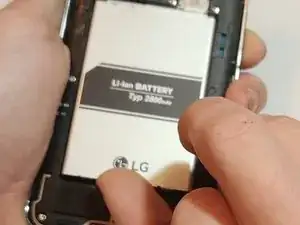
Pull the battery out of the back of the phone. A small indent is present to allow you to pry it out but you may also just flip the phone over and strike it gently against your palm.
-
-
-
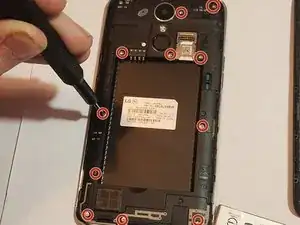
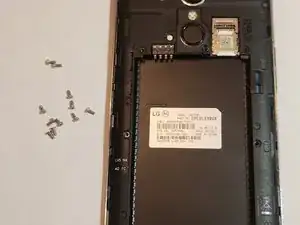
Unscrew all of the screws now visible on the back panel of the phone--11 in total. A #00 Phillips screwdriver works here.
-
The screws are M1.3 and 3 mm long.
-
-
-
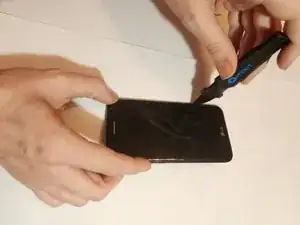
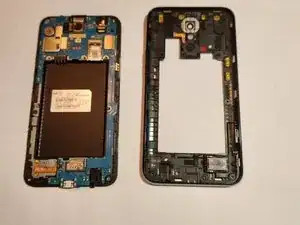
Insert the Jimmy into the small gap between the edge of the phone screen and body. Gently pry until it pops loose then remove jimmy and use your hands to slowly pry the body away from the screen
-
-
-
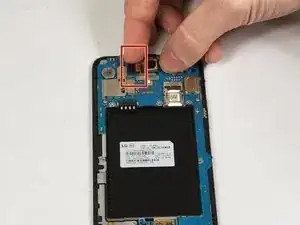
Locate the pin connection for the camera, noted by red box in the guide photo.
-
Gently lift the camera up while pulling away from connection; it should detach with minimal effort.
-
To reassemble your device, follow these instructions in reverse order.