Introduzione

When the Motorola G7 Play, models XT1952-3 and XT1952-2, no longer charges, it could be due to a failing charging port. This replacement guide provides efficient steps to get the device working again. If replacing the charging port doesn’t fix the issue, attempt to replace the battery with this guide.

Before you begin, download the Rescue and Smart Assistant app to backup your device and diagnose whether your problem is software or hardware related.

  1. myPnevNSNNPKgJjY
    myPnevNSNNPKgJjY
    EO5ZBNZxWHVRNAoF
    • Turn off your device before you begin.

    • Use the iFixit pick to break the adhesive around the back case.

    • Use a heat gun, hairdryer, or iOpener to weaken the adhesive around the back case. If you're using the iOpener, please review the instructions for proper use.

    How long do you have to use the heat gun before the glue loosens?

    Pamela DeMars -

    It's worked for me with about maybe 15-20 seconds of heating per side.

    Matthieu Bister -

    I could not get the pick started under the cover. Ruined several tips. I started with a hair dryer and switched to a heat gun. Be careful with a heat gun! 😬

    K Goatee -

  2. tgoBehD2raMYJuwT
    • Detach the back case from the phone.

    • Make sure the back is opened right to left so the cable of the fingerprint scanner does not get damaged.

  3. ib1tdYuELTqFPZih
    ib1tdYuELTqFPZih
    qx5B3YUkDDxMqSno
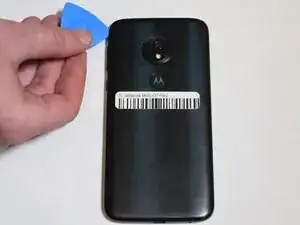
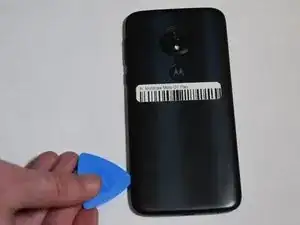
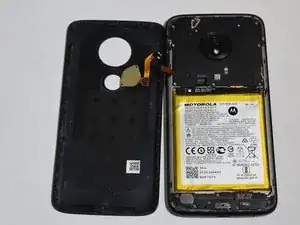
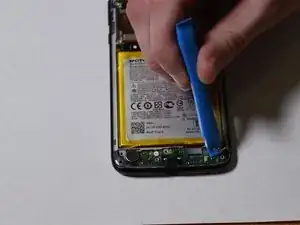
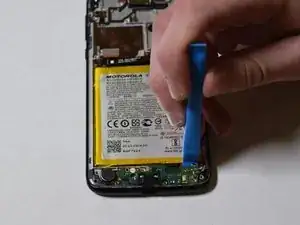
    • Use the iFixit pick and the iFixit opening tool to pull the fingerprint scanner off of the back case.

    My g7 power had a removable connector at the phone side

    K Goatee -

  4. DXEkaPWAgFqmuWRp
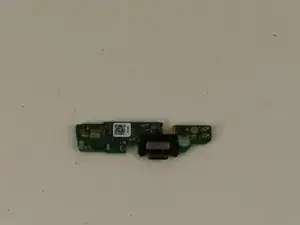
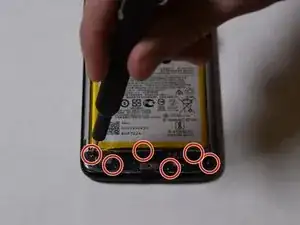
    • Remove the six 3.2 mm screws from the charging port assembly cover with a Phillips #00 screwdriver.

  5. aS53wKr1XSOJKxnM
    • Using the iFixit opening tool, carefully pry up the charging port assembly cover.

    *Motherboard magically dissappears for the rest of the guide*

    Nicky Rey -

  6. uNZJqKjnMHSEgxng
    uNZJqKjnMHSEgxng
    cWTPtFCF1WJlUiKK
    • Using an iFixit opening tool, detach the cables from the charging port assembly.

  7. jKlWCAQHZ4LVjHLH
    • Using the iFixit opening tool, carefully pry up the charging port assembly.

Conclusione

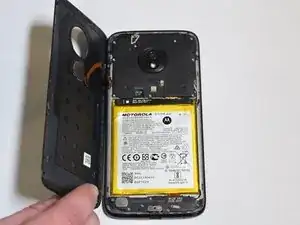
To reassemble your device, follow these instructions in reverse order.

Monserath Casillas

Membro da: 10/02/20

1146 Reputazione

Un commento

Xt1952-4 is the same. Replaced the charge port due to microphone failing.

Travis Brubaker -