Introduzione
Follow this guide to replace the USB-C board in your PlayStation 5 Slim.
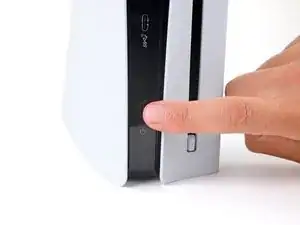
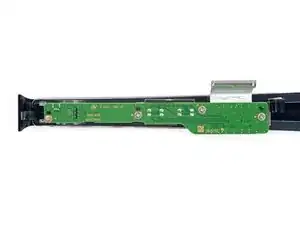
The USB-C board contains the ports and power button.
If you're having issues connecting your controllers via USB-C or the USB-C connection is loose, or if your power button is sticky, it may be time to replace the USB-C board.
-
-
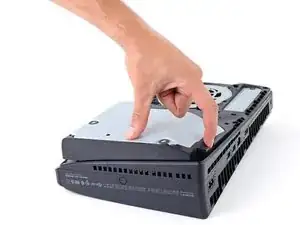
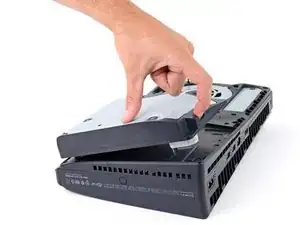
Shut down your console.
-
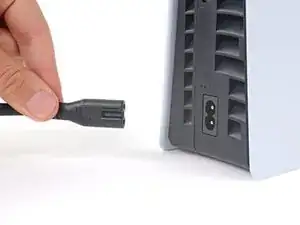
Unplug all cables and accessories.
-
Remove any stands supporting your device.
-
-
-
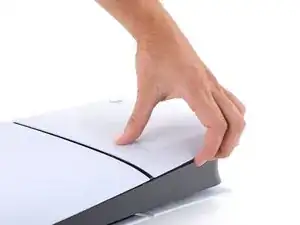
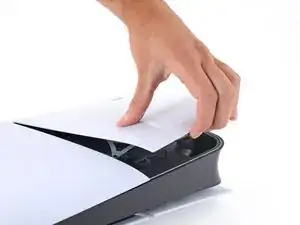
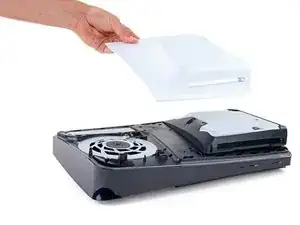
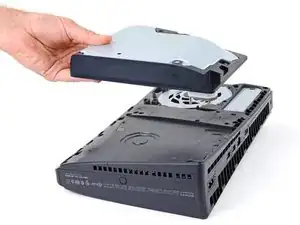
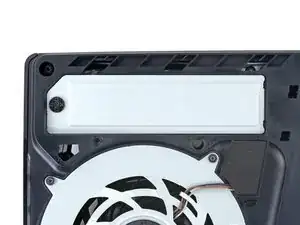
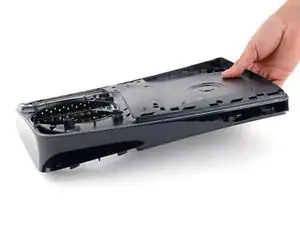
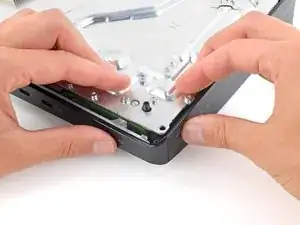
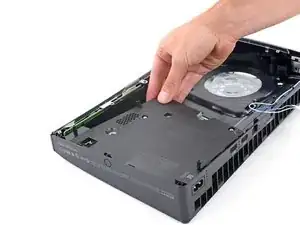
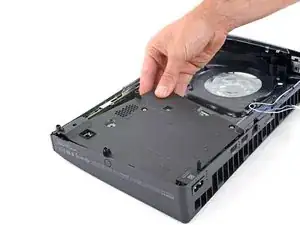
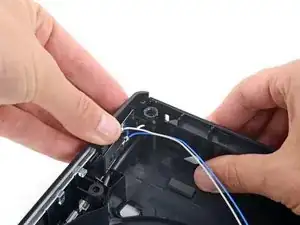
Use the cutout on the bottom right corner of the disc drive to lift its right edge.
-
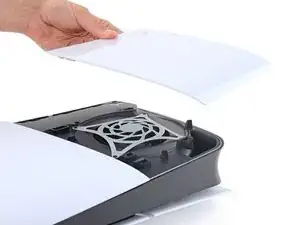
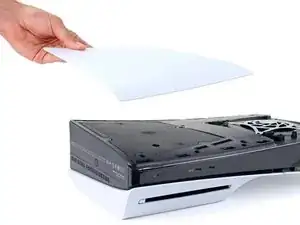
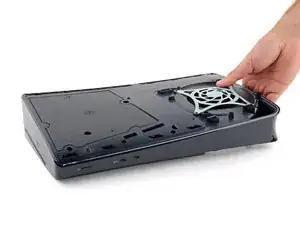
Remove the disc drive.
-
-
-
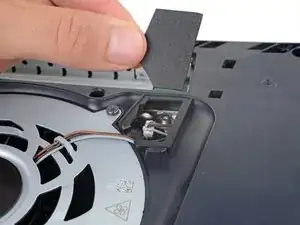
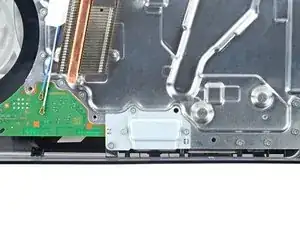
Use a Phillips screwdriver to remove the 17.1 mm‑long screw securing the expansion slot cover.
-
-
-
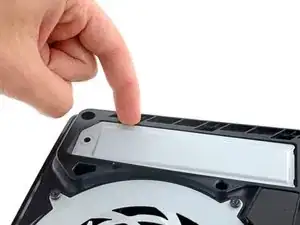
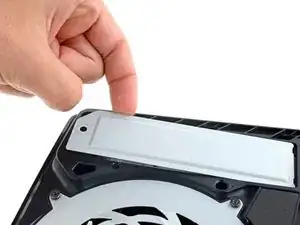
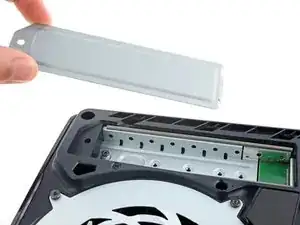
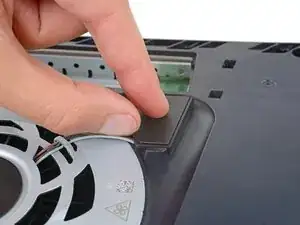
Use your fingers to lift the expansion slot cover near the notch by the screw hole and remove the cover.
-
-
-
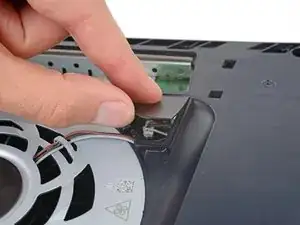
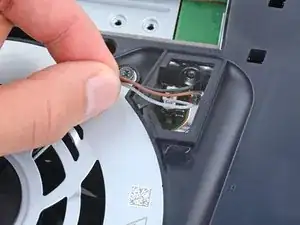
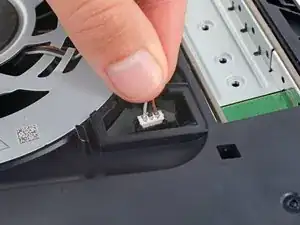
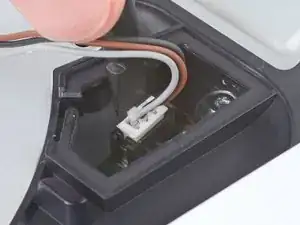
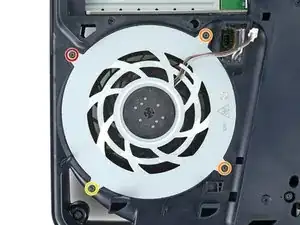
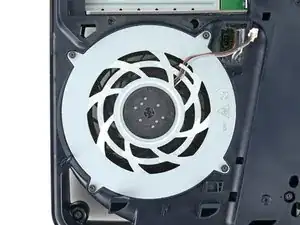
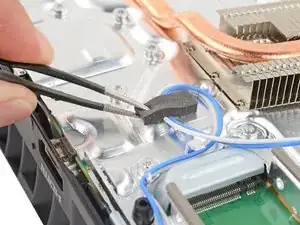
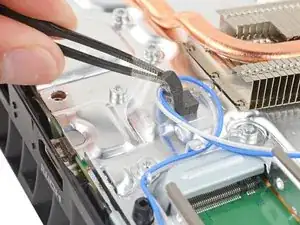
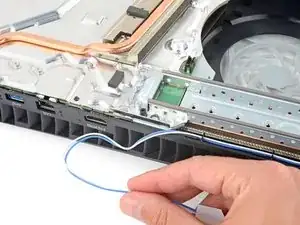
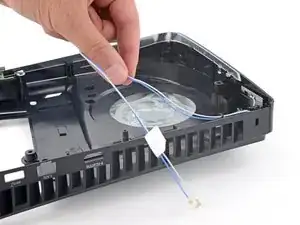
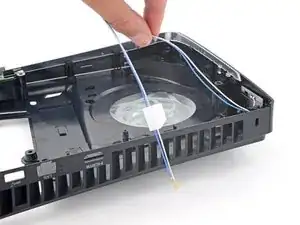
Firmly grip the fan cables white connector head and pull it straight up and out of its socket.
-
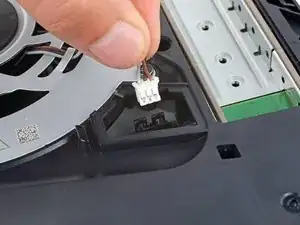
Align the connector over its socket.
-
Push down on the connector's tab with the flat end of a spudger until the connector slides fully into its socket.
-
-
-
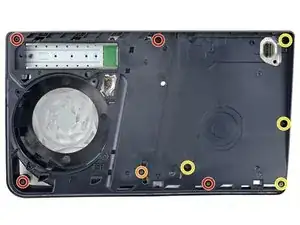
Use a T8 Torx Security screwdriver to remove the four screws securing the fan:
-
One 31.2 mm‑long screw
-
Two 21.3 mm‑long screws
-
One 11.6 mm‑long screw
-
-
-
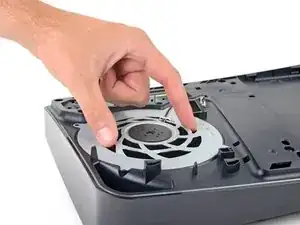
Use your fingers to grab the fan by its vents.
-
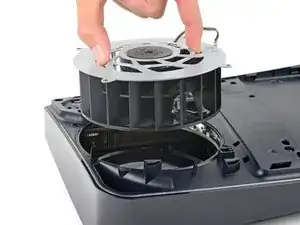
Lift the fan straight up and remove it.
-
Insert the fan so its cables are near their connector.
-
-
-
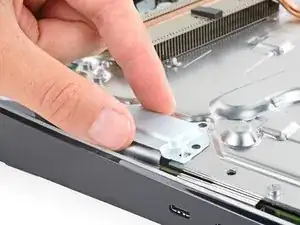
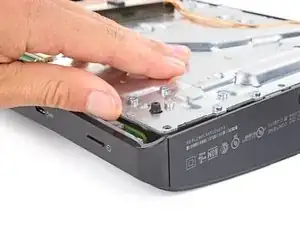
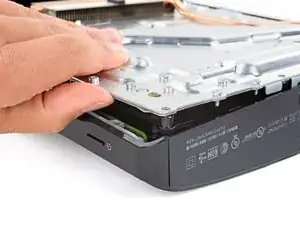
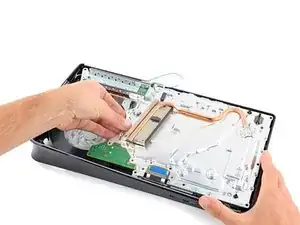
Use a T8 Torx Security screwdriver to remove the two 21.3 mm‑long screws securing the power supply.
-
-
-
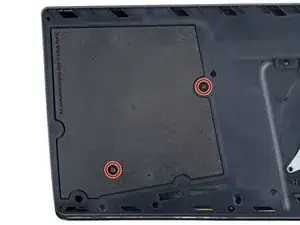
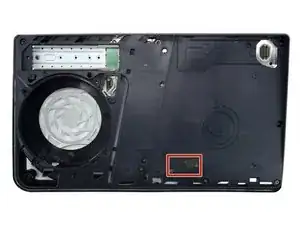
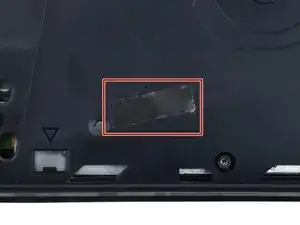
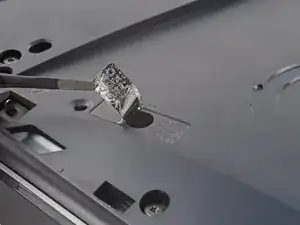
A tamper-evident sticker hides one of the main board cover screws.
-
Use tweezers to peel up the sticker up until you can access the screw underneath.
-
-
-
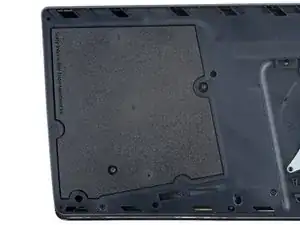
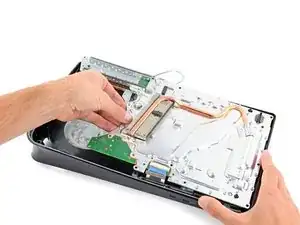
Use a T8 Torx Security screwdriver to remove the nine screws securing the main board cover:
-
Four 18.9 mm‑long screws
-
One 21.3 mm‑long screw
-
Four 31.2 mm‑long screws
-
-
-
Use a T8 Torx Security screwdriver to remove the four screws securing the interconnect cable cover:
-
One 28.7 mm‑long screw
-
Three 7.5 mm‑long screws
-
-
-
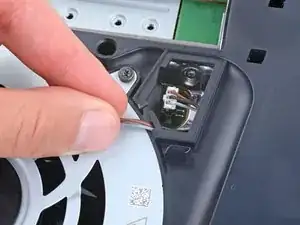
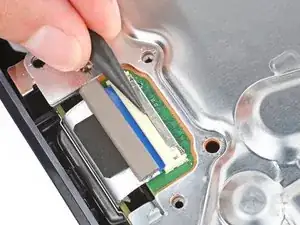
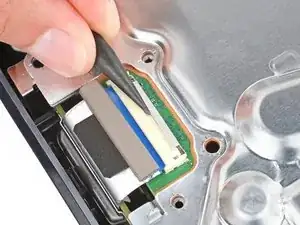
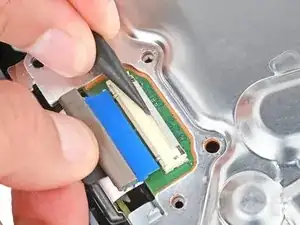
Use the point of a spudger to push the interconnect cable's metal latch down and away from the connector—this is its unlocked position.
-
Keep the latch in its unlocked position and carefully pull the interconnect cable straight out of its socket.
-
-
-
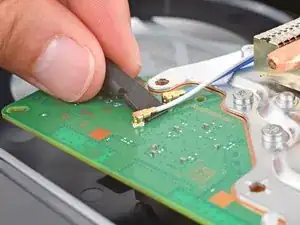
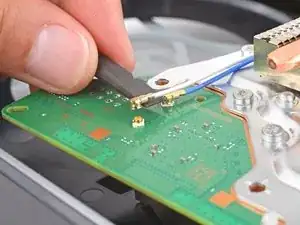
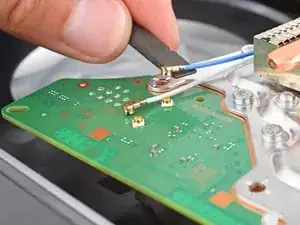
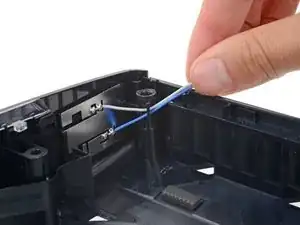
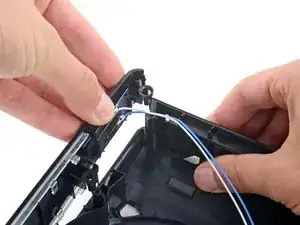
Insert the flat end of a spudger under the metal neck of one of the antenna cable's coaxial connectors.
-
Lift straight up to disconnect the cable.
-
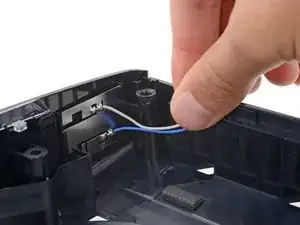
Repeat the process to disconnect the other antenna cable.
-
-
-
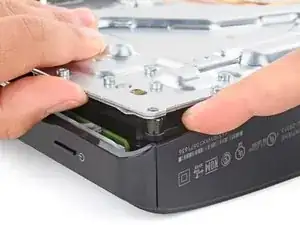
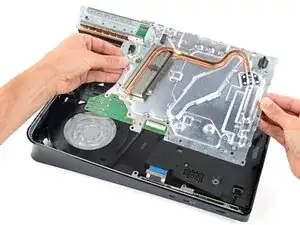
Lift the bottom left corner of the main board assembly off its gray plastic post. Keep the assembly lifted for the next step.
-
-
-
Keep the main board assembly raised with one hand.
-
With your free hand, insert your finger between the assembly and power supply.
-
Push down on the power supply and lift the assembly to separate them.
-
-
-
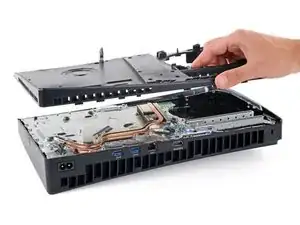
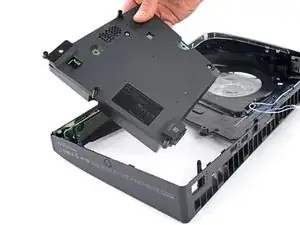
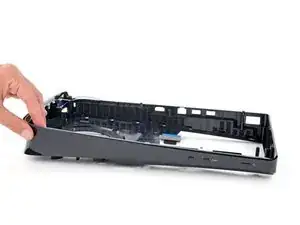
Firmly secure the plastic housing with one hand.
-
With your free hand, grab the upper edge of the main board assembly and lift it out of the plastic housing.
-
Lower the assembly into its recess so its prongs go into their socket on the power supply and the three cutouts go over their alignment posts.
-
-
-
Lift the left edge of the power supply and remove it.
-
Insert the power port into its cutout on the back of your PlayStation.
-
Lower the power supply into its recess making sure the cutout on the bottom left corner goes over its plastic post.
-
-
-
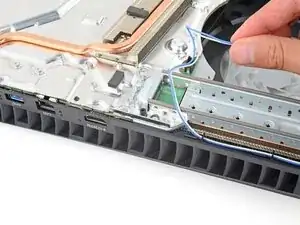
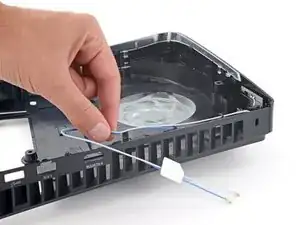
Pull both antenna cables up and out of their clips along the rear edge of your PlayStation.
-
-
-
Push both antenna cables down and out from under their clip on the top right corner of the plastic housing.
-
-
-
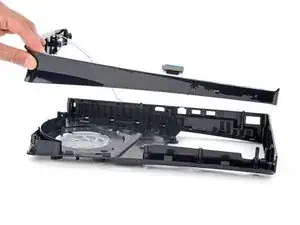
With one hand, secure the right edge of the plastic housing.
-
With your free hand, firmly lift the top edge of the front trim to release its three plastic clips.
-
-
-
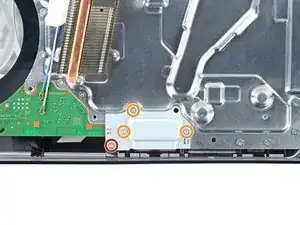
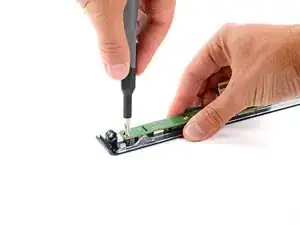
Secure the front trim against your workspace so the USB-C board screws are facing up.
-
Use a Phillips screwdriver to remove the four 6.7 mm‑long screws securing the board.
-
-
-
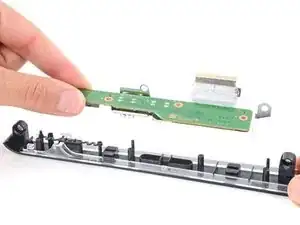
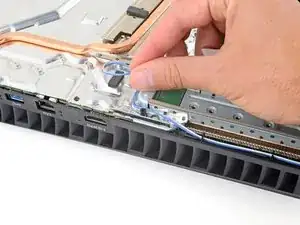
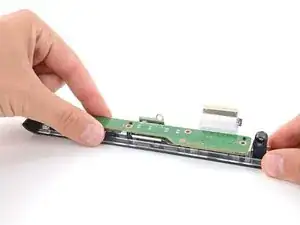
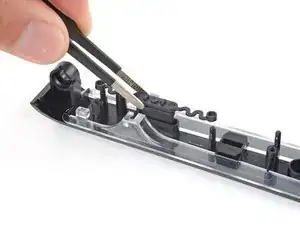
Lift the USB-C board straight up and remove it.
-
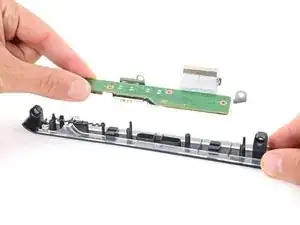
Before putting the board into place, make sure the small, plastic power button is in its recess.
-
Set the board into place so its cutouts go over their alignment pegs on the front trim and the USB-C ports go into their recesses.
-


To reassemble your device, follow these instructions in reverse order.
Take your e-waste to an R2 or e-Stewards certified recycler.
Repair didn’t go as planned? Try some basic troubleshooting, or ask our Answers community for help.