
Introduzione
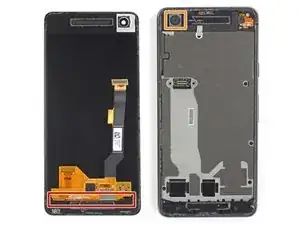
Guida solo prerequisita per rimuovere il display del tuo Pixel 2.
-
-
Se il vetro del tuo schermo è crepato, applica del nastro adesivo su di esso per evitare di farti male e impedire che la rottura si espanda. In questo modo si realizza anche una superficie liscia che permette alla ventosa di aderire.
-
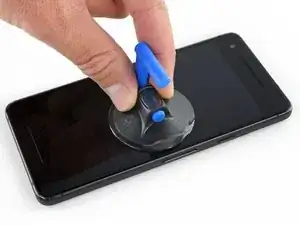
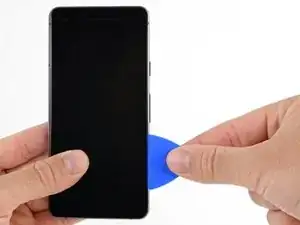
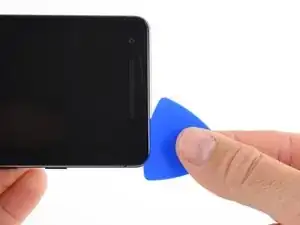
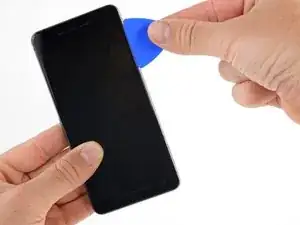
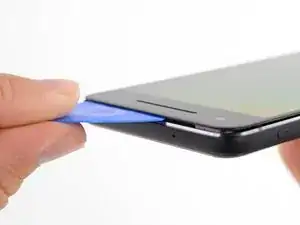
Applica una ventosa il più vicino possibile al lato con il pulsante del volume del telefono, appena prima della curva del bordo.
-
-
-
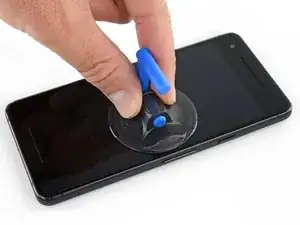
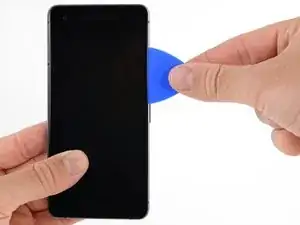
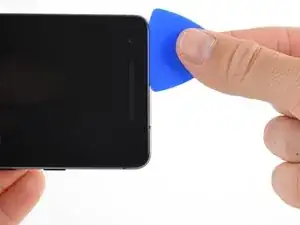
Tira la ventosa con una trazione decisa e costante e inserisci un plettro di apertura tra il pannello frontale e la cover posteriore.
-
-
-
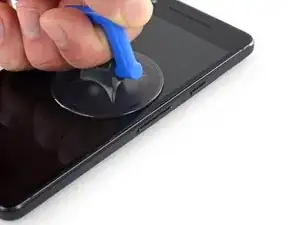
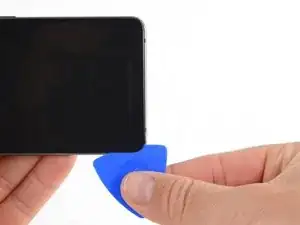
Non inserire il plettro per più di 9 mm nel bordo inferiore del telefono. Se il plettro entrasse in contatto con la parte curvata del pannello OLED, lo schermo potrebbe danneggiarsi.
-
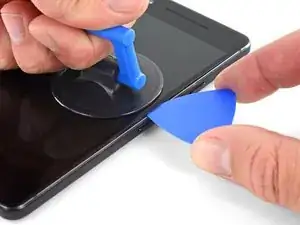
Nell'angolo superiore sinistro, limitati a dei tagli molto superficiali: infilando l'attrezzo molto all'interno potresti danneggiare la fotocamera anteriore.
-
Inserire lo strumento di apertura per più di 1,5 mm sui lati del dispositivo o per più di 9 mm dai bordi superiore e inferiore può causare danni permanenti allo schermo.
-
-
-
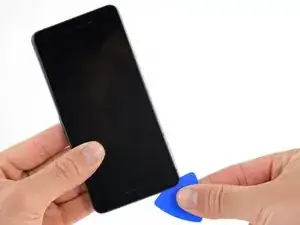
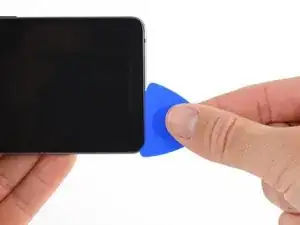
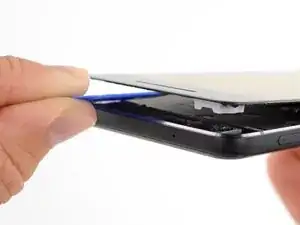
Fai scorrere il plettro di apertura verso l'alto lungo il lato destro del telefono per staccare la colla dello schermo.
-
-
-
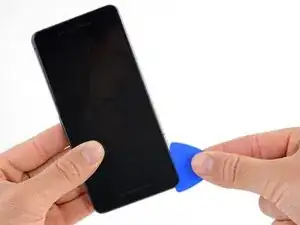
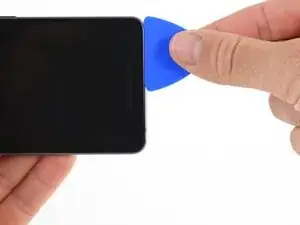
Fai scorrere il plettro di apertura attorno all'angolo superiore destro e lungo il bordo superiore del telefono.
-
-
-
Fai scorrere il plettro attorno all'angolo superiore sinistro del telefono e verso il basso lungo il bordo sinistro.
-
-
-
Fai scorrere il plettro attorno all'angolo inferiore sinistro e attorno al bordo più basso del telefono. Tieni lo strumento poco angolato e distante dallo schermo per evitare danni agli angoli dell'OLED.
-
Fai molta attenzione a non inserire lo strumento di apertura per più di 9 mm per evitare danni al pannello OLED.
-
-
-
Inserisci di nuovo il plettro nel bordo superiore del telefono e fai leva per sollevare delicatamente lo schermo.
-
-
-
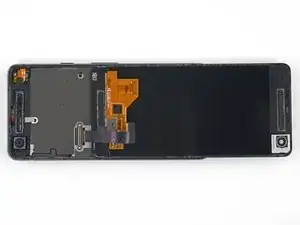
Disponi delicatamente lo schermo sopra il case posteriore, come mostrato nell'immagine, evitando di forzare o strappare il cavo a nastro del display.
-
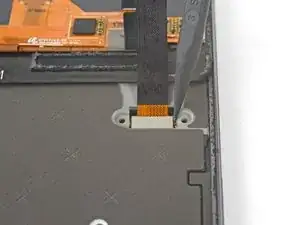
Rimuovi le quattro viti Torx T5 da 4,0 mm che fissano la staffa del cavo del display.
-
-
-
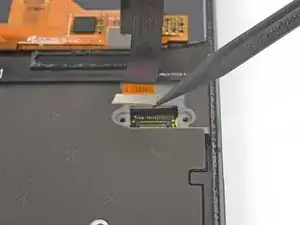
Usa l'estremità a punta di uno spudger per sollevare il connettore del cavo del display e staccarlo dal suo zoccolo sulla scheda madre.
-


Per rimontare il tuo dispositivo, segui queste istruzioni in ordine inverso.

My screen is severly cracked. I would recommend clear packaging tape as it is wide enough to accomodate the suction cup. Thinner cellophane tape won’t seal properly.
John Tippitt -
Does the Google Pixel 2 have be powered off before removing the digitizer screen? Its not mentioned in this article...
Will the phone be damaged if the power is still on when disconnecting the broken screen?
Alex -
Replacing the battery in my Pixel 2 was successful because I read the comments. They are invaluable in this endeavor.
David Castro -
Suggest procedure revision:
Step 1: Read all steps and associated comments before proceeding.
Step 2: Ensure they supplied you with the right F$%^ING TOOLS in the kit before proceeding.
I'm F$%^ED because any store around me that might have this T4 Torx bit is already closed and my screen is already off. My kit came with a T2 Torx bit which is not used anywhere in this entire process.
Jens Davidsen -
I bought one of the kits and it had everything needed to change the battery except the alcohol, including spudgers, screwdriver, torx (2 sizes), tweezer, alcohol dispenser, glue strips and die-cut glue card that fit the phone case perfectly. I followed these instructions and read the comments. Applied alcohol and patience, took my time and got the job done without any damage to the phone. Thank you ifixit!
Jeffrey Price -