Introduzione

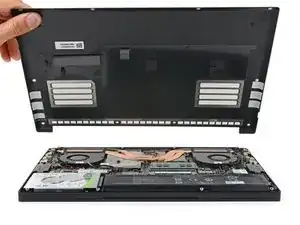
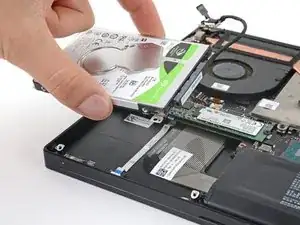
This guide demonstrates how to remove the HDD (Hard Disk Drive) in your Razer Blade 15" (2018).

  1. U3WCBShbaLvURkIn
    U3WCBShbaLvURkIn
    DLKeF3nRAqw6JZHV
    • Allow your laptop's battery to drain below 25% before starting this repair—a charged battery may catch fire if damaged.

    • Unplug all cables, fully shut down your laptop, and close the lid.

  2. mwpZH3qBEQhGfMsZ
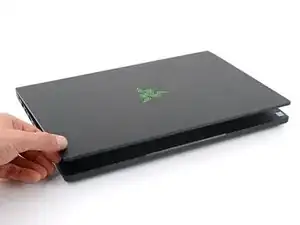
    • Rotate your laptop so the screen hinge is farthest from you.

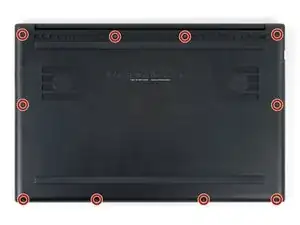
    • Use a Torx T5 driver to remove the ten 3.8 mm-long screws securing the back cover.

  3. UyswDlrMoOuPxypO
    UyswDlrMoOuPxypO
    ZCQLS6SmYFD16roT
    AKZCEEwppCqshwfw
    • Depending on the age and condition of your laptop, the back cover may come off sooner than this guide instructs. If the cover feels loose, remove it at any time.

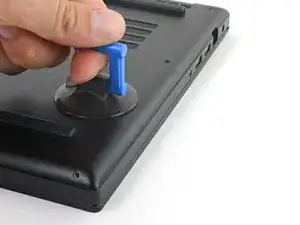
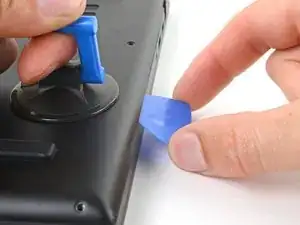
    • Apply a suction handle to the right edge of the back cover, between the middle screws and the screws closest to you.

    • Pull up on the suction handle to create a small gap between the back cover and the frame.

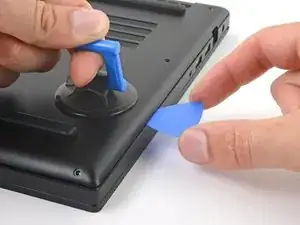
    • Insert an opening pick into the gap.

  4. 5ZeHhQqyGyPNtQ2Z
    5ZeHhQqyGyPNtQ2Z
    65pDl33yTCvLjvtV
    6GNJkCfOsbUZWFQE
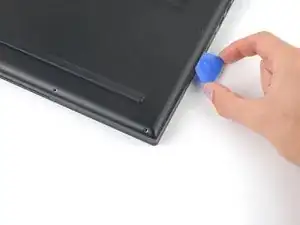
    • Angle your opening pick upward, away from the frame. Keep it angled upward as long as it's between the back cover and the frame.

    • Insert your pick up to 10 mm (0.4 in) deep.

  5. aoYEQ1ZuOohURDBV
    aoYEQ1ZuOohURDBV
    3wZjhrAbjWVHpYDE
    QaiFOX5uygSIVlEo
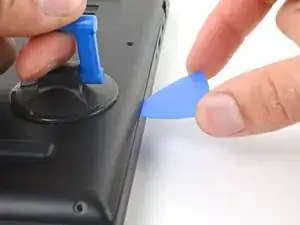
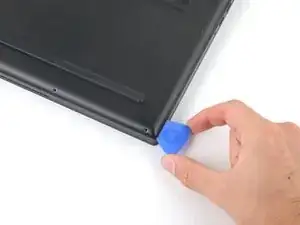
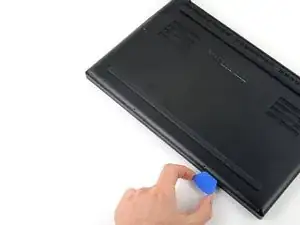
    • Slide your opening pick around the bottom right corner of the back cover to free it from the frame.

  6. aoJKrYRFNEwNCsgQ
    aoJKrYRFNEwNCsgQ
    WU5LeqALfrufkyDR
    1ig13qvemkhwD3TF
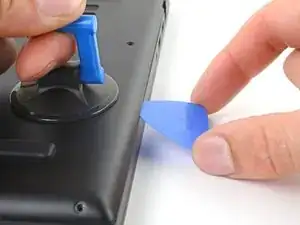
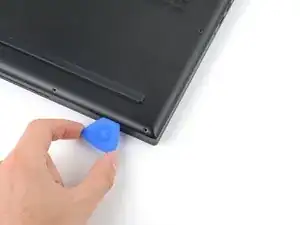
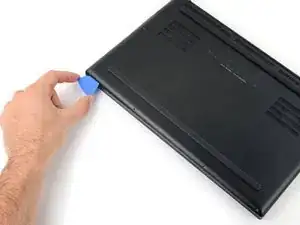
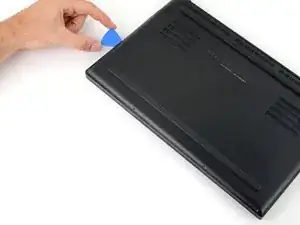
    • Slide your opening pick along the front edge and around the front left corner of the back cover to free it from the frame.

  7. I5kaOpbIqhSTcGUi
    I5kaOpbIqhSTcGUi
    jVDlxYULoPWxIQZK
    sopitFR2e4OLx1Fn
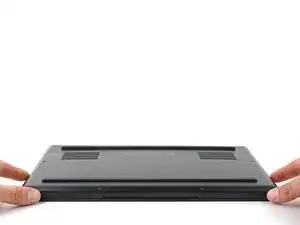
    • Remove the back cover.

    • Lay the back cover down on its rubber feet to avoid damaging the gray thermal pads on its underside.

  8. tl4ggcyTcEFHBtcx
    tl4ggcyTcEFHBtcx
    QPDdmGyfDxdgdhNN
    • Apply a heated iOpener to the battery cable tape for one minute.

    • You can also use a hair dryer—but be careful, as overheating the battery may damage it or create a fire hazard.

  9. ERiRULpYZEt5i1me
    ERiRULpYZEt5i1me
    LJcIXWnnRRFw4dPm
    hWjBHE1olSZCQguG
    • Be careful not to damage the battery with your tool.

    • Use blunt nose tweezers or your fingers to peel the battery cable tape away from the cable.

  10. OtNVUtIl2ECSCjeK
    OtNVUtIl2ECSCjeK
    DFBDFRBp2HppeMkb
    Fgs2I1YL5fbhjokZ
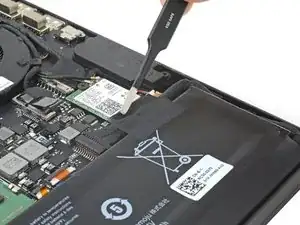
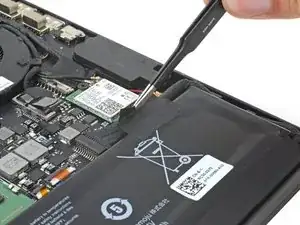
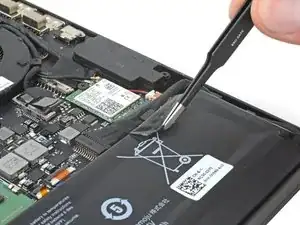
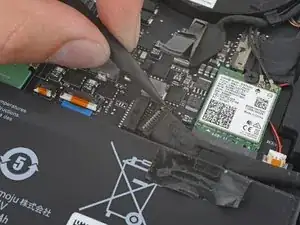
    • Use the point of a spudger to press on alternating sides of the battery connector and walk it out of its socket.

  11. 1hEwhhAafoTL5RAQ
    1hEwhhAafoTL5RAQ
    c6tUsi3qbas3bbhm
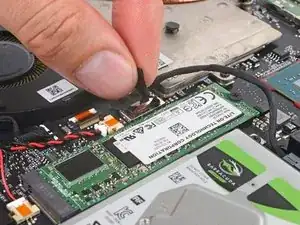
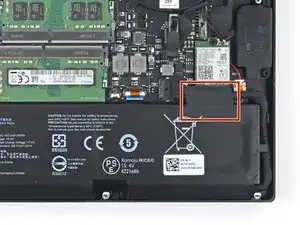
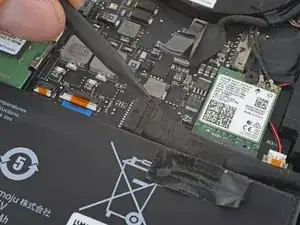
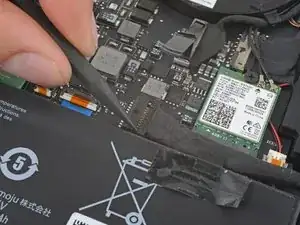
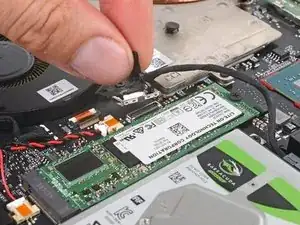
    • Grab the pull tab on the hard drive press connector, just below the right fan.

    • Pull up and disconnect the connector from its socket.

    • During reassembly, align the press connector over its socket and press down until it clicks into place. If it doesn't connect, re-align it and try again.

  12. WRoYpxnuqZAMiCAB
    WRoYpxnuqZAMiCAB
    h6ZNASpM4UpLp5if
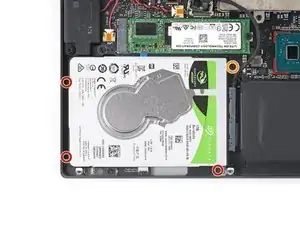
    • Use your Phillips screwdriver to remove the four screws securing the hard drive mounts:

    • Three 3.2 mm screws

    • One 5.2 mm screw

  13. MDjpKWiWc1ZIKNvY
    MDjpKWiWc1ZIKNvY
    U6jTsOYBP4cTdIOu
    • Lift the hard drive straight up to remove it.

Conclusione

To reassemble your device, follow these instructions in reverse order.

Clay Eickemeyer

Membro da: 19/09/22

64976 Reputazione

0 commenti