Introduzione

  1. bWAZXlX21ld3vlQO
    • Guarda il video prima di iniziare! Assicurati di leggere tutti i passaggi prima di iniziare.

    • Consiglio fortemente di acquistare l'Essential Electronics Toolkit IF145-047-1 se non hai gli strumenti appropriati per la procedura.

    • Non lamentatevi con me del video: non l'ho registrato io. A mio parere sorvola troppo sui connettori. Tutti i connettori sono degli ZIF tranne alcuni che sono coassiali.

    • Il connettore che mi preoccupa di più è quello dello schermo: ha una linguetta flessibile da usare per tirarlo verso la cerniera dalla scheda madre. Ricollegarlo sembra difficile ma in realtà non dovresti avere problemi.

  2. TLFLcqWKQ2NIPmNi
    TLFLcqWKQ2NIPmNi
    3HDvwPXa14FUl6AN
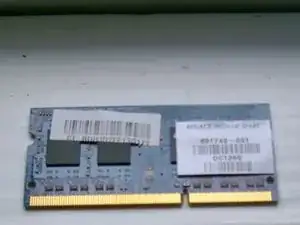
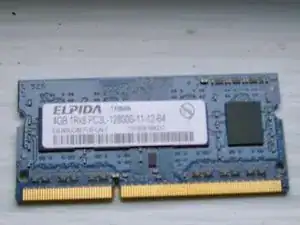
    • 8GB 1600MHz DDR3 SDRAM <br/> PC3-12800 Non ECC Unbuffered 204-Pin SODIMM

    • Nell'immagine vedi il banco originale da 4 GB.

  3. WVWMjPUjMELSWSsK
    WVWMjPUjMELSWSsK
    4KqE3uKXWrl14QPO
    bKDSQbipJscAEXMG
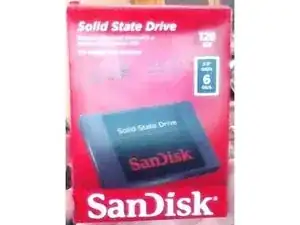
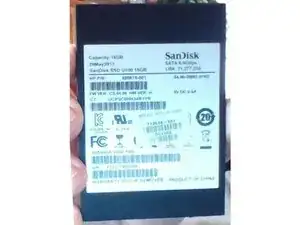
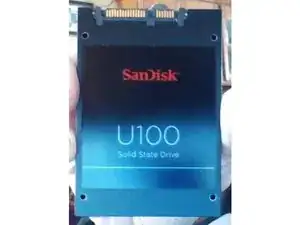
    • SanDisk 128GB SATA 6.0GB/s 2.5-Inch 7mm Height Solid State Drive (SSD) con velocità di lettura fino a 475MB/s- SDSSDP-128G-G25

    • L'immagine della scatola è del nuovo SSD, ma nelle altre due vedi l'SSD originale.

  4. abwoA2ET6mdUpwKZ
    abwoA2ET6mdUpwKZ
    TnZDwF6cXvCEiQdk
    • Esegui un backup dell'SSD originale in modo da poter ripristinare ChromeOS sul nuovo. Il backup può essere eseguito tramite "Chromebook Recovery Utility" che trovi sullo store online di Chrome come mostrato nella prima immagine. Ti servirà una chiavetta USB da 4 GB.

    • Scrivi una tabella delle partizioni vuota sul tuo nuovo SSD prima di installarlo. Ti servirà un sistema Linux con un'interfaccia SATA e il programma gparted per completare questo passaggio.

    • L'SSD non sarà riconosciuto dal sistema senza la tabella vuota!!!!La seconda immagine mostra il programma "gparted".

    • Devi solo indicare al programma gparted il nuovo SSD e la tabella delle partizioni verrà creata se non è già presente (come su un SSD nuovo). Se è già presente dovrai pulirla in modo che ChromeOS possa inizializzarla correttamente durante l'installazione. Premi il tasto cancella per rimuovere la linea della tabella seleezionata.

    • Puoi fare questo passaggio con il tuo Chromebook. Dovrai installare crouton e un adattatore da USB a SATA.

    • Esegui tute queste procedure PRIMA di installare le componenti nuove nel Chromebook!!!!!!

  5. sdVYLWZQj2CWpGW2
    sdVYLWZQj2CWpGW2
    4RGnoO1jxFSLAgbY
    • Al primo avvio ti verrà richiesto di selezionare il dispositivo da cui ripristinare il sistema sul tuo nuovo SSD. Se non ne hai creato uno nel passaggio precedente, dovrai reinstallare l'SSD originale e crearlo. Ti avevo detto di leggere tutti i passaggi, vero?

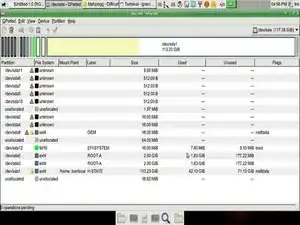
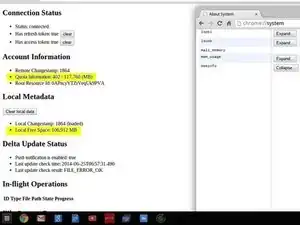
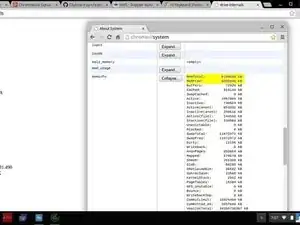
    • Le immagini ti mostrano dove controllare per capire se i tuoi aggiornamenti funzionano correttamente nell'URL di sistema. Semplicemente scrivili nel tuo FYI.

    • Se tutto funziona correttamente come nelle immagini, puoi installare crouton, ubuntu e virtualbox e usare seriamente il tuo Cromebook ora!!!!!

    Fixed dead URL for USB/SATA adapter device acquisition in next to last bullet point under step four above.

    tcagle53 -

Conclusione

Per rimontare il dispositivo, segui le istruzioni in ordine inverso.

tcagle53

Membro da: 18/06/14

8207 Reputazione

8 commenti

How big should be the partition?

Rafael Bernardino -

The partition size is governed by the size of the SSD you install. ChromeOS does this for you when you restore from your ChromeOS image media. I got 107 GB of free formatted space from a 128 GB SSD as you can see above. This seems about right given the original SSD was 16 GB.

tcagle53 -

I have this model and I want a SSD with more storage, this model to be specific: http://www.bestbuy.com/site/seagate-1tb-...

Is it compatible?

Sabria Page -

That link is to a SSHD not an SSD. A SSHD is still a rotating magnetic media drive. As such it will drain your battery even faster than the stock drive does. It also doesn't give any dimensions for the device. I am not sure if all 2.5" drives have the same dimension in the thickness (smallest) of the three dimensions. I believe the SSD I used was 10mm thick. If you can find the dimension specs and it is similar it will work but you may find your battery life of your chromebook suffers to some extent. If you just want a little more storage the SD card slot is an much easier way to get more storage.

tcagle53 -

I just checked my original guide and I gave the thickness of my upgrade drive as 7mm NOT 10mm. If any drive you are considering is thicker than 7mm you can forget it because it won't fit in the chromebooks thin drive compartment.

tcagle53 -

I looked up the model number of that unit on google and found the dimension for thickness of that drive is 9.5mm so..... no it won't fit.

tcagle53 -

Would there be any benefit / downside to using a 16Gb RAM to this motherboard?

John R -

Checking if feasible……. from the HP documentation page, which I can hardly believe an five year old link I setup under the device page on ifixit.com STILL WORKS!!!!!

product documentation

From manual above on page 1….

Memory One SODIMM memory module slot Dual-channel memory support DDR3L-1600 MHz Dual Channel support DDR3-1333 MHz support (DDR3L-1600 downgraded to DDR3-1333) Supports up to 4 GB of system RAM in the following configurations: ● 4096 MB total system memory (4096 MB × 1) ● 2048 MB total system memory (2048 MB × 1)

So the answer to your question is there is no benefit/downside unless you are trying to get your device to an inoperable state (I am assuming since I’ve not actually tried).

tcagle53 -