
Introduzione
Segui questa guida per sostituire un altoparlante sinistro difettoso nella tua console Nintendo Switch Lite.
Nota: Questa procedura richiede lo scollegamento della batteria per sicurezza. Per fare ciò, bisogna rimuovere la piastra protettiva. La piastra protettiva è legata al dissipatore con la pasta termica, che dovrà essere pulita e riapplicata prima di installare di nuovo la piastra protettiva.
-
-
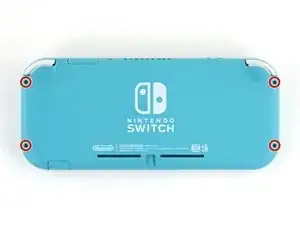
Usa un cacciavite tri-wing Y00 per rimuovere le quattro viti lunghe 6,3 mm che fissano il pannello posteriore.
-
-
-
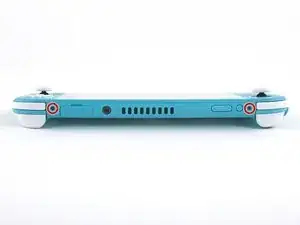
Usa un cacciavite a croce JIS o quello PH 000 ufficiale di iFixit per rimuovere le seguenti viti di fissaggio del pannello posteriore:
-
Due viti lunghe 3,6 mm nella parte superiore del dispositivo
-
Due viti lunghe 3,6 mm nella parte inferiore del dispositivo
-
-
-
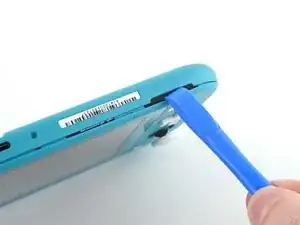
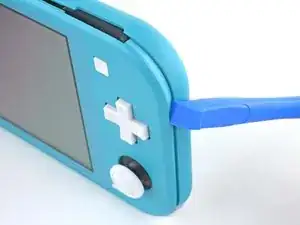
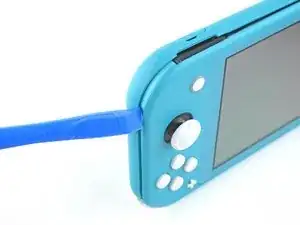
Inserisci uno strumento di apertura della griglia dell'altoparlante di sinistra, nella parte inferiore del dispositivo.
-
Torci lo strumento di apertura per sganciare le clip che bloccano il pannello posteriore.
-
-
-
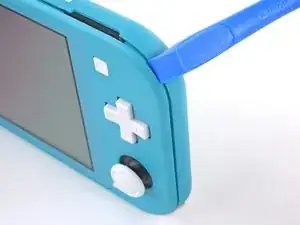
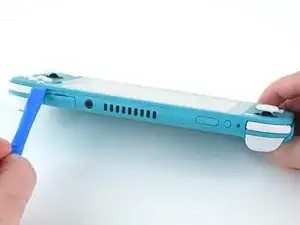
Fai scorrere l'attrezzo di apertura attorno al bordo inferiore sinistro per sganciare le clip sul lato sinistro del dispositivo.
-
-
-
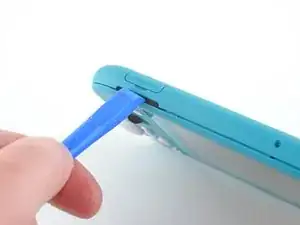
Inserisci uno strumento di apertura della griglia dell'altoparlante di sinistra, nella parte inferiore del dispositivo.
-
Torci l'attrezzo per sganciare le clip che bloccano il pannello posteriore.
-
-
-
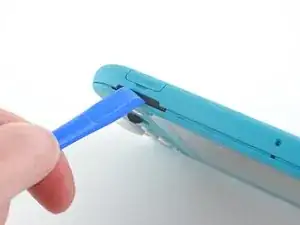
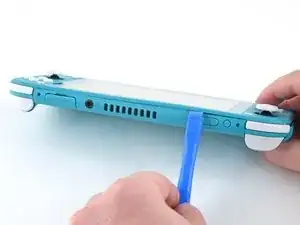
Fai scorrere lo strumento di apertura attorno all'angolo inferiore destro e usalo come leva per liberare le clip sul lato destro del dispositivo.
-
-
-
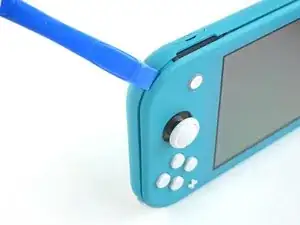
Continua a far scorrere lo strumento di apertura lungo la fessura fino alla parte superiore del dispositivo per sganciare le clip.
-
-
-
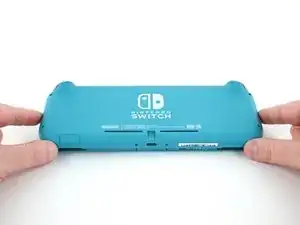
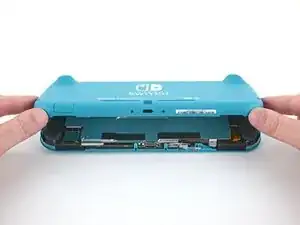
Solleva il bordo inferiore del pannello, aprendolo come un libro.
-
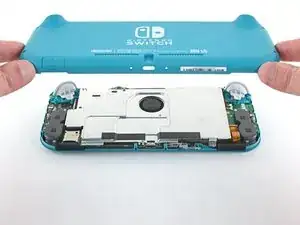
Rimuovi il pannello posteriore.
-
-
-
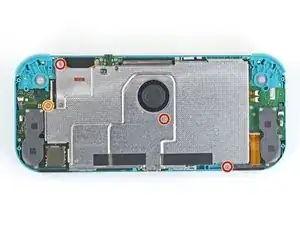
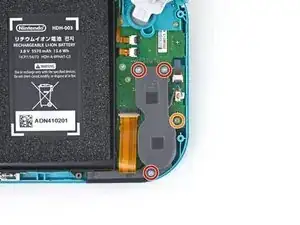
Usa un cacciavite a croce JIS 000 o quello PH 000 ufficiale di iFixit per rimuovere le seguenti quattro viti:
-
Tre viti lunghe 3,1 mm
-
Una vite lunga 4,5 mm
-
-
-
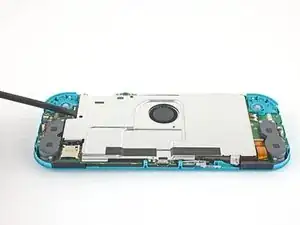
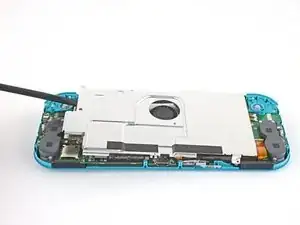
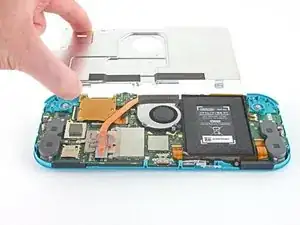
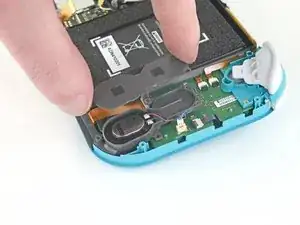
Usa uno spudger o le dita per sollevare la piastra di schermatura e staccarla dal dispositivo.
-
Rimuovi la piastra di schermatura.
-
-
-
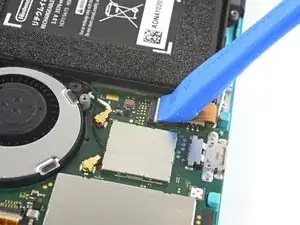
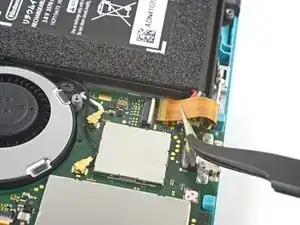
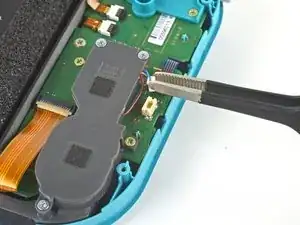
Usa uno strumento di apertura o un'unghia per ruotare la piccola aletta incernierata del connettore ZIF del cavo di interconnessione sulla scheda madre.
-
-
-
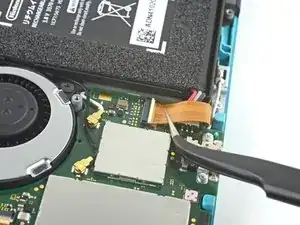
Usa delle pinzette per far scorrere fuori dal suo connettore e quindi scollegare il cavo di interconnessione sulla scheda madre.
-
-
-
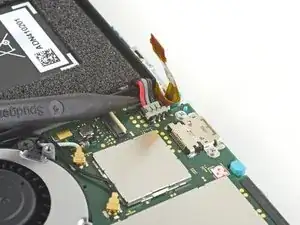
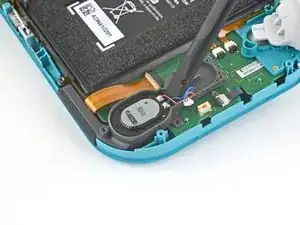
Usa l'estremità punta di uno spudger per sollevare il connettore della batteria estraendolo dal suo zoccolo sulla scheda madre.
-
-
-
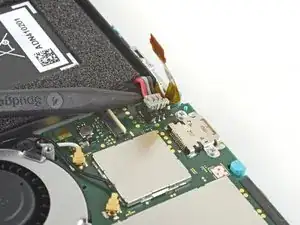
Usa un paio di pinzette o le dita per tirare il cavo dell'altoparlante sinistro verso l'alto e via dalla sua presa sulla scheda figlia.
-
-
-
Usa un cacciavite a croce Phillips per rimuovere le quattro viti seguenti:
-
Tre viti da 2,5 mm
-
Una vite da 4,5 mm
-
-
-
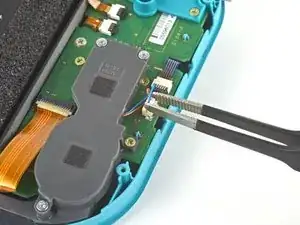
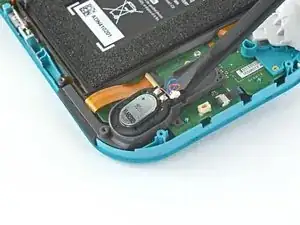
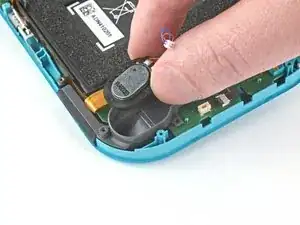
Inserisci uno spudger nella fessura nella parte superiore dell'altoparlante.
-
Solleva l'altoparlante per rimuoverlo dal suo alloggio.
-
Rimuovi lo speaker sinistro.
-


Per rimontare il tuo dispositivo, segui le istruzioni in ordine inverso.
Porta i tuoi rifiuti elettronici a un riciclatore certificato R2 o e-Stewards.
La riparazione non è andata come previsto? Prova delle soluzioni ai problemi di base, oppure rivolgiti alla nostra comunità Risposte Nintendo Switch Lite per trovare aiuto.

Un commento
Est-ce que les haut parleur des la switch classique et de la lite son pareil et compatible ?
All my screws got stripped any ideas on how to remove?
Almost A Mammal -
A Y0 screwdriver seemed to work better for me.
Tommy Morrill -
What type of screw driver do I use to un screw the screws and which way
Luca Capito -
Y 0.6 was all I had but it seemed to fit perfectly
Trevor -