Introduzione
Usa questa guida per sostituire una batteria usurata. Se la tua batteria è gonfia, prendi adeguate precauzioni.
-
-
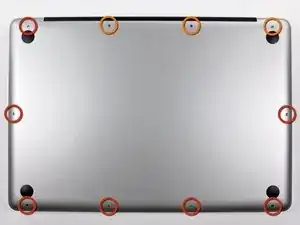
Rimuovi le seguenti 10 viti a croce Phillips che fissano il case inferiore a quello superiore:
-
Sette viti da 3 mm.
-
Tre viti da 13,5 mm.
-
-
-
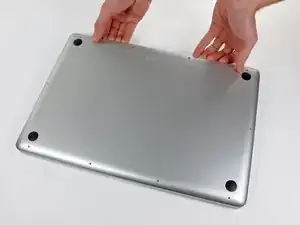
Usando entrambe le mani, solleva il case inferiore vicino alla griglia di aerazione per sbloccare le due clip che lo fissano al case superiore.
-
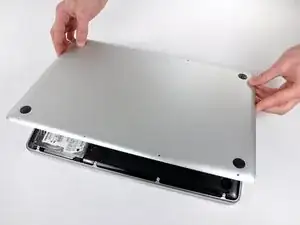
Rimuovi il case inferiore e mettilo da parte.
-
-
-
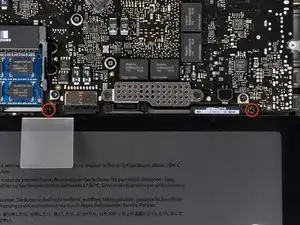
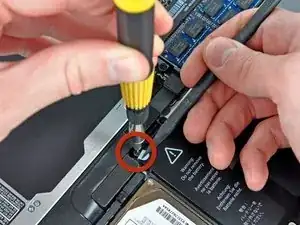
Usa la punta di uno spudger per piegare all'indietro l'aletta dell'adesivo con l'avviso di non rimuovere la batteria " Warning: Do not remove the battery" mentre rimuovi le viti Pentalobe a cinque punte celate al di sotto.
-
-
-
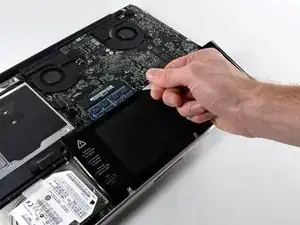
Solleva la batteria tirando la linguetta di plastica e falla scorrere lontano dal bordo lungo del case superiore.
-
-
-
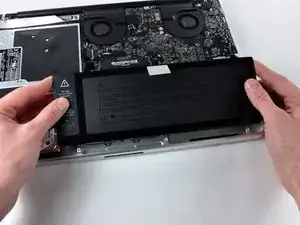
Inclina la batteria all'indietro quanto basta per rendere accessibile il connettore del cavo della batteria.
-
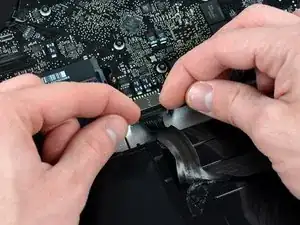
Tira via il connettore del cavo della batteria dallo zoccolo sulla scheda logica e rimuovi la batteria dal case superiore.
-
Per riassemblare il dispositivo, segui queste istruzioni in ordine inverso.

18 commenti
Just installed a new battery from Anker. This tutorial was very helpful to me. iFixit was out of stock on the battery I needed, or I would have ordered from you.
Anker did include the special 5 prong tiny screwdriver needed.
JohnB -
I bought and installed the ifixit.com battery for my Mid 2009 15 inch MacBook Pro and it was easy and is working great. Much better than the dying battery it had. It was very easy. I did purchase the required tools which made it simple. Thanks.
1tom2go -
Ordered the battery from iFixit, forgot to order the Pentalobe screwdriver. Nevermind, if you only do that stuff once (as I expect after 6 years with one battery) - don't spend the money on special equipment that cannot be used for anything else :)
Opening the macbook is easy (I have done that before to exchange the superdrive with a larger harddisk and the original HD with an SSD drive, and a couple of times to clean the fans), but the 3 screws on the battery are a pain.
What did the job for me: an old mini-flathead-screwdriver (approx. 2mm? - just slightly larger than the pentalobe) and a file. As none of my other screwdrivers would work with the ....pentalobes, i filed down the flathead (-)screwdriver so that it could get hold in 2 of the lobes - which did let me open and close these screws without a problem. My screws were not closed very tight though - if they are there is probably no way around the right tool.
May be helpful to have more distinct colors to identify the different screws.
Victor Caamano -