Introduzione
Segui questa guida per sostituire una batteria esaurita o degradata nel Nintendo Switch Lite.
La Switch utilizza delle viti JIS, ma all'occorrenza puoi usare un cacciavite Phillips. Stai molto attento a non spanare le viti. Le punte Phillips di iFixit sono progettate per essere compatibili anche con le viti JIS.
Per la tua sicurezza, scarica la batteria da sostituire sotto il 25% prima di smontare la tua Switch. In questo modo si riduce il rischio di un pericoloso incendio se la batteria viene danneggiata accidentalmente nel corso della riparazione. Se la tua batteria è gonfia, prendi adeguate precauzioni.
Nota: questa procedura richiede la rimozione della piastra di schermatura, che è parzialmente incollata al dissipatore da della pasta termica. Questa pasta deve essere ripulita e quindi applicata nuovamente prima di rimontare la piastra di schermatura.
-
-
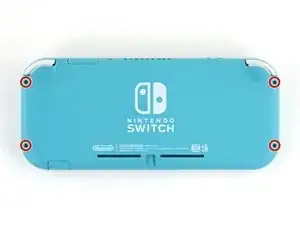
Usa un cacciavite tri-wing Y00 per rimuovere le quattro viti lunghe 6,3 mm che fissano il pannello posteriore.
-
-
-
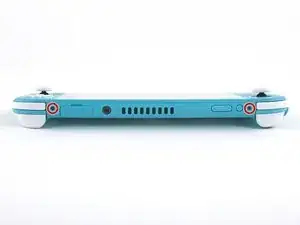
Usa un cacciavite a croce JIS o quello PH 000 ufficiale di iFixit per rimuovere le seguenti viti di fissaggio del pannello posteriore:
-
Due viti lunghe 3,6 mm nella parte superiore del dispositivo
-
Due viti lunghe 3,6 mm nella parte inferiore del dispositivo
-
-
-
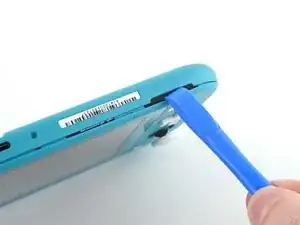
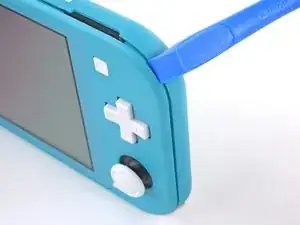
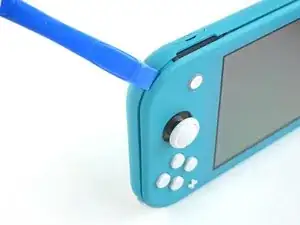
Inserisci uno strumento di apertura della griglia dell'altoparlante di sinistra, nella parte inferiore del dispositivo.
-
Torci lo strumento di apertura per sganciare le clip che bloccano il pannello posteriore.
-
-
-
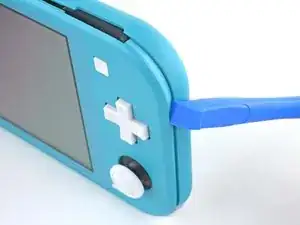
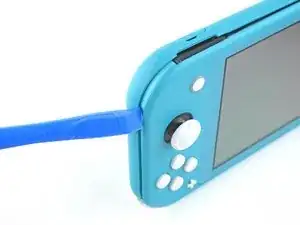
Fai scorrere l'attrezzo di apertura attorno al bordo inferiore sinistro per sganciare le clip sul lato sinistro del dispositivo.
-
-
-
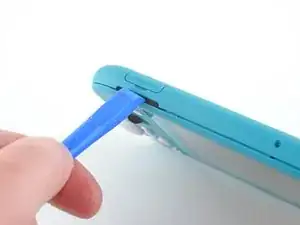
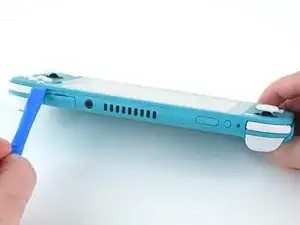
Inserisci uno strumento di apertura della griglia dell'altoparlante di sinistra, nella parte inferiore del dispositivo.
-
Torci l'attrezzo per sganciare le clip che bloccano il pannello posteriore.
-
-
-
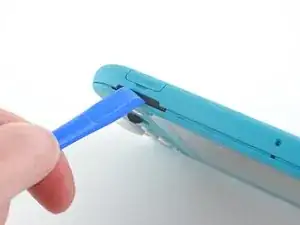
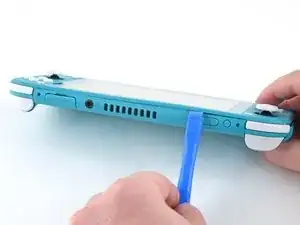
Fai scorrere lo strumento di apertura attorno all'angolo inferiore destro e usalo come leva per liberare le clip sul lato destro del dispositivo.
-
-
-
Continua a far scorrere lo strumento di apertura lungo la fessura fino alla parte superiore del dispositivo per sganciare le clip.
-
-
-
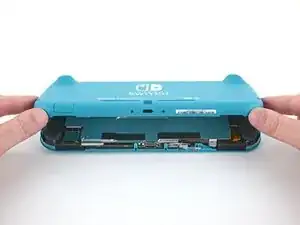
Solleva il bordo inferiore del pannello, aprendolo come un libro.
-
Rimuovi il pannello posteriore.
-
-
-
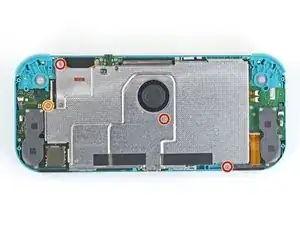
Usa un cacciavite a croce JIS 000 o quello PH 000 ufficiale di iFixit per rimuovere le seguenti quattro viti:
-
Tre viti lunghe 3,1 mm
-
Una vite lunga 4,5 mm
-
-
-
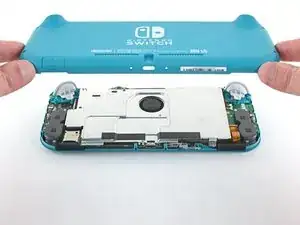
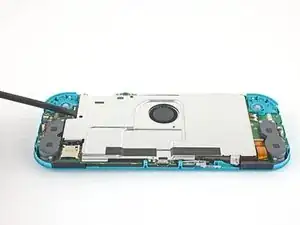
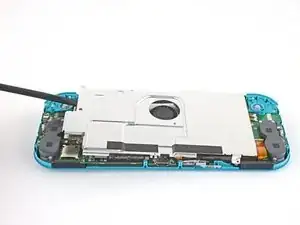
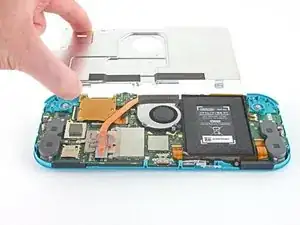
Usa uno spudger o le dita per sollevare la piastra di schermatura e staccarla dal dispositivo.
-
Rimuovi la piastra di schermatura.
-
-
-
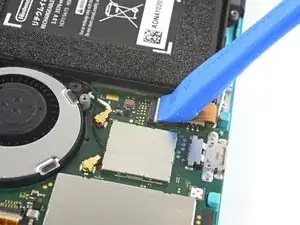
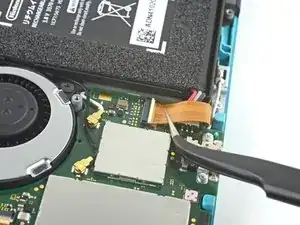
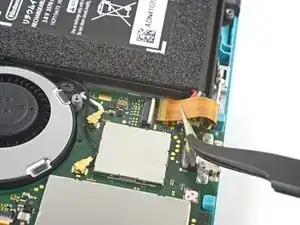
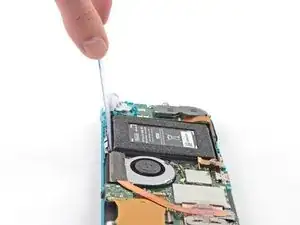
Usa uno strumento di apertura o un'unghia per ruotare la piccola aletta incernierata del connettore ZIF del cavo di interconnessione sulla scheda madre.
-
-
-
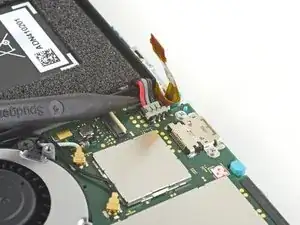
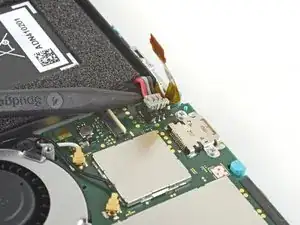
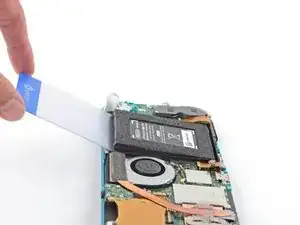
Usa delle pinzette per far scorrere fuori dal suo connettore e quindi scollegare il cavo di interconnessione sulla scheda madre.
-
-
-
Usa l'estremità punta di uno spudger per sollevare il connettore della batteria estraendolo dal suo zoccolo sulla scheda madre.
-
-
-
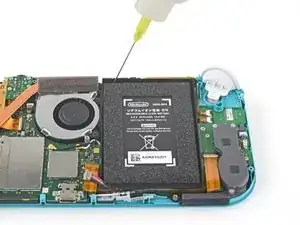
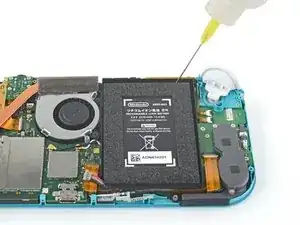
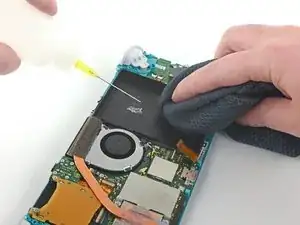
Per ammorbidire l'adesivo, applica alcune gocce di antiadesivo oppure alcol isopropilico ad alta concentrazione (90% o superiore) lungo il lato superiore dell'interno del vano della batteria.
-
-
-
Ruota verso l'alto il bordo superiore del dispositivo per consentire all'alcol isopropilico di eseguire il suo lavoro sotto la batteria.
-
Tienilo così per 1-2 minuti per dar tempo all'alcol isopropilico di ammorbidire l'adesivo.
-
-
-
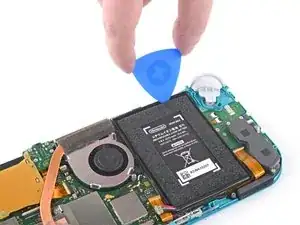
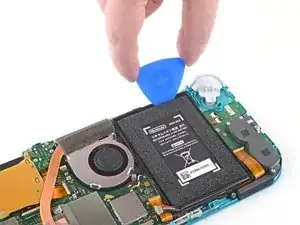
Inserisci un plettro di apertura nella fessura tra la batteria e il bordo del suo alloggiamento.
-
Infila con cautela la punta del plettro di apertura sotto la batteria e fallo scorrere lungo il bordo per iniziare a tagliare l'adesivo sottostante.
-
-
-
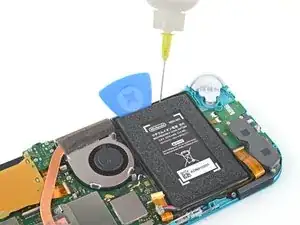
Lascia in posizione il plettro di apertura e applica qualche altra goccia di antiadesivo o alcol isopropilico all'interno del vano della batteria.
-
Solleva il bordo superiore del dispositivo e aspetta 1-2 minuti per lasciare il tempo al solvente di ammorbidire l'adesivo.
-
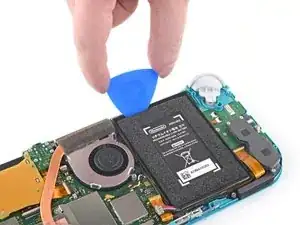
Continua a lavorare con il plettro di apertura lungo il bordo superiore della batteria, tagliando ulteriormente l'adesivo sottostante.
-
-
-
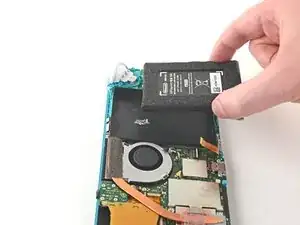
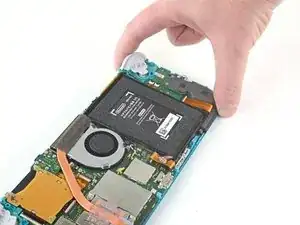
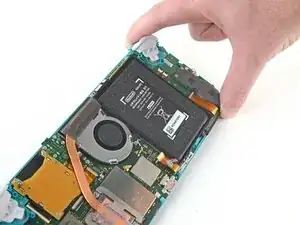
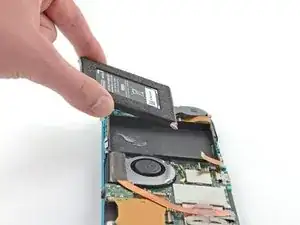
Una volta che c'è spazio per farlo, inserisci una scheda di plastica sotto la batteria e fai leva lentamente per sollevare la cella.
-
Rimuovi la batteria.
-
-
-
Usa dell'antiadesivo O alcol isopropilico e un panno in microfibra per pulire ogni adesivo rimasto sotto la batteria prima di installare la nuova cella.
-
Se la tua nuova batteria non è dotata di adesivo preinstallato, segui questa guida per installare adesivo pretagliato sulla parte inferiore della batteria.
-


Per riassemblare il tuo dispositivo, segui queste istruzioni in ordine inverso.
Per prestazioni ottimali, calibra la batteria appena installata dopo aver completato la procedura.
Porta i tuoi rifiuti elettronici a un riciclatore certificato R2 o e-Stewards.
La riparazione non è andata come previsto? Prova delle soluzioni di base ai problemi, oppure rivolgiti alla nostra https://www.ifixit.com/Answers/Device/Ni... per trovare aiuto nella risoluzione dei problemi.

18 commenti
Hello!
I am preparing to repair my daughters nintendo switch light. It has stopped charging out of no where. I have all the tools, I just can't find the battery anywhere. Where would you recommend buying it from?
If you are still looking Ifixit sells one themselves Nintendo Switch Lite Battery
Thanks for the guide. Battery replacement kits are now available on Amazon: https://www.amazon.com/Nintendo-HDH-001-... (they weren’t in November! I was also looking for this during that time)
Unfortunately, the battery was much harder to remove than I expected. I did use a lot of isopropyl alcohol, but the adhesive they use really was giving me a lot of trouble. I should’ve wisened up and googled other adhesive removal methods or tried a new approach other than prying with the spudgers.
Well, now the LCD now has what looks like pressure damage in the bottom left where I’d imagine a lot of the prying pressure went. It is much more noticeable when the screen goes all-white, and not too bad with darker colors.
I don’t blame iFixit for my mistake of course, and it is really disappointing that Nintendo used the amount of adhesive that they did. But I hope this comment can serve as a warning to others attempting this repair to be more gentle even if it’s refusing to come off.
vmgm -
Yikes! Sorry to hear this. How did you pry with the spudger exactly? If you kept it around the top edge of the battery well then I would assume it wouldn’t damage the screen, but if you inserted the end of the spudger deeper in the battery well and used that point as the fulcrum, then I could see that putting a lot of pressure on the back of the LCD.
@craiglloyd I did an embarrassing amount of spudger prying pretty much everywhere along the top/bottom of the battery, I actually broke a few spudger tips in the process so that might reveal something about my approach…
But, I’m starting to think it may not be LCD damage after all, but rather some isopropyl alcohol caught behind the screen– During my prying, the Switch case was getting pretty heavily warped, so maybe some of the alcohol (that I definitely used in excess) slipped in and got sandwiched under the screen? I started to notice this since the blotches seem like they’ve moved over time. Here’s an image of the screen now https://imgur.com/DjYmFnJ (and the dark gray blotch along the leftside isn’t a shadow, white spots in bottom left I thought were pressure damage)
It’s still very usable / not noticeable on black colors and thanks again for the guide! I can give the screen more time to see if it improves at all, or maybe try going back in and trying to see it is trapped alcohol that can be released
vmgm -
Have the marks faded over time? We have had the ame issue and believe it is the isopropyl alcohol :/ we didn't use loads but found there was a gap at the bottom of where the battery is held which clearly let some of the alcohol through. I'm really hoping it will evaporate over time but not sure :/
Sadly no, the marks are still there, and haven’t been motivated to try to fix yet. I’ve seen some videos online where people can coerce trapped isopropyl alcohol out without having to take a screen apart, but have been hesitant to try out some of the methods.
vmgm -
Any way of fixing the discolored left corner screen issues? I did a battery replacement and a very small portion of the lower left color is discolored.
Mike -
All my screws got stripped any ideas on how to remove?
Almost A Mammal -
A Y0 screwdriver seemed to work better for me.
Tommy Morrill -
What type of screw driver do I use to un screw the screws and which way
Luca Capito -
Y 0.6 was all I had but it seemed to fit perfectly
Trevor -