Introduzione

Se il tuo Galaxy A5 non tiene più la carica, usa questa guida per sostituire la batteria usurata.

Se la batteria è gonfia, prendi adeguate precauzioni.

Questa guida include la rimozione del display e del telaio centrale. Avrai bisogno di nuove strisce adesive per riattaccare la batteria e il display al telefono.

Prima di smontare il tuo telefono, scarica la batteria sotto il 25%. La batteria può prendere fuoco e/o esplodere se forata inavvertitamente, ma le possibilità che questo succeda sono molto più basse se è stata scaricata in precedenza.

  1. 2mUZCcmpttVH4vcd
    2mUZCcmpttVH4vcd
    cyJDngvUfDle2knY
    spvK1AIEVBHtqOWM
    • Prima di tutto spegni il tuo telefono.

    • Usa un iOpener per riscaldare e ammorbidire l'adesivo dietro il case posteriore.

    • Solleva il case posteriore con una ventosa per inserire un plettro di apertura.

  2. miE2qaQ2gYvUejv5
    miE2qaQ2gYvUejv5
    ILp6M3brtZ66LM2A
    KDDXKXEcGdAahZHR
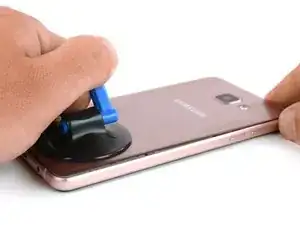
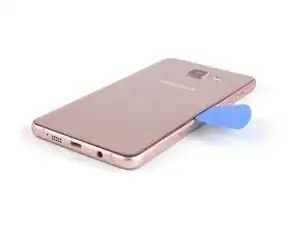
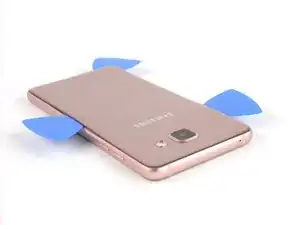
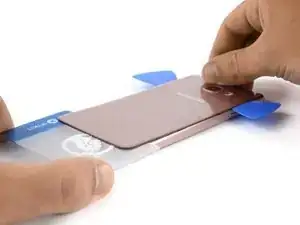
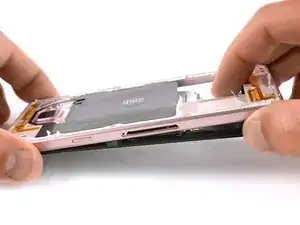
    • Fai scorrere il plettro fino alla metà del telefono per separare il case posteriore dal telaio.

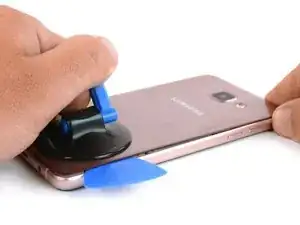
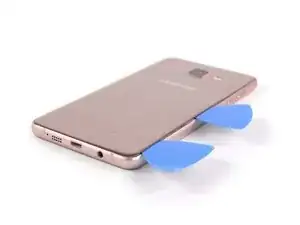
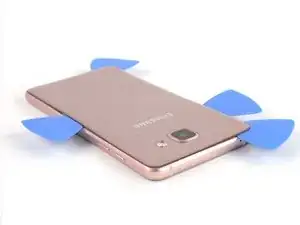
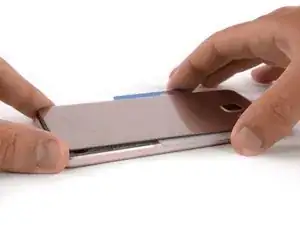
    • Inserisci un secondo plettro e fallo scorrere attorno all'angolo destro, lungo il bordo inferiore e attorno all'angolo sinistro.

  3. XprCrLvTLxmfK1ZO
    XprCrLvTLxmfK1ZO
    LARNvICYTUDMkbG2
    4TPN1VQRS2RRONiO
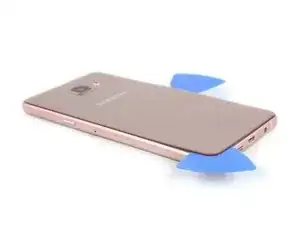
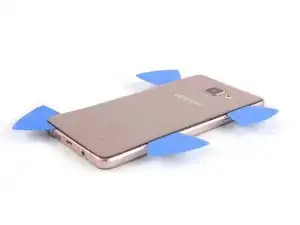
    • Prendi un altro plettro e continua verso l'angolo superiore.

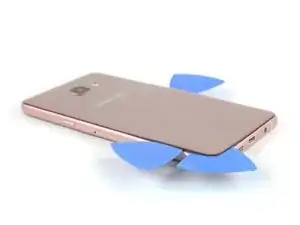
    • In questa fase potresti usare un plettro in più per la parte rimanente in alto.

  4. TUEwkvlgrr2PLPvH
    TUEwkvlgrr2PLPvH
    X1arsiJbHSWVqNCb
    PiWYUf6GRQsbL6HM
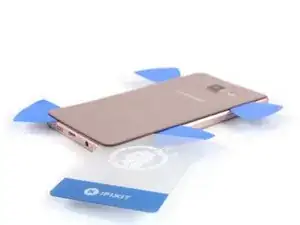
    • Inserisci una scheda di plastica dalla parte inferiore del telefono e introducila sotto il case posteriore.

  5. CCwYLvYPbTiUR2aJ
    CCwYLvYPbTiUR2aJ
    2UNDKrxsGL3pqpaN
    GV3PoRipY12FMPUi
    • Riscalda di nuovo il case posteriore per spostare la scheda di plastica verso l'alto.

    • Guarda sempre sotto la cover posteriore durante l'operazione per non danneggiare i componenti come l'antenna NFC.

    • Muovi la scheda di plastica fino alla protuberanza della camera. Solleva leggermente il case posteriore e rimuovilo finalmente.

    • Assicurati di rimuovere ogni residuo di colla e applica nuovamente dell'adesivo in fase di rimontaggio.

  6. KSWbG16QAZfjDAgB
    KSWbG16QAZfjDAgB
    hoMJS3m2gjE5rObW
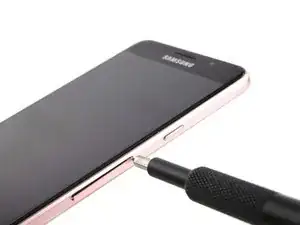
    • Rimuovi il vassoio della scheda SIM.

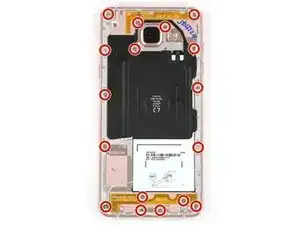
    • Rimuovi le 17 viti Phillips #00 (3,4 mm) dal telaio centrale.

  7. 3E1PlDr1pFfOtl6e
    3E1PlDr1pFfOtl6e
    eCjgl2WxQJ4LlAee
    OjUxuipuwukNMBoI
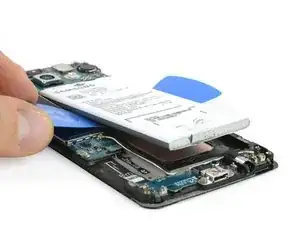
    • Premi sulla parte visibile della batteria per staccarla e separarla dal telaio centrale.

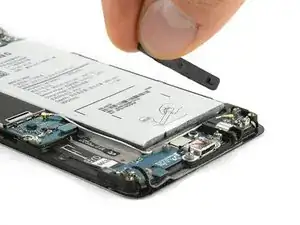
    • L'etichetta IMEI sulla tua vecchia batteria potrebbe aiutarti ad identificare il tuo telefono. Non dimenticare di trasferirla sulla batteria di ricambio.

  8. L5kZoYFxsIDA23O2
    L5kZoYFxsIDA23O2
    SAB5EALLNyNIQwP2
    TN4AKp3ixB1jOL4I
    • Fra la batteria e il telaio centrale c'è un distanziale di plastica. Serve uno strumento con lama di metallo per rimuoverlo prima di sostituire la batteria. Fai molto attenzione a non perforare la batteria.

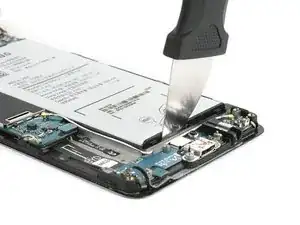
    • Usa il Jimmy con cautela per far uscire il distanziale di plastica dalla cavità tra la scheda figlia e la batteria.

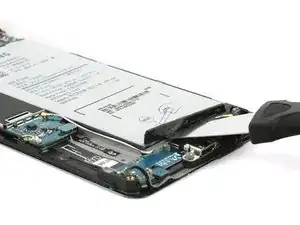
    • Rimuovi il distanziale di plastica dal telefono.

    Bei mir war der Plastikabstandhalter fest am Akku. Am Ersatzakku allerdings auch.

    Miautier -

  9. nDhS5Ve2rd4EQqRR
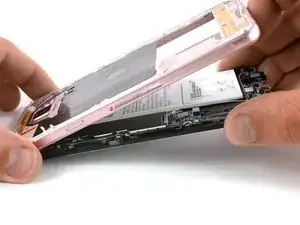
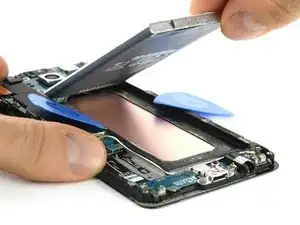
    • Sempre con cautela solleva la batteria e inserisci la punta di un plettro di apertura sul lato sinistro.

    • Ora puoi prendere un secondo plettro e inserirlo sul lato destro. Non inserirlo troppo in profondità per evitare di danneggiare lo schermo LCD sottostante.

    Very hard to do from this side. I recommend removing the mainboard and trying this from the top where the battery connector is. There is an area flush with the base surface.

    Felix -

  10. HEwyTedvtWnMjfoX
    HEwyTedvtWnMjfoX
    pJFiOgjO2kRfO1Hw
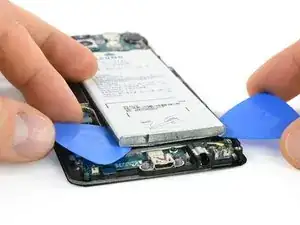
    • Fai scorrere i plettri verso la parte superiore per liberare la batteria dall'adesivo.

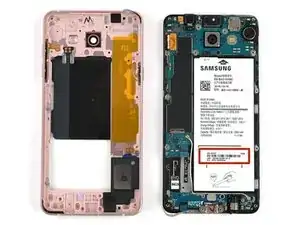
    • Adesso puoi rimuovere la batteria.

    Take care not to dent or break the copper plate under the battery. That is your screen and any deformation will damage the display causing bleeding and/or pixel loss.

    taz -

Conclusione

Per rimontare il duo dispositivo, segui queste istruzioni in ordine inverso. Applica nuovamente dell'adesivo dove necessario.

Tobias Isakeit

Membro da: 31/03/14

116544 Reputazione

19 commenti

Guten Tag,

Ich habe meinem Battery ausgetauscht, nach dem Austausch das Volume Taste und sim slat 2 funktioniert nicht mehr.

wie kann ich die reparieren?

vielen dank

peyman -

Prüfe, ob die Kontakte der Lautstärkeknöpfe und das Flachbandkabel noch in Ordnung sind (nicht verschmutzt oder verbogen). Das mit dem Sim Slot klingt schon etwas seltsam. Das Modell in dieser Anleitung hat nur einen Sim Slot und einen micro-SD Slot.

Tobias Isakeit -

Hi in step 7 you can see a black thin plastic over the battery. Is it the NFC antenna?

carolinaaires -

Yes, this is the NFC antenna.

Tobias Isakeit -

Just saved 2k INR by following this guide !!! Thanks Man

priyadarshi -

Can i get some screws of this mobile i mean like this mobile ,actually i have also a a5 but i have no mobile screws then i want

Hayat hesham -

Then how can you put everything back together as strong as before? any glue needed? thanks

Hayden -

بدلت البطارية متمل اشتغل واستقبل رسائل الحل

Abd Aln -

بدلت بطارية جلاكسي a5

Abd Aln -

The glue is too strong, it's exaggerated! You will easily kill the display.

Easy Repair -

The glue is too strong, it's exaggerated! You will easily kill the display!

Easy Repair -

Super Anleitung, es hat geklappt! Danke :)

pld1 -

عندي ضعف في شبكة الاتصال ايش السبب

محمد المخلافي -

اذا تركت بعض الغراء علي الهوائي هل يسبب له

محمد المخلافي -

Whats the screw size

Hayat hesham -

The screws are 3.4 mm long (information added in the step). Unfortunately not sure where to get them.

Tobias Isakeit -

Danke für die Anleitung, hat super funktioniert. Ich habe meine Bemühungen auf Video festgehalten: https://youtu.be/yfY4Jk4IhO0

Miautier -

Gratulation zur gelungenen Reparatur und Danke für den Link zum Video.

Tobias Isakeit -

The battery is very hard to remove because it has adhesive under it.

I recommend you to disassemble the mainboard and lever up the battery from the top as there you will have the only accessible flush area to really slide something under.

Felix -