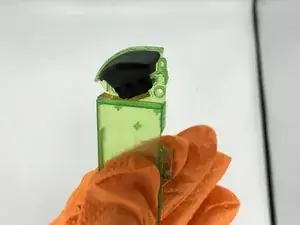
Introduzione

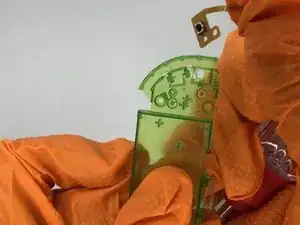
A causa di un uso intenso o una forza eccessiva, la custodia del tuo controller Joy-Con per Nintendo Switch potrebbe usurarsi o rompersi. L'esposizione dei componenti elettronici del Joy-Con potrebbe causare ulteriori danni. Tuttavia i Joy-Con potrebbero continuare a funzionare senza una nuova custodia. Ti suggerisco di sostituire la custodia prima di dover acquistare un nuovo paio di controller. Se desideri riparare l'involucro della Switch, usa questa guida per sostituire la custodia del controller destro.

Nota che la procedura per la riparazione del Joy-Con sinistro è diversa.

Sebbene la sostituzione delle custodia del Joy-Con implichi per lo più lo svitare e spostare le parti elettroniche, alcuni passaggi richiedono precisione per riposizionare i piccoli componenti.

Siccome i controller Joy-Con sono separati dal sistema principale, non avrai bisogno di spegnere la tua Switch prima di iniziare a sostituire la custodia dei Joy-Con.
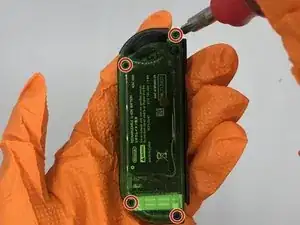
  1. JG4F4lwVDWd5Nfrr
    • Rimuovi le 4 viti a tre punte dal retro del Joy-Con.

    • Queste sono le uniche viti a tre punte del Joy-Con. Tutte le altre richiedono un cacciavite per viti a croce Phillips.

  2. TY1I2YNADeMd1mva
    • Apri il guscio posteriore ed esponi la batteria.

  3. QJHUwltO2SmaVCAf
    QJHUwltO2SmaVCAf
    5QfWFYarWySUCpGS
    • Rimuovi la vite che collega la guida al guscio posteriore.

  4. SOenGyoi2MWIVr5h
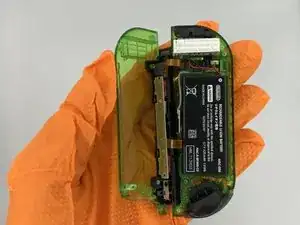
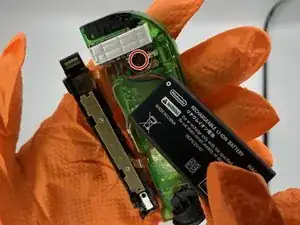
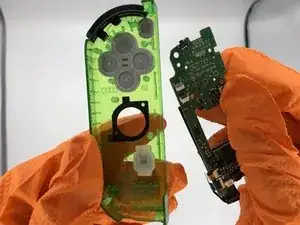
    • Rimuovi la batteria e scollegala dalla scheda madre. Puoi aiutarti con delle pinzette o con le dita stesse per disconnettere il connettore dalla scheda madre.

    • Potrebbe essere difficile rimuovere la batteria a causa dell'adesivo che la tiene in posizione. Puoi aiutarti con una leva per estrarla dalla custodia.

    I messed up the pins for one of the ribbon cables trying to remove the battery connector, be careful with this one, had to order a new motherboard for my joycon

    Milky Manz -

  5. VHaUnOdIfF42TS1j
    VHaUnOdIfF42TS1j
    tqnwFjXCsOBdLJRQ
    • Prima di passare al prossimo passaggio prendi nota di come è posizionato il cavo dell'antenna per un corretto riassemblaggio.

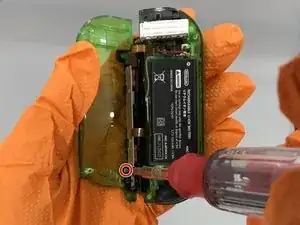
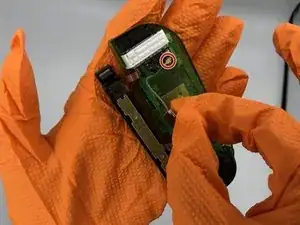
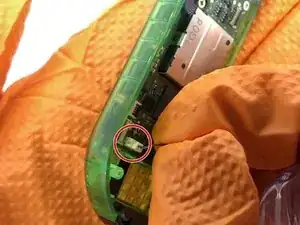
    • Rimuovi il piccolo chip antenna (mostrato nella seconda foto) e disconnettilo dalla scheda madre.

  6. EvLRPHpVIHURmyvV
    • Rimuovi le 3 viti che fissano l'alloggiamento batteria alla custodia.

  7. KGJuyPdtStmKHFYY
    KGJuyPdtStmKHFYY
    HJYJvgwhPYZh1IOT
    vyAmGbdeoTv6ssm4
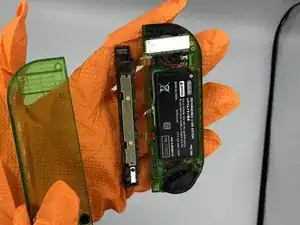
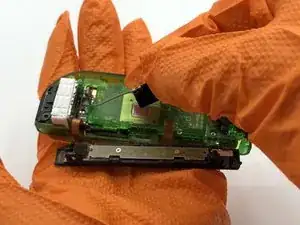
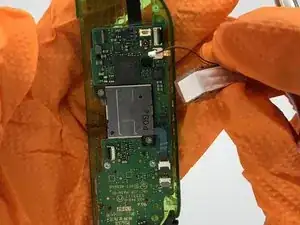
    • Stacca i cavi a nastro che collegano la guida all'alloggiamento batteria e alla scheda madre. Sblocca i cavi spingendo verso l'alto la parte superiore del connettore ed estraendo il cavo dal connettore.

    • Puoi anche scegliere di lasciare il binario connesso, anche se sarà scomodo.

    • Fai attenzione a non sollevare i connettori nella direzione sbagliata. La connessione più vicina ai pulsanti della spalla si solleva lontano dal binario (la parte nera), mentre la connessione più vicina al motore di vibrazione si solleva nella direzione opposta, verso il binario (la parte sottile grigia).

    Gibt es die Platine für die beiden Taster an der Ladeschiene auch als Ersatzteil? Wenn ich der Joy-Con zusammengebaut ist und damit das Flachbandkabel zusammengedrückt wird funktionieren die beiden Taster nicht. Wenn der Joy-Con auseinander gebaut ist und das Kabel langestreckt ist, dann funktionieren die beiden Taster.

    Ich hoffe, dass es am Kabel liegt und nicht am Kontakt auf dem Motherboard.

    Schulte Kippen -

    HEY, BE CAREFUL WITH THOSE RIBBON CABLE CLIPS.

    The clip towards the R/ZR buttons releases from the side the cable plugs in.

    The clip towards the rumble motor releases from _the opposite side_ as the cable.

    Mr. Llama -

    Thank you for this! I was wondering why it wasn’t coming up lol

    pattie -

    Um… what happens if you accidentally push on the gray part of the one near the rumble motor?

    Elise Glover -

    I found out… it breaks the ability to dock your controller to your switch, you will only be able to play wirelessly and won’t be able to charge your controller. Don’t be like me.

    el15ecg -

  8. EtBWeKrgQG35HUbd
    EtBWeKrgQG35HUbd
    j45DbrWC3jBfTO1W
    fmUuZVJYNpOQvllF
    • Rimuovi il motore delle vibrazioni e scollega il connettore bianco a due pin.

    WARNING

    do not attempt to remove the connector if it can be avoided- it is held in place by two incredibly thin metal strips that can easily bend and warp, making it impossible to put the connector back into place.

    The Nones -

  9. wo6kIsCpKC4UFLE4
    wo6kIsCpKC4UFLE4
    GNi2dmBJyN3AYi6O
    Myyd2vSwcij4sdFy
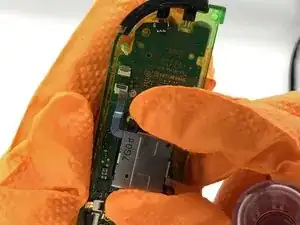
    • Rimuovi il pulsante ZR nero dall'alloggiamento batteria.

    • Rimuovi il sensore del bottone svitandolo dall'alloggiamento batteria.

  10. nSxVaFQPN5cJK6H1
    nSxVaFQPN5cJK6H1
    OXnTeHtUENTrOXxa
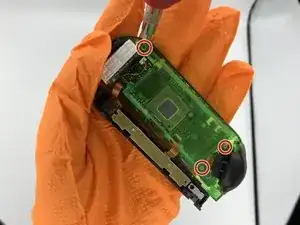
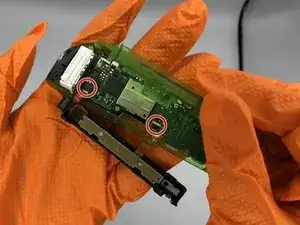
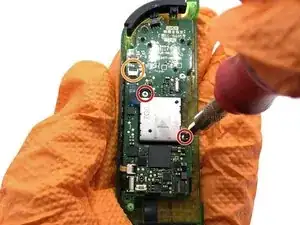
    • Rimuovi le due viti Phillips che fissano il joystick alla scheda madre.

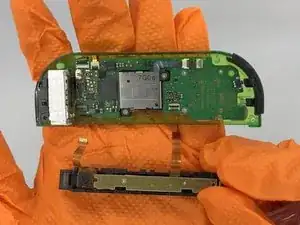
    • Scollega il cablaggio del joystick dalla scheda madre.

    The joystick ribbon cable releases from the side _opposite_ where the cable plugins in.

    Mr. Llama -

  11. OoUDypUeFgIrmtSw
    OoUDypUeFgIrmtSw
    5ENT6JNDQCEIbxFW
    • Rimuovi le due viti che fissano la scheda madre al guscio.

    Notable omission: be sure to disconnect the Ribbon cables near the bottom left (directly next to the rumble motor connector). You will have to swap the IR sensor and whatever the gold ribbon cable goes to/is (apologies, I don’t really know). Both are loosely held down with adhesive so just do that when you swap the buttons in the next step. When reconnecting the ribbon cables to the motherboard, I found it MUCH easier to put the ribbon cables back in place before screwing in the motherboard. I am amateur at this (only have fixed a couple iphones and few sets of joycons) but I found the angle to be particularly challenging if the motherboard was screwed in.

    Garrett Catlin -

    Also omitted: be sure to transfer the NFC antenna. It’s the black rectangle that surrounds the joystick that connects to the motherboard with a light brown cable. It’s lightly held in with adhesive, so a little prying should get it loose.

    Mr. Llama -

  12. ua3gxTkkm5pGYUGI
    • Trasferisci tutti i bottoni nella nuova custodia.

    • Se dovessero mancare alcune coperture in silicone per i bottoni, queste potrebbero essere rimaste attaccate alla scheda madre.

Conclusione

Per riassemblare il tuo controller, segui questa guida al contrario.

Matthew Cheney

Membro da: 16/01/20

1050 Reputazione

4 commenti

Not quite as thorough as the other Joy-con tear down but always a handy thing to have, going by the pictures it gave me all the information I needed personally concerning the screws, so I was able to strip the whole controller down and swap it into another shell. It is straight forward once you get in to it and have to give the author their much deserved credit for posting this up!

Lee Whittaker -

Very good detailed guide, only thing I would change is I’d probably take the rumble motor out right after of even before the battery. It’s pretty easy to remove, you can do it at anytime after opening, and it gets the wires out of the way to make other parts easier.

Dominic Garcia -

I am having difficulty removing the ribbon cable next to the rumble motor on step 7. It would be nice to have a photo of which way the clamp is expected to swing; I suspect I know the correct direction, but my tools are bending it instead.

earthexe -

In fact, this step is unnecessary unless you are replacing the buttons or rail case. The rail may remain attached if you are only replacing the front, back, and middle casing.

earthexe -