Introduzione
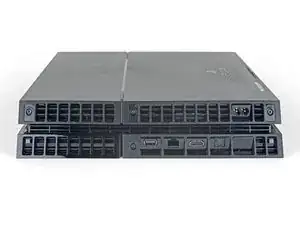
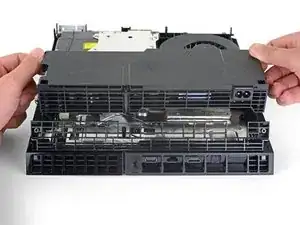
Segui questa guida per sostituire il lettore ottico sulla tua Sony Playstation 4.
Sui modelli di PS4 della serie 1xxx, l'unità ottica e la scheda madre sono accoppiate in fabbrica, quindi limitarsi a sostituire il lettore ottico porterà a un dispositivo non funzionante. Accertati di ordinare un'unità ottica e una scheda madre correttamente accoppiate per il tuo modello di PS4 e sostituiscili entrambi.
Scollega dall'alimentazione la tua PS4 prima di iniziare qualsiasi riparazione.
Strumenti
Ricambi
-
-
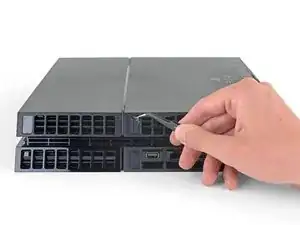
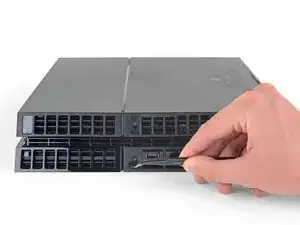
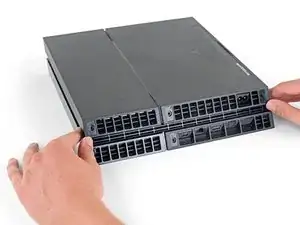
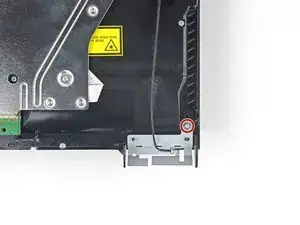
Usa le pinzette per rimuovere i due adesivi al centro del retro della PS4 per esporre due viti della scocca.
-
-
-
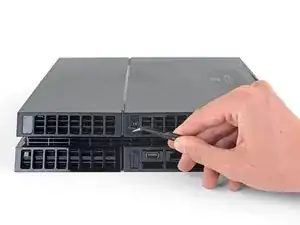
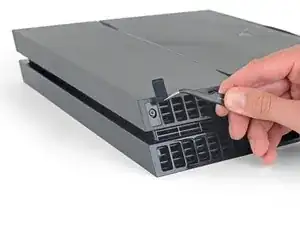
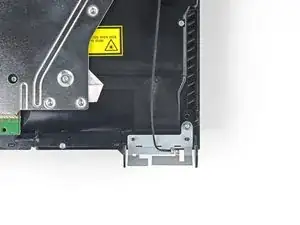
Usa delle pinzette per rimuovere con delicatezza le cover delle viti che trovi in ciascuno dei due angoli, esponendo altre due viti.
-
-
-
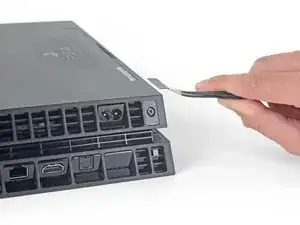
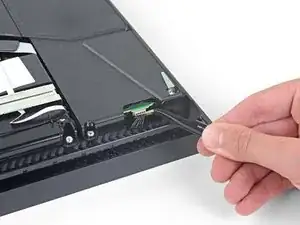
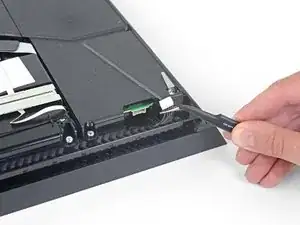
Usa delle pinzette per estrarre, sollevandolo, il cavo dell'alimentatore e disconnettere l'alimentatore dalla scheda madre.
-
-
-
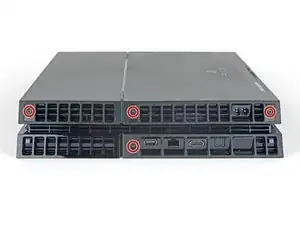
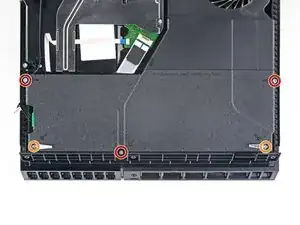
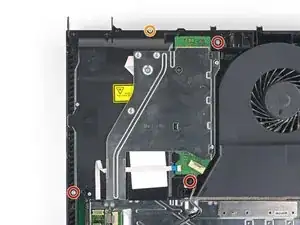
Rimuovi le tre viti Torx security da 9,7 mm.
-
Rimuovi le due viti a croce Phillips da 41 mm e le staffe.
-
-
-
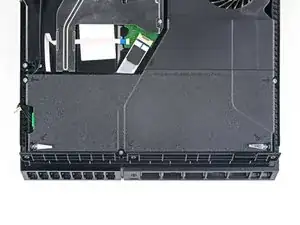
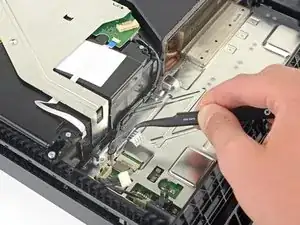
Afferra il cavo dell'antenna con le pinzette o le dita e spostalo fuori dalle guide dei cavi.
-
-
-
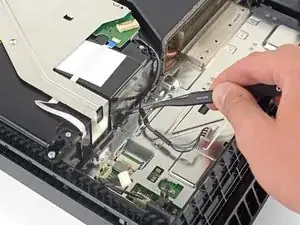
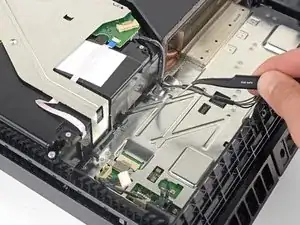
Usa le pinzette o le dita per sfilare il cavo dell'antenna da sotto il cavo del drive ottico.
-
-
-
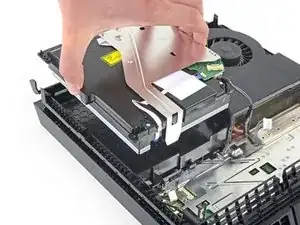
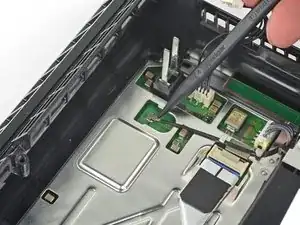
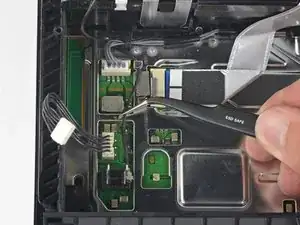
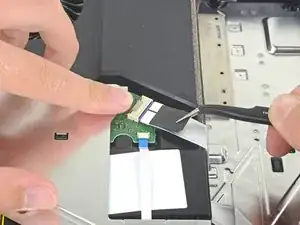
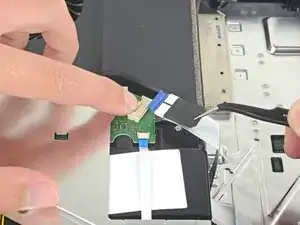
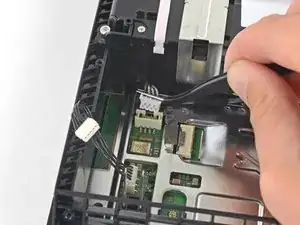
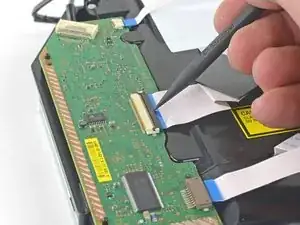
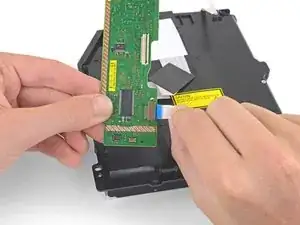
Con un'unghia premi sulla leva di rilascio del cavo a nastro in cima al lettore ottico.
-
Usa le dita o le pinzette per disconnettere il cavo a nastro, tirando la linguetta nera.
-
-
-
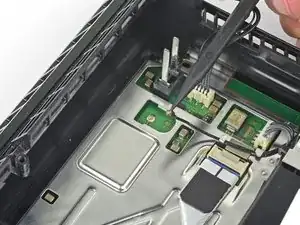
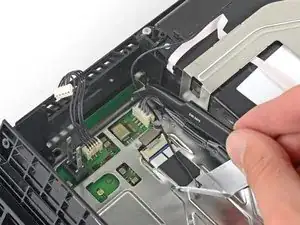
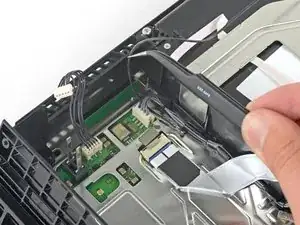
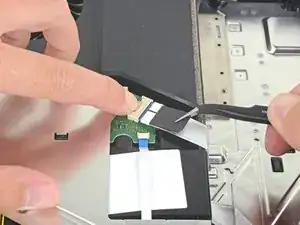
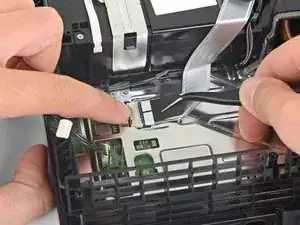
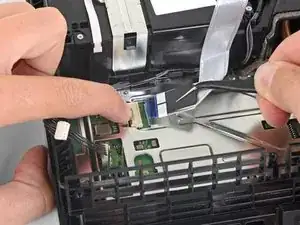
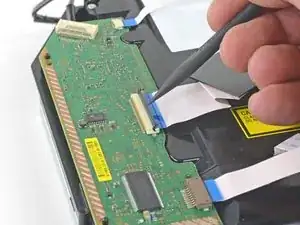
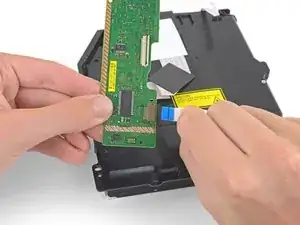
Usa le unghie per tenere premuta la leva di rilascio del cavo a nastro connesso alla scheda madre.
-
Usa le dita o le pinzette per disconnettere il cavo a nastro tirando la linguetta nera.
-
Metti da parte il cavo a nastro per il riassemblaggio.
-
-
-
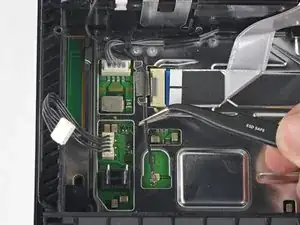
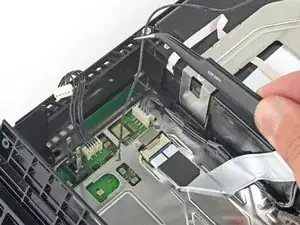
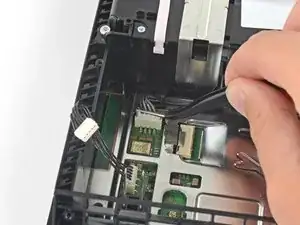
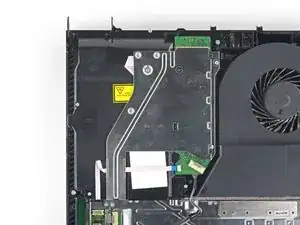
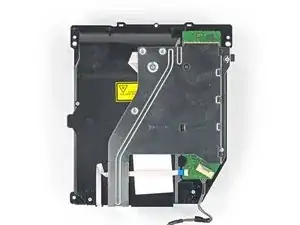
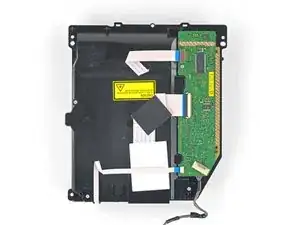
Usa le dita o le pinzette per rimuovere il cavo del lettore ottico dalle guide che lo tengono fermo.
-
-
-
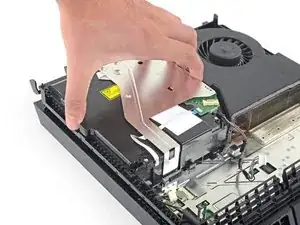
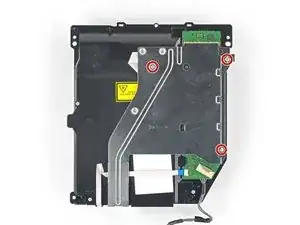
Rimuovi le quattro viti che tengono fermo il lettore ottico.
-
Tre viti Torx da 9,7 mm
-
Una vite a croce Phillips da 6,2 mm
-
-
-
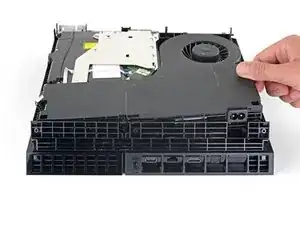
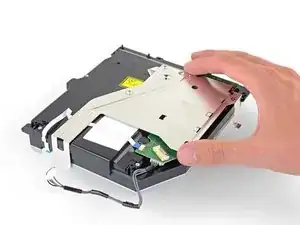
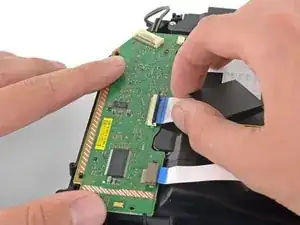
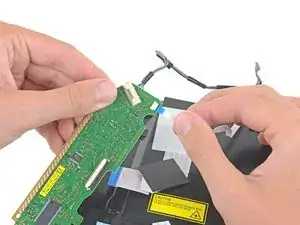
Tieni la scheda in una mano e il cavo a nastro inferiore nell'altra.
-
Estrai il cavo a nastro inferiore dalla presa.
-
-
-
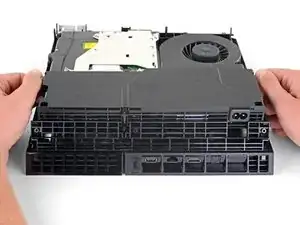
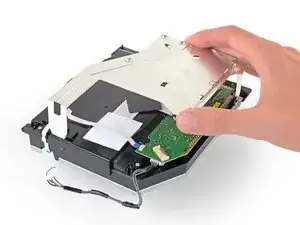
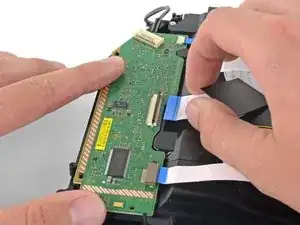
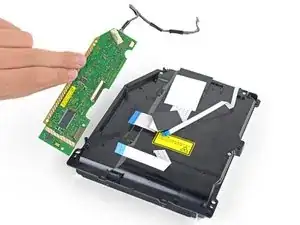
Tieni la scheda in una mano e il cavo a nastro superiore nell'altra.
-
Estrai il cavo a nastro superiore dalla presa.
-


'📌Per riassemblare il dispositivo, segui i passaggi precedenti in ordine inverso.'
Porta i tuoi rifiuti elettronici a un riciclatore certificato R2 o e-Stewards.
La riparazione non è andata come previsto? Dai un'occhiata alla nostra comunità Risposte per trovare aiuto nella risoluzione dei problemi.
Confronta la tua nuova parte di ricambio con la parte originale: potrebbe essere necessario trasferire i componenti rimanenti o rimuovere i supporti adesivi dalla nuova parte prima dell'installazione.

71 commenti
This was a great help after my 2 yr old put a coin in my PS4. However when following the steps backwards I got to step 7 which says 'Remove the 5 wire plug attached from the power supply to the motherboard' & couldn't see how to reattach it. I then noticed it looks like I've pulled the whole plastic white casing/plug holder (within the orange rectangle) off the mobo rather than just the plug from the casing. Although the pic looks like the plastic casing does come off the mobo as it's at an angle (maybe why I pulled the whole thing out or maybe I did it right).
I'm thinking I've made a mistake is because now I cant see anywhere that I can 'plug' the 5 L shaped wires on the bottom of the plastic casing back onto the mobo. Plus where they used to be attached there's now 5 tiny silver rectangles on the mobo (2 opposite 3), so I guess these 5 wires were some how adhered to those mobo rectangles by a conductive adhesive of some sort.
Any suggestion for the best repair method would be appreciated.
Thanks
If you've pulled the female end from the motherboard the it need to be resoldered to the board, most likely gonna need to pull the motherboard. It's a very simple connector, sounds as if you yanked the whole thing off.
lynx2069 -
Is anyone there who try to change the optical drive without change the Motherboard in the same time ? And does it run ?
Thanks for your help.
How about a guide for replacing just the laser unit instead of the whole drive?
I changed the drive with its motherboard, when I want to update the system, an error message appears:
CE-42116-8 .
Would this fix the disc ejection issue?
Tim -
No, as the issue isn't attributable to the drive itself. The issue is the capacitive eject button and the rubber foot on the bottom of the console. The foot expands with the heating and cooling cycles of the machine, and can set off the button just by making any contact at all. I suggest removing it, cutting off the front 1/8", then reinstalling it. That's what worked for me.