Introduzione

Segui questa guida per sostituire il display insieme al suo telaio del tuo smartphone Huawei Mate 9.

  1. Y1tRRdIZpVAQ2Tai
    Y1tRRdIZpVAQ2Tai
    vIbtJURVjavtm2dB
    • Prima di tutto spegni il telefono e rimuovi il vassoio della scheda SIM.

  2. NFcYVCIDyg55UOVv
    NFcYVCIDyg55UOVv
    NASkAIeHoBiIDOhC
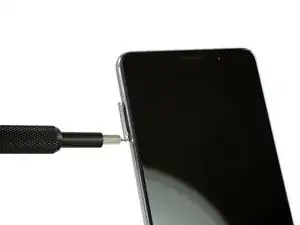
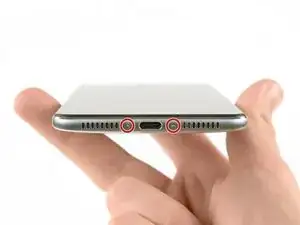
    • Svita le due viti sul bordo inferiore con un cacciavite Torx T2.

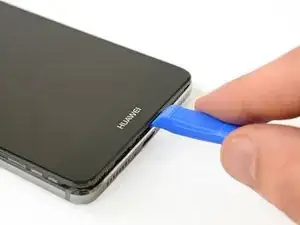
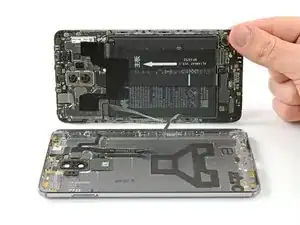
    • Inserisci uno strumento di apertura in plastica fra il display e il case. Apri lo smartphone sollevando delicatamente il display con tutti i suoi componenti fuori dal case.

    • Non aprire ancora completamente il telefono. Il cavo del lettore impronte digitali è ancora connesso al case posteriore.

  3. KqeWUSnXAaEGC3QV
    KqeWUSnXAaEGC3QV
    jCcEnAK3XGeRnVyg
    • Apri il telefono verso destra.

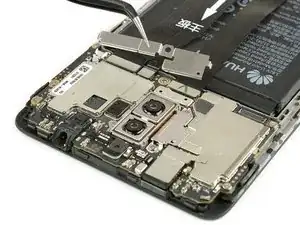
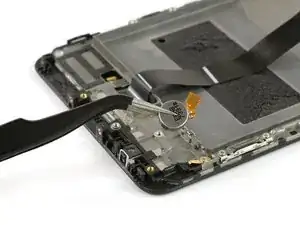
    • Disconnetti il cavo del sensore impronte digitali con uno spudger.

  4. FurdDZWcVXUOhBX5
    • Stacca con cautela la striscia adesiva di plastica che fissa i due cavi alla batteria.

  5. VwCZOQVUGdidtoww
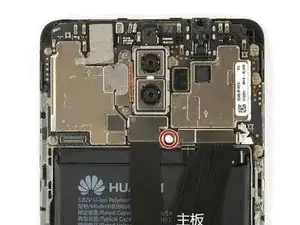
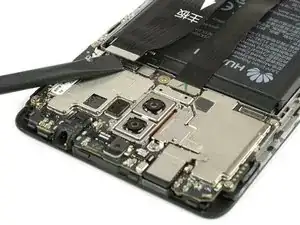
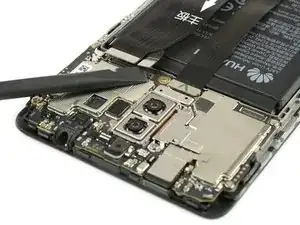
    • Rimuovi l'indicatore danneggiamento liquidi e la vite Phillips #00 sottostante che tiene la piastra in posizione.

  6. hXxpmXVjKFQ4YWcv
    • Rimuovi la staffa del cavo.

  7. OMRvxenMDZO4ZWJl
    OMRvxenMDZO4ZWJl
    dRfsNLgRZfvHKX2K
    iDCbEmKOYCdQ2PiK
    • Con uno spudger disconnetti i cavi di interconnessione, della batteria e del display.

  8. m5TtxJPifNsq1OoB
    m5TtxJPifNsq1OoB
    S5aD1NRXJtbyhNIU
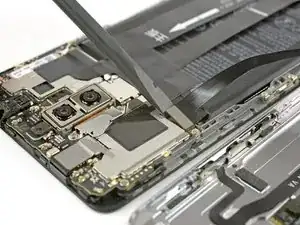
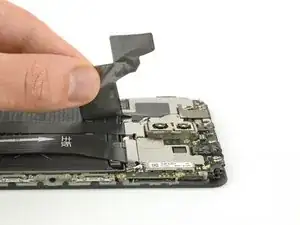
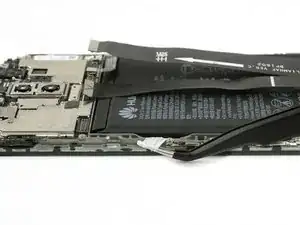
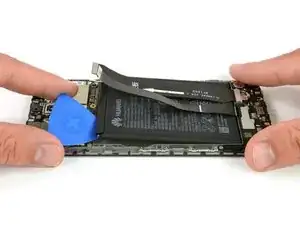
    • Stacca la striscia adesiva che si trova sotto la batteria tirando sulla linguetta mantenuta a un angolo ridotto.

    • Se la striscia si rompe, afferrala e avvolgila un paio di volte attorno alle punte di una pinzetta e continua a tirare.

  9. 4SxXuBGPwbNo1qnV
    4SxXuBGPwbNo1qnV
    eHXuGpugFk4kdf6m
    • Se la batteria a questo punto non è libera, usa una scheda di plastica per infilarti sotto la parte inferiore della batteria, per staccare l'adesivo residuo.

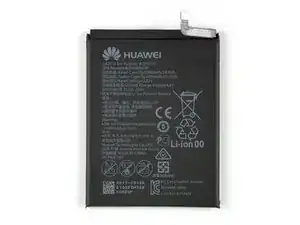
    • Rimuovi la batteria.

    • In fase di rimontaggio sostituisci il vecchio adesivo con nastro biadesivo o strisce adesive pretagliate.

    • Non rimontare mai una batteria che è stata piegata o danneggiata nel corso della rimozione.

    Vorsicht bei diesem Schritt!

    Der Akku ist in der unteren Hälfte mit sehr gut klebendem Tape gesichert! Ein massives Hebeln zerstört den Akku (Akku knickt und Zellen bekommen einen Kurzschluss)!

    Hebelt ihn wie auf dem Bild, oben etwas hoch damit ihr mit einer alten EC oder Kreditkarte o.ä. unter den Akku kommt und damit das Tape langsam wegdrücken könnt.

    Tobias Hannemann -

    Der Klebstoff an der Unterseite des Akkus hielt diesen bei meinem Gerät ziemlich fest und ließ sich trotz zweimaligem langen Auflegen des 30 Sekunden in der Mikrowelle erwärmten Opening-Pick-Gel-Kissens nur mühevoll lösen. Ohne Gefahr zu laufen, dabei den Chassis-Rahmen mit dem darunter befindlichen Display zu verbiegen und dieses zu beschädigen, half mir die Kante des Spudgers, den Akku Millimeter um Millimeter vom Klebstoff allmählich zu lösen. Ein stabiler dünner Plastikspachtel könnte dabei besonders hilfreich sein. Das alte Akku-Kissen riss beim lösen aus dem Chassis-Rahmen und entzündetes Gas des Lithium-Ionen-Gemisches entwich unter leichtem Funkensprühen. Es ist also Vorsicht geboten sowohl beim Entfernen, bei der späteren Aufbewahrung und der Entsorgen des alten, in meinem Falle beschädigten Akkus.

    Angesichts dieses Umstandes und dass es nicht einfach war, das Gerät zu öffnen (Schritt 2), stufe ich den gesamten Vorgang des Akkutausches eher als moderat bis schwierig ein!

    Nemo Outis -

  10. NGlXq65qETIC6yJb
    NGlXq65qETIC6yJb
    DNJUMVPGhZ1KKYTg
    Y2OMQSLR3NxGHBVB
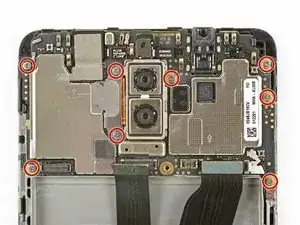
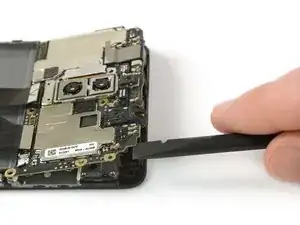
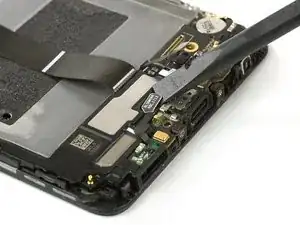
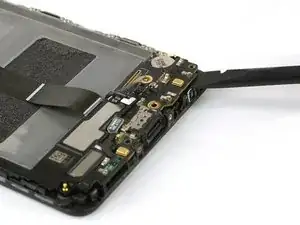
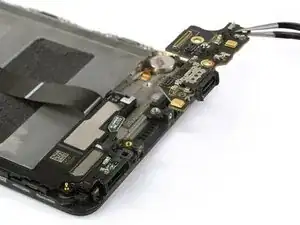
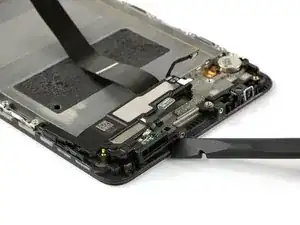
    • Svita le otto viti Phillips #00 che fissano la scheda madre.

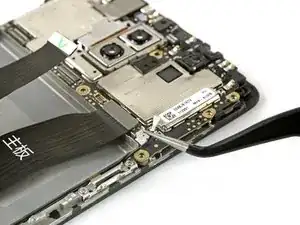
    • Disconnetti il cavo dell'antenna con delle pinzette.

    • Dopo la rimozione di tutte le viti, restano delle piccole clip che tengono la scheda madre in posizione. Non romperle quando rimuovi la scheda ma premi leggermente sul lato delle clip per rimuoverle facilmente.

    • Utilizza uno spudger per sollevare con cautela la scheda madre insieme a tutti i suoi componenti e rimuovila.

    “there are still small clamps” since you've been able to pull the motherboard out, maybe you could be a little more specific with where these clamps are and which way they should move to allow mb removal?

    Tallis Macaulay -

  11. S2j6sMkvk6DuvoZW
    S2j6sMkvk6DuvoZW
    KEwPjRa2FTbMT5e2
    YGLOQB6byneWKUhK
    • Togli l'altoparlante voce.

    • Stai attento a non piegare i connettori metallici.

    • Disconnetti il cavo dell'antenna e rimuovilo con cautela.

    This picture shows “remove the earpiece speaker” with the speaker already removed. How do you get tweezers under it?

    Tallis Macaulay -

    The answer is, wegdge it up from the side of the speaker.

    Why is that not included in the instructions?

    Tallis Macaulay -

  12. gQytQRttkwPRGiN6
    gQytQRttkwPRGiN6
    63mbDnM1BRlobbWT
    WpFjrYK2xM2hIaOF
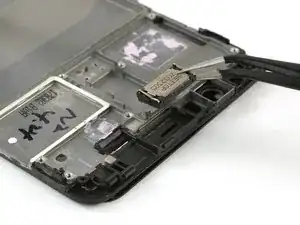
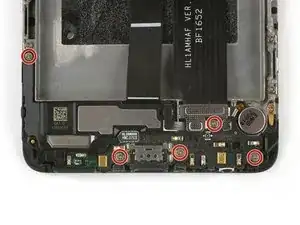
    • Concentrati ora sulla parte inferiore del tuo telefono e svita le cinque viti a croce Phillips #00.

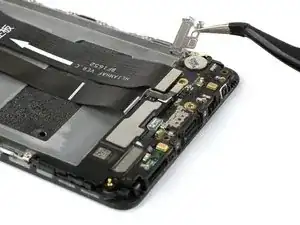
    • Rimuovi la piastra metallica che copre la connessione del cavo flessibile della scheda madre.

    • Disconnetti e rimuovi il cavo flessibile della scheda madre con uno spudger.

  13. ejTvmFCLCHlgCyeU
    ejTvmFCLCHlgCyeU
    M2TAkriIERPCJoPx
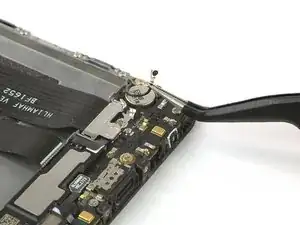
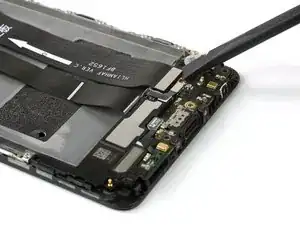
    • Con uno spudger disconnetti i cavi dell'altoparlante e della presa di carica dalla scheda figlia.

  14. OZGlW1XQtdrTgHAx
    OZGlW1XQtdrTgHAx
    HCYsqYdhsbWDrbAm
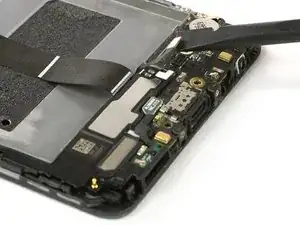
    • Con uno spudger solleva con cautela e rimuovi la scheda figlia. Non rompere le piccole clip che fissano la scheda figlia ma premi leggermente sul lato delle clip per rendere più facile la rimozione della scheda.

  15. otKZuAZ6mySRa4kW
    otKZuAZ6mySRa4kW
    ZaAqyatWsdkiSGPj
    TVIpRlTWdSNBVPXO
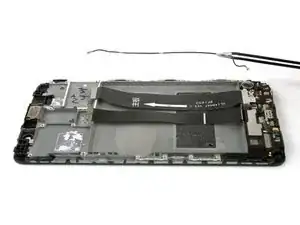
    • Utilizza uno spudger per rimuovere l'altoparlante e la presa di carica. C'è sotto un po' di adesivo, quindi l'unità potrebbe opporre un po' di resistenza al distacco.

    • Stacca e rimuovi il motore di vibrazione (incollato) con delle pinzette.

    • Se non riesci a rimuovere l'altoparlante o il motore di vibrazione, puoi utilizzare un iOpener per ammorbidire l'adesivo e provare di nuovo.

    • Prima del rimontaggio verifica se il tuo nuovo display include tutti i componenti o se devi recuperarli dall'originale.

    • Quando rimonti il telefono, sostituisci il vecchio adesivo con nastro biadesivo o strisce adesive pretagliate.

    Nicht die Schraube links an diesem Board vergessen!

    Jakob Dobberow -

    Hier fehlt das lösen einer Schraube, links in der Verlängerung der Lautsprecher mit Ladebuchse ist ein Loch zu sehen, dort sitzt noch eine Schraube.

    Michael Bröstl -

Conclusione

Per rimontare il tuo dispositivo, segui queste istruzioni in ordine inverso. Prima del rimontaggio verifica se il tuo nuovo display comprende tutti i componenti o se alcuni devono essere recuperati dall'originale.

Dominik Schnabelrauch

Membro da: 23/11/16

200687 Reputazione

5 commenti

why take out the battery??

JPBrokenIT -

Hi JPBrokenIT,

this is a guide for the full display assembly. This means you’ll exchange the display including the whole mid frame for a new one. If you’re going to leave the battery in its place. You need a new one for your spare part. If you don’t want to buy a new battery, you’ll need to transfer it from the old mid frame with display, to the new one. If you want to exchange the display without the mid frame, you need to follow this guide - Sostituzione display Huawei Mate 9

Dominik Schnabelrauch -

Hi guys, just a small Thing, but you missed to mention one additional screw which holds the Speaker unit on top of the “arm” to the left. Anyway, very good and helpful guide. Christian

Chris V -

Hi Chris V,

thanks for mentioning. I made the correction.

Dominik Schnabelrauch -

I was stuck at step 2. I could not pry open the case, not even a tiny gap, and the plastic opening tool broke. The assembly and case were attached so tight. I even tried to use a flat metal screw driver to try to get an “entering point”. But the case was so well snugged onto the assembly. Maybe Huawei put some glue during assembling process. I halted the repairing. At least the phone is now still functioning with a broken screen.

Sky Land -