Introduzione
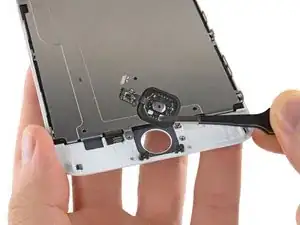
Usa questa guida questa guida per sostituire il gruppo pulsante home. Tieni conto che solo il gruppo originale del pulsante home del telefono permette di usare la funzionalità Touch ID. L'installazione di un nuovo pulsante home permette di recuperare solo le funzioni ordinarie del pulsante home, non quelle del Touch ID.
Puoi usare questa guida anche per sostituire le parti seguenti:
-
-
Spegni il tuo iPhone prima di cominciare a smontarlo.
-
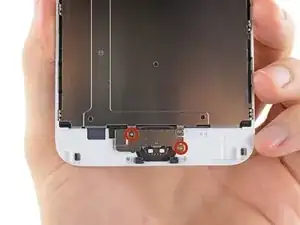
Rimuovi le due viti Pentalobe P2 da 3,6 mm vicino al connettore Lightning.
-
-
-
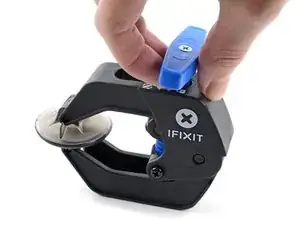
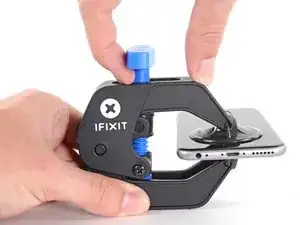
Tira la maniglia blu indietro per sbloccare i bracci dell'Anti-Clamp.
-
Fai scorrere i bracci oltre il bordo sinistro o destro del tuo iPhone.
-
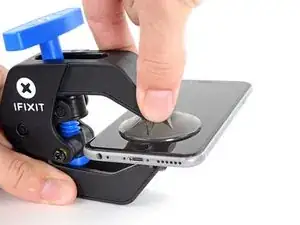
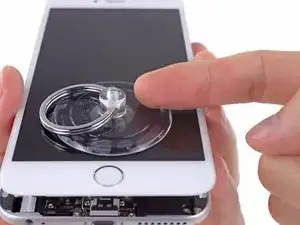
Posiziona le ventose vicino al bordo inferiore dell'iPhone, appena sopra il tasto Home, una di fronte e una sul retro.
-
Premi le ventose insieme per farle aderire sull'area desiderata.
-
-
-
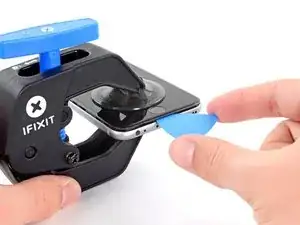
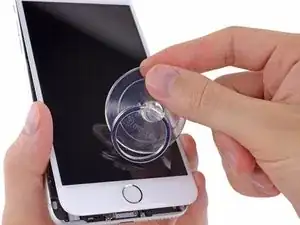
Tira la manopola blu in avanti per bloccare i bracci.
-
Gira la manopola in senso orario di 360° o finché le ventose cominciano ad allungarsi.
-
Inserisci un plettro di apertura o un altro strumento sotto lo schermo quando l'Anti-Clamp crea una fessura abbastanza grande.
-
Salta i prossimi tre passi.
-
-
-
Usa una singola ventosa per sollevare il pannello frontale:
-
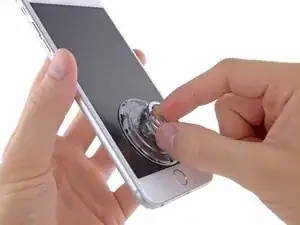
Premi una ventosa sullo schermo, appena sopra al tasto Home.
-
-
-
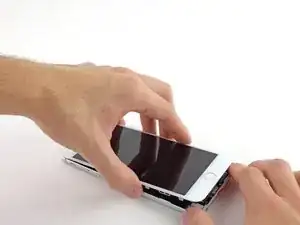
Mentre tieni fermo l'iPhone con una mano, tira la ventosa per separare lievemente il gruppo del pannello frontale dal case posteriore.
-
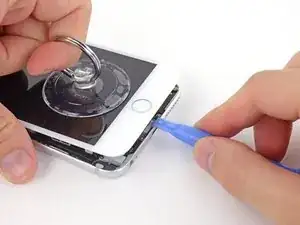
Usando uno strumento di apertura in plastica, inizia a staccare con delicatezza il case posteriore, allontanandolo dal gruppo display, mentre continui a tirare con la ventosa.
-
-
-
Tira la sporgenza in plastica per allentare la ventosa.
-
Rimuovi la ventosa dal gruppo display.
-
-
-
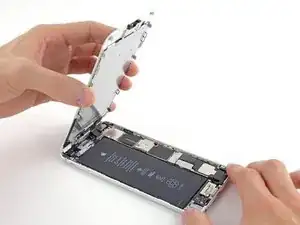
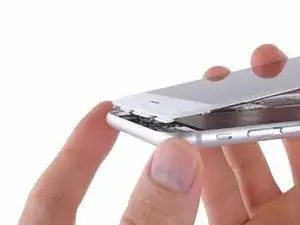
Solleva dal case posteriore il lato del pulsante home del gruppo del pannello frontale, usando il lato superiore del telefono come una cerniera.
-
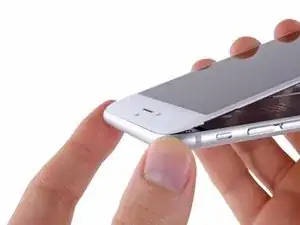
Apri il display a un angolo di circa 90° e posalo contro qualcosa che lo tenga aperto mentre tu stai lavorando sul telefono.
-
Aggiungi un elastico per tenere il display al suo posto mentre lavori. In questo modo si eviteranno sforzi imprevisti sui cavi del display.
-
-
-
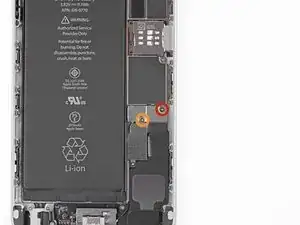
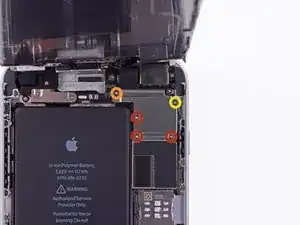
Rimuovi le seguenti viti a croce Phillips dalla staffa del connettore della batteria:
-
Una vite da 2,3 mm
-
Una vite da 3,1 mm
-
-
-
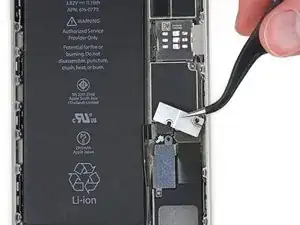
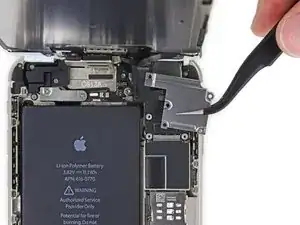
Usa un'unghia pulita o il bordo di uno strumento di apertura per sollevare con delicatezza il connettore della batteria dalla sua sede sulla scheda logica.
-
-
-
Rimuovi le seguenti cinque viti a croce Phillips che tengono in posizione la staffa del cavo del gruppo del pannello frontale:
-
Tre viti da 1,2 mm
-
Una vite da 1,5 mm
-
Una vite da 2,9 mm
-
-
-
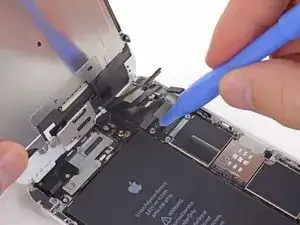
Mentre continui a tenere aperto il pannello frontale, usa un'unghia o uno strumento di apertura per staccare il connettore della fotocamera anteriore e dell'altoparlante voce.
-
-
-
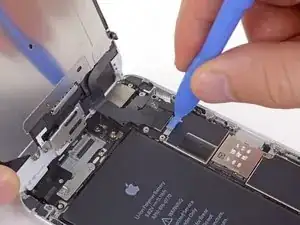
Usa uno strumento di apertura in plastica per staccare il connettore del cavo dati del display.
-
-
-
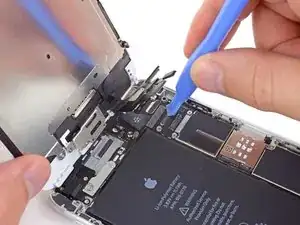
Rimuovi le due viti Phillips da 1,8 mm che fissano sul pannello anteriore la staffa del pulsante home.
-
-
-
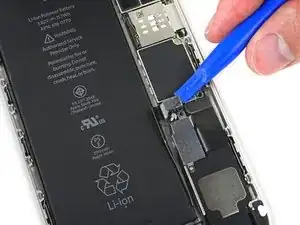
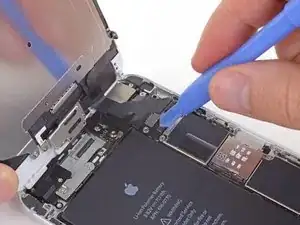
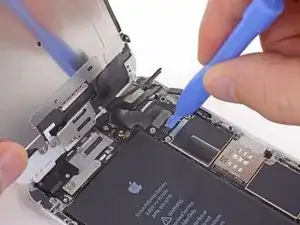
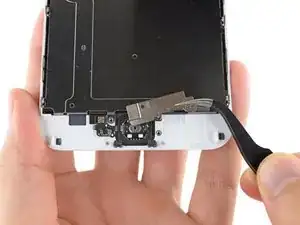
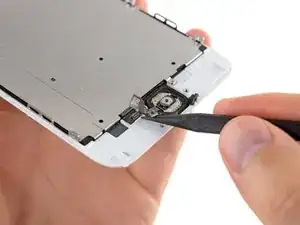
Usa la punta di uno spudger per staccare il connettore del pulsante home dal suo zoccolo sul cavo del pulsante home.
-
-
-
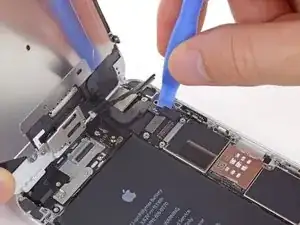
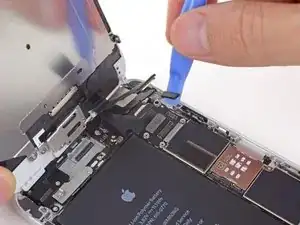
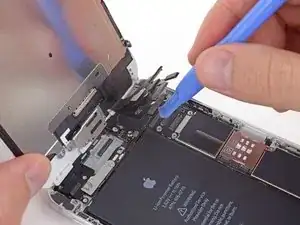
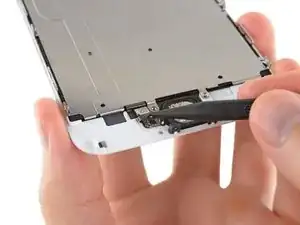
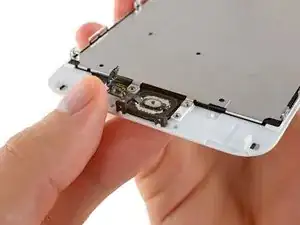
Incunea senza forzare la punta di uno spudger sotto il connettore del cavo del pulsante home.
-
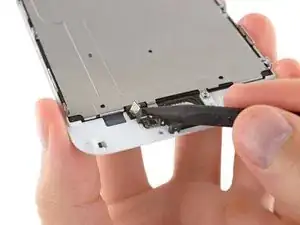
Usa, muovendolo con delicatezza, lo spudger per separare il cavo del connettore del pulsante home dall'adesivo che lo fissa al gruppo del pannello anteriore.
-
-
-
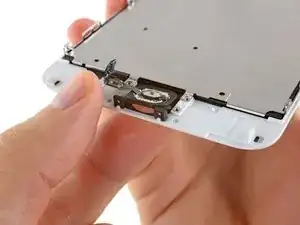
Scalda leggermente (con un iOpener, una pistola termica o un asciugacapelli) per ammorbidire l'adesivo che fissa la guarnizione del tasto home.
-
Usando la punta del dito, spingi gentilmente, ma non rimuovere, il pulsante home verso il lato opposto. Usa una pressione forte costante per separare lentamente la guarnizione in gomma del pulsante home dal pannello anteriore.
-
-
-
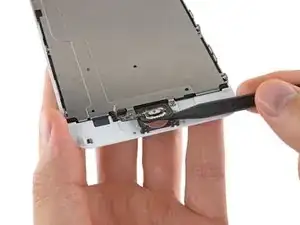
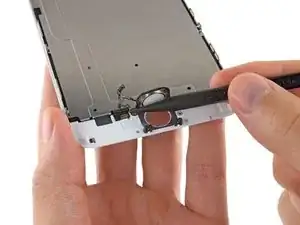
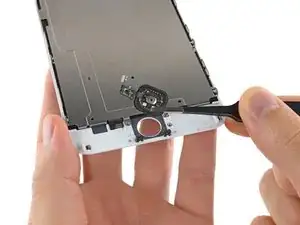
Usa con delicatezza la punta di uno spudger per finire di separare il pulsante home dal gruppo del pannello anteriore.
-


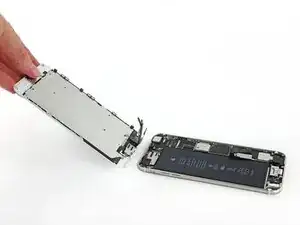
Per rimontare il tuo dispositivo, segui queste istruzioni in ordine inverso.

23 commenti
My iphone was screen broken and i change it with a original complete iphone screen, the home button works fine but the touch id dont work. I change the home button to the one that i have in the broken screen and still the touch id dont work. What can i do to fix the touch id?
replace the flex cable which connects touch ID cable with mother board
Hi guys, I replaced my front assembly and I'm having the opposite issue with my home button: The TouchID is working fine, but the home button being pressed is not working. I've tried re-seating the cable a few times. I'm normally pretty good at these kinds of things but I'm assuming I may have somehow crimped one of the ribbon cables.
My question: If something is damaged, is it more likely the cable on the back of the heat-sink that is damaged, or the home button ribbon cable itself? I realize that I will lose TouchID if its the latter, I just want to know what my options are. I'm having trouble searching the issue because everyone else has the issue where the TouchID doesn't work (for obvious reasons) but mine is working just fine.
Thanks for any advice.
Hi everyone, I replaced the home button on my cell phone iphone 6+, the home button functionality works just fine, however the biometrics fingerprint reader does not work anymore. Any suggestions? Thank you
Unfortunately, as stated in the introduction to this guide, that outcome is normal. For security reasons, the fingerprint sensor is coded to your phone's logic board at the factory. If you replace the button, you'll lose the fingerprint sensor function. Only Apple has the capability to pair new Touch ID sensors to existing phones. As far as I know, there are only two ways around this: (1) replace both your home button and logic board with a factory-paired home button and logic board harvested from another phone, or (2) pay Apple for an out-of-warranty repair (meaning you ship your phone to them and they give you a refurb in return).
Pentalobe P2
Enea Del Lama -
I prefer to remove the SIM card as the very first step since it's safer to do so while the phone is fully assembled.
estebanfallasf -
I stripped one of the two screws - at a dead stop.
Margaret Patterson -
Before you even start: get the iOpener or hairdryer out. You’ll need it
GPZ -
If a lightning connector won’t provide a charge or needs to be wiggled carefully to provide a charge, power off the device, then try using precision tweezers to scrape the innermost wall of the lightning jack in a pinching motion to check for lint buildup. Pocket lint or other debris can accumulate inside the jack, compacting each time a cable is inserted. This can prevent a lightning cable from seating fully. Clearing the lint may restore functionality without replacing the part.
Andrew Dolan -
A few hints:
* heating up the phone works great. I used a heating pad that you put in the microwave to heat sports injuries.
* also, I made a sheet to help you keep track of the screws as you remove them. Print out the page, then place double sided tape below each color-coded listing of screws, and stick the screws to the tape as you disassemble. This helps prevent losing the screws and keeps track of what screws are what for easier reassembly. https://drive.google.com/file/d/1pLSvKvB...
Paul Faulstich -
Additional hints, for anyone who needs them:
* stick the screws to the tape in the same positions as they are shown in the guide. This will make it easier to identify them during reassembly.
* if the screws get mixed together, the ‘mm’ (millimetre, millimeter) measurements given in the guide can be used to identify them. Compare the lengths of the threaded shafts to each other to determine which screw is which.
Friendly Advice -